 |
|||
|
|
|||
|
Page Title:
PLANETARY GEARING, SHAFTS, AND THIRD CLUTCH REPAIR (CONT) |
|
||
| ||||||||||
|
|
 TM 9-2320-360-34-2
NOTE
Shaft bushing surface measurement
will be used in paragraph 22-17 to
find output shaft bushing clearance.
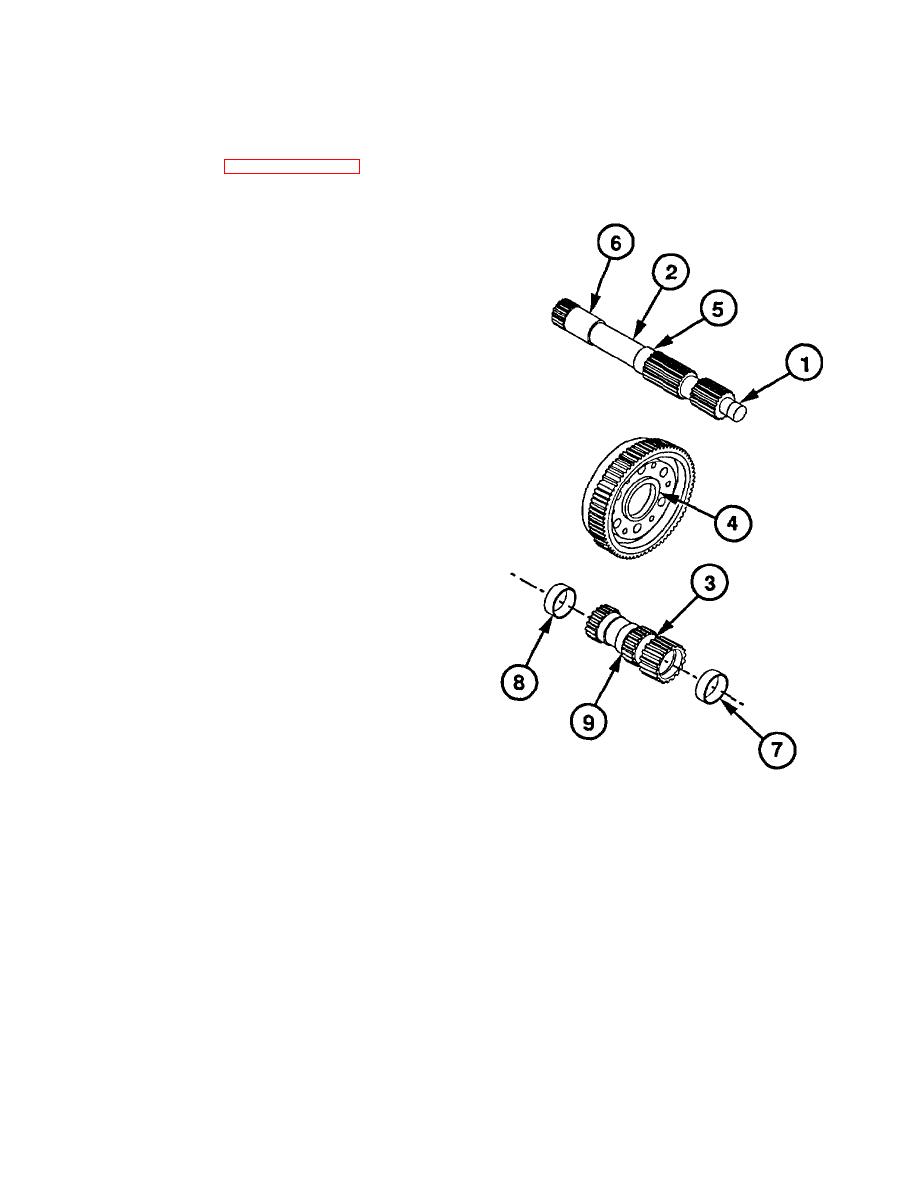
(7) Measure and note diameter of shaft
bushing surface (1) of main shaft (2).
(8) Measure diameter of front carrier bushing
surface (3).
(9) Measure inside diameter of bushing (4).
(10) If bushing (4) to front carrier bushing
surface (3) clearance is greater than
0.0072 in. (0.18 mm), replace bushing.
(10.1) Inspect surface finish of bearing surfaces
(5 and 6) on main shaft (2). Replace main
shaft if any defects are found.
(11) Measure diameter of bushing surfaces (5
and 6) on main shaft.
(12) Measure inside diameter of bushings (7
and 8) in sun gear shaft (9).
NOTE
Bushings can be easily removed
once collapsed.
Use of a small
punch thru the swaging hole will
collapse the forward bushing.
A
small chisel between the shaft and
the bushing outside edge can be
used to collapse the rear bushing.
(13) If clearance between bushings (7 and 8)
and shaft bushing surfaces (2 and 5) is
more than 0.0064 in. (0.16 mm), remove
bushings.
(14) Inspect both ends of sun gear shaft (9) for
spline damage and cracks. Inspect shaft
inside diameter for scoring and metal
transfer. Replace sun gear shaft if any
defects are found.
Change 3 22-90.1
|
|
Privacy Statement - Press Release - Copyright Information. - Contact Us |