 |
|||
|
|
|||
|
|
|||
| ||||||||||
|
|
 (12) Assemble wear ring (3, fig. 4-27) to
piston (10).
(13) Install piston (10), washer (2) and nut
(1) on the piston rod. Tighten nut (1) to 750-850
lb-ft.
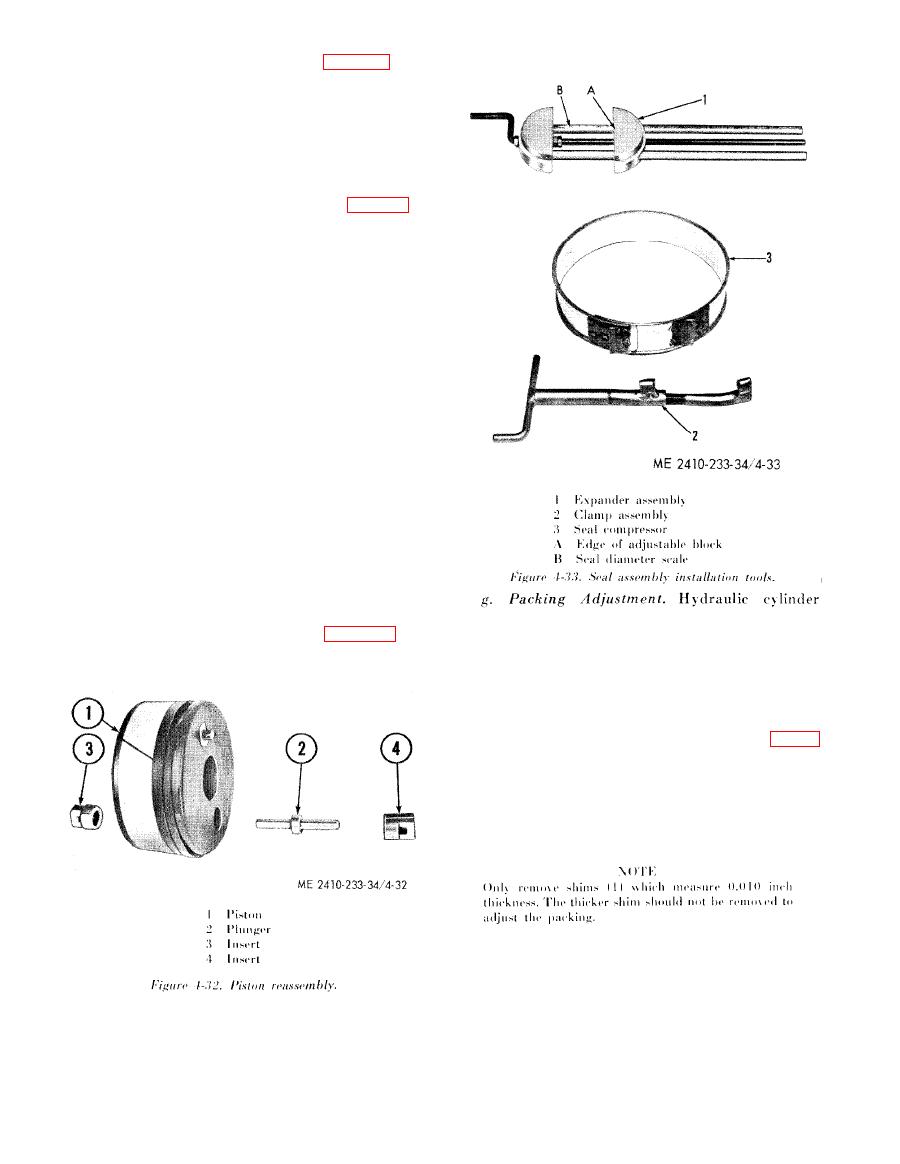
(14) Install the rubber inner ring of seal
assembly (9) into the groove on the piston ( 10).
(15) Place the outer sealing ring of the seal
assembly on the expander assembly (1, fig. 4-33).
(16) Stretch until point "A" is slightly above
the 4.75 mark "B" which is the diameter of the
ring.
(17) Back point "A" to the 4.75 mark "B"
and try to lift the seal ring from the expander
assembly (1). If the seal ring will not slip off easily,
rotate the seal ring 900 and stretch as before. When
ring will slip off the expander assembly easily, with
point "A" set at the 4.75 inch mark "B", the ring
can be assembled on the piston, over the rubber
inner ring.
CAUTION
Do not over-stretch the seal ring.
(18) oil the piston, wear ring, seal assembly,
and the inside of the cylinder, and install the seal
compressor (3) and clamp assembly (2) over the
seal assembly. Compress the seal assembly until it
is equal to the od of the piston.
(10) Install the piston assembly into the
cylinder, allowing the seal compressor to shoulder
against the cylinder and be forced off the seal
assembly, as the piston is pushed into the cylinder.
(20) Tighten the cylinder head bolts with the
packing leakage can be caused by wear, cuts,
piston rod fully extended. Refer to table 1-2 for
and/or distortion of the packing. If the cylinder
correct torque values.
leaks around the rod, shims can be removed to
tighten the packing around the rod.
( 1 ) Lower the hydraulically controlled
equipment to the ground to relieve cylinder
pressure.
(2) Remove bolts holding retainer (2, fig. 4-
34) to cylinder head.
(3) Pry or tap retainer out to permit cutting
and removng shims (1).
(4) Remove one shim at a time. If, after
removing two shims, the cylinder still leaks.
disassemble cylinder and replace packing.
|
|
Privacy Statement - Press Release - Copyright Information. - Contact Us |
