|
| |
TM 9-2320-360-34-1
NOTE
Do step (4) if bushing was removed.
(4)
Install bushing (6) in shift housing (7).
(5)
Install new oil seal (8) in shift housing (7).
WARNING
Adhesive-sealant can burn easily,
can give off harmful vapors, and are
harmful to skin and clothing. To
avoid injury or death, keep away from
open fire and use in well-ventilated
area. If adhesive-sealant gets on skin
or clothing, wash immediately with
soap and water.
(6)
Coat threads of screw (9) with adhesive-
sealant (Item NO TAG, Appendix B).
(7)
Install shift lever (10) in shift housing (7)
with new preformed packing (11), shaft
(12), washer (13), and screw (9).
(8)
Lightly coat cams (14) with grease.
NOTE
When properly installed, cams are
positioned in groove on drive.
(9)
Install two cams (14) on shift lever (10).
(10)
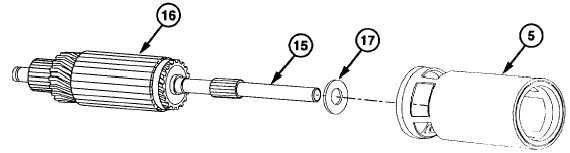
Coat splines of armature shaft (15) with
thin film of lubricating oil.
(11)
Install armature (16) in field ring (5).
(12)
Install thrust washer (17) on armature
shaft (15).
6-37
|