 |
|||
|
|
|||
|
Page Title:
Air Compressor - Remove and Install |
|
||
| ||||||||||
|
|
 TM 9-2320-312-24-2
Truck Engine
Disassembly and Assembly Section
4. Place the electric starting motor in the flywheel
housing. Install three bolts (1).
5. Connect all of the electrical wires to the electric
starting motor by using the index marks.
i01748218
Air Compressor - Remove and
Install
SMCS Code: 1803-010
Removal Procedure
Table 53
Required Tools
Tool
Part Number
Part Description
Qty
138-7573
1
A
Link Bracket
g00609682
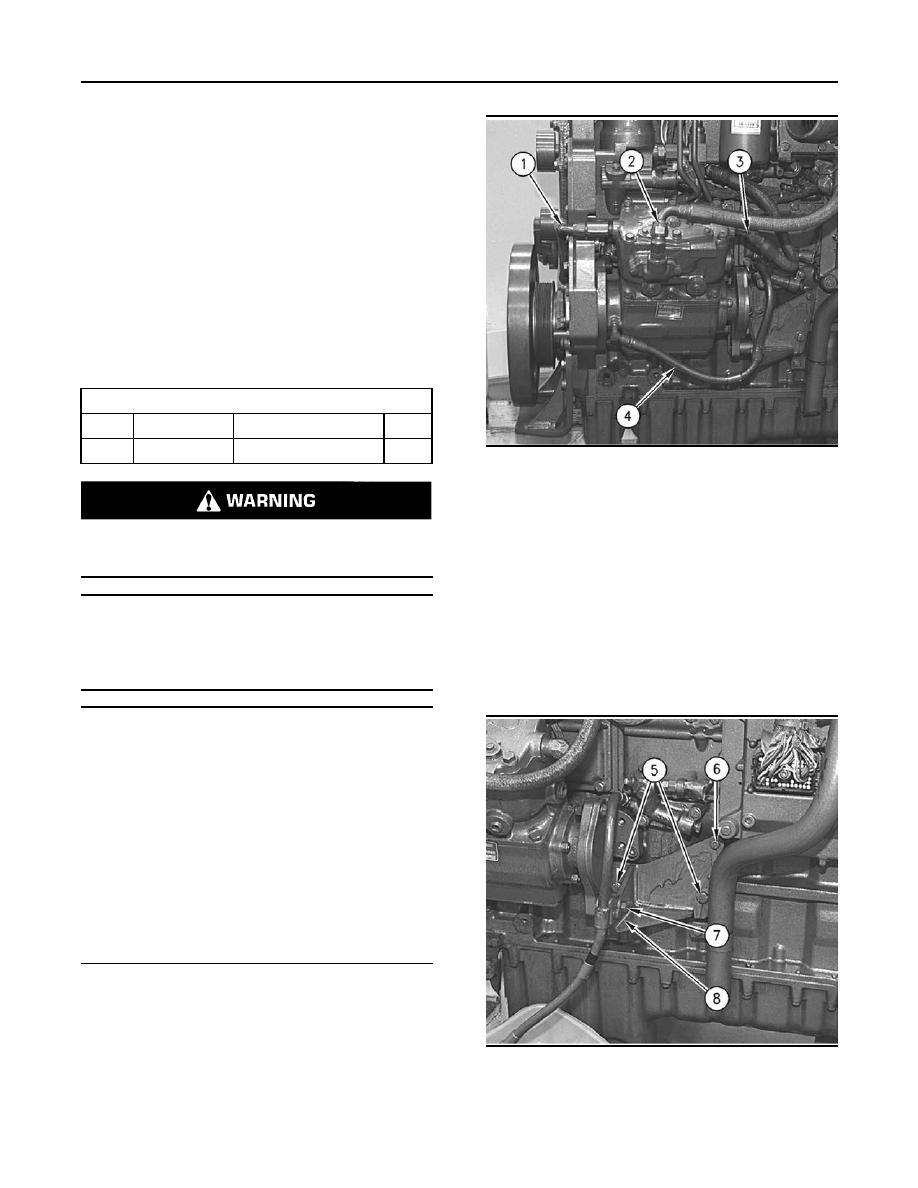
Illustration 283
2. Disconnect water hose (1) and water hose (3)
from the air compressor.
Do not disconnect the air lines until the air pres-
3. Disconnect air hose (2) and oil hose (4) from the
sure in the system is at zero. If hose is disconnect-
air compressor.
ed under pressure it can cause personal injury.
4. Install Tooling (A) and a proper lifting device
to the air compressor. The weight of the air
NOTICE
compressor is approximately 23 kg (51 lb).
Keep all parts clean from contaminants.
5. Remove the mounting bracket for a Midland
Contaminants may cause rapid wear and shortened
EL-740 air compressor by using the following
component life.
procedure:
NOTICE
Care must be taken to ensure that fluids are contained
during performance of inspection, maintenance, test-
ing, adjusting and repair of the product. Be prepared to
collect the fluid with suitable containers before open-
ing any compartment or disassembling any compo-
nent containing fluids.
Refer to Special Publication, NENG2500, "Caterpillar
Tools and Shop Products Guide" for tools and supplies
suitable to collect and contain fluids on Caterpillar
products.
Dispose of all fluids according to local regulations and
mandates.
1. Remove the air pressure from the air tank and
drain the coolant from the cooling system.
g00609684
Illustration 284
a. Remove bolt (8) and the clip for the oil hose
from the bracket for the air compressor.
|
|
Privacy Statement - Press Release - Copyright Information. - Contact Us |
