 |
|||
|
|
|||
|
Page Title:
Crankshaft Rear Seal Carrier - Remove and Install |
|
||
| ||||||||||
|
|
 TM 9-2320-312-24-2
Truck Engine
Disassembly and Assembly Section
NOTICE
Keep all parts clean from contaminants.
Contaminants may cause rapid wear and shortened
component life.
g00614109
Illustration 134
4. Position Tooling (D) over Tooling (A) and Tooling
(C). Install Tooling (E). Tighten Tooling (E) in
order to install the crankshaft rear seal and the
crankshaft wear sleeve.
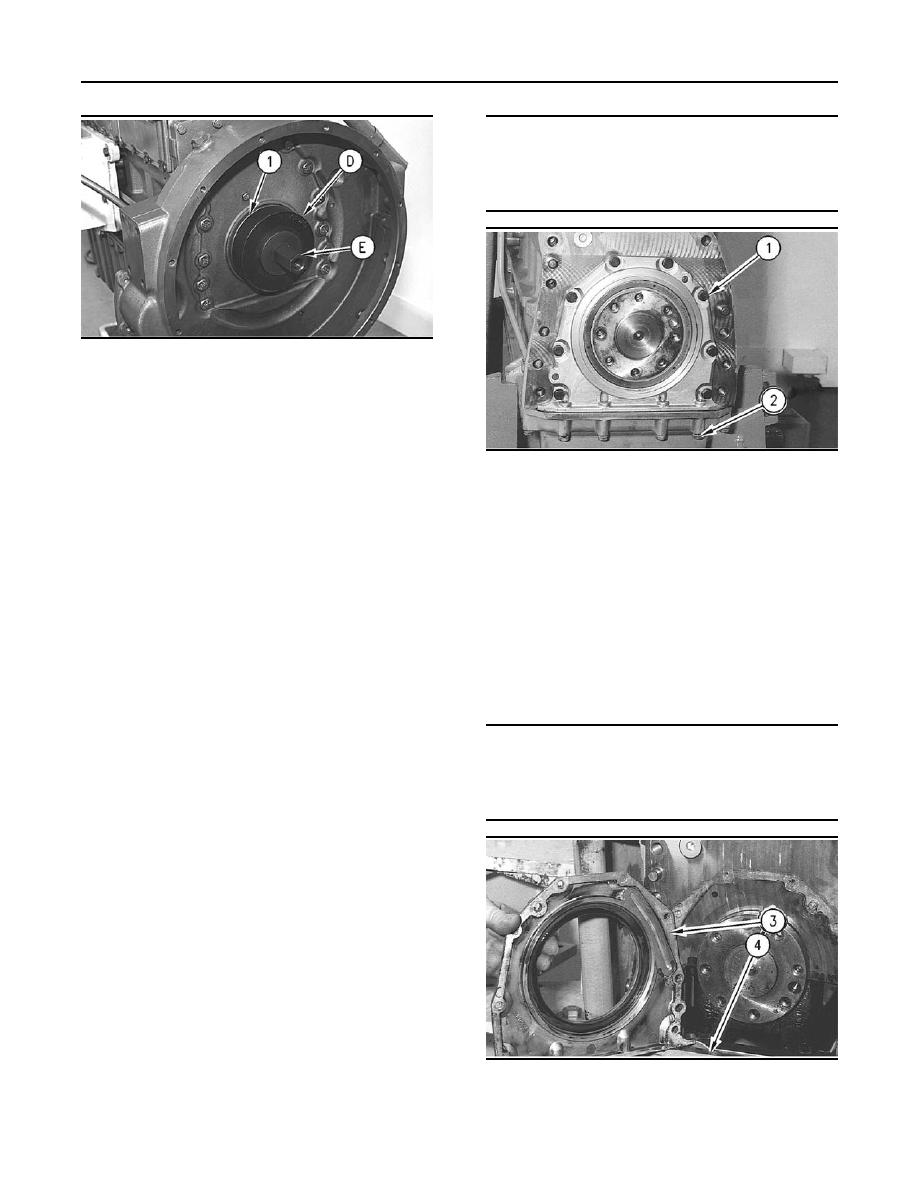
g00613081
Illustration 135
5. Remove Tooling (E), Tooling (D), and Tooling (C).
Turn over Tooling (C). Install Tooling (C), Tooling
1. Remove bolts (2) for the engine oil pan and
(D), and Tooling (E). Tighten Tooling (E) in order
carefully lower the engine oil pan away from the
to complete the installation of the crankshaft rear
cylinder block.
seal and the crankshaft wear sleeve.
2. Remove eight bolts (1) and the washers that
6. Remove Tooling (E) and Tooling (D). Check
hold the rear seal carrier for the crankshaft to
Tooling (C) and Tooling (A). The faces of Tooling
the cylinder block.
(C) and Tooling (A) will be flush if the crankshaft
rear seal and the crankshaft wear sleeve are
3. Carefully pry the rear seal carrier for the
properly installed. Refer to the Specifications
crankshaft off of the two dowels in the cylinder
Module for more information.
block.
7. Remove Tooling (C), Tooling (B), and Tooling (A).
Installation Procedure
End By:
NOTICE
a. Install the flywheel. Refer to Disassembly and
Keep all parts clean from contaminants.
Assembly, "Flywheel - Install".
Contaminants may cause rapid wear and shortened
component life.
i01579321
Crankshaft Rear Seal Carrier -
Remove and Install
SMCS Code: 1161-010-C3
Removal Procedure
Start By:
a. Remove the flywheel housing. Refer to
Disassembly and Assembly, "Flywheel Housing
- Remove and Install".
g00613107
Illustration 136
|
|
Privacy Statement - Press Release - Copyright Information. - Contact Us |
