 |
|||
|
|
|||
|
|
|||
| ||||||||||
|
|
 TM 9-2320-312-24-1
CAPACITOR AND CAPACITOR START RELAY REPLACEMENT - CONTINUED
0119 00
CAPACITOR REMOVAL
CAUTION
Protect external case of capacitor from physical impact to avoid damaging plastic shells of individual capac-
itors.
NOTE
Tag cables and wires to ensure correct installation.
Remove tiedown straps as required and discard. Use new tiedown straps on installation.
1.
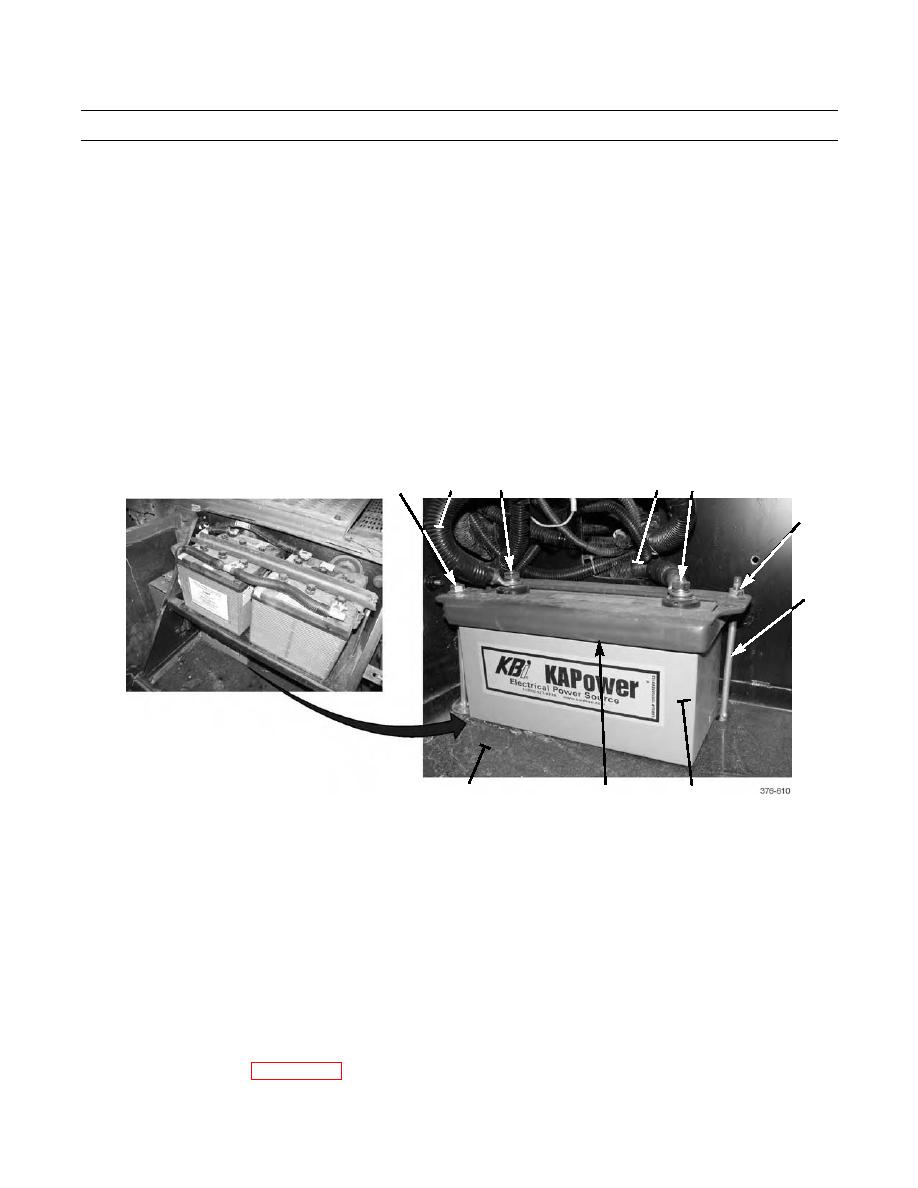
Remove nut (3), lockwasher (4), washer (5), and disconnect cable (2) from negative terminal of capacitor (8).
2.
Remove nut (3), lockwasher (4), washer (5), and disconnect cable (6) from positive terminal of capacitor (8).
3.
Remove two nuts (1), hold-down (9), capacitor (8), and two J-bolts (7) from battery pad (10) on bottom shelf of battery
box.
3,4,5
3,4,5
6
2
1
1
7
8
10
9
CAPACITOR INSTALLATION
CAUTION
Protect external case of capacitor from physical impact to avoid damaging plastic shells of individual
capacitors.
Prior to installation, ensure capacitor case has no trace of damage, cracks or electrolyte leakage.
1.
Remove two protective caps from terminals of replacement capacitor (8). Install caps on capacitor that was removed
from vehicle.
2.
Position capacitor (8) on battery pad (10) on bottom shelf of battery box. Secure with two J-bolts (7), hold-down (9),
and two nuts (1).
3.
Connect cable (6) to positive terminal of capacitor (8) with washer (5), lockwasher (4), and nut (3).
4.
Connect cable (2) to negative terminal of capacitor (8) with washer (5), lockwasher (4, and nut (3).
5.
Connect battery cables (WP 0115 00).
|
|
Privacy Statement - Press Release - Copyright Information. - Contact Us |