 |
|||
|
|
|||
|
Page Title:
SOLENOID VALVE REMOVAL - CONTINUED |
|
||
| ||||||||||
|
|
 TM 9-2320-312-24-1
ETHER COLD START SYSTEM MAINTENANCE - CONTINUED
0077 00
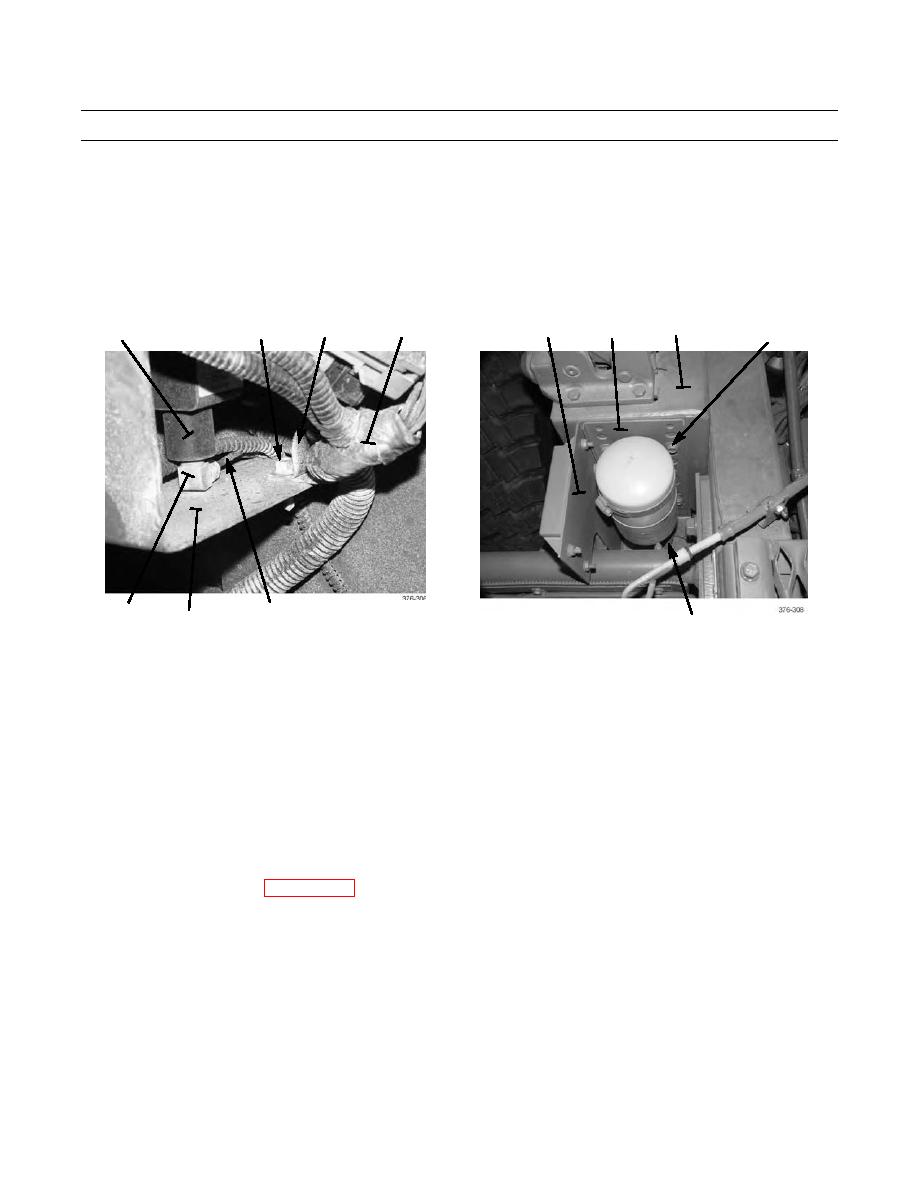
SOLENOID VALVE REMOVAL - CONTINUED
6.
Disconnect ether fuel line (21) from elbow (22) on underside of solenoid valve (3).
7.
Remove nut (17), screw (18), and clamp (19) with ether cold start system harness (20) from bracket (10).
8.
Remove four nuts (25), screws (26), bracket (10), and solenoid valve (3) with mounting bracket (23) from cab tilt latch
mount (24).
9.
Remove elbow (22) from solenoid valve (3).
24
10
20
19
23
17,18
3
25,26
21
22
10
3
SOLENOID VALVE INSTALLATION
1.
Install elbow (22) (right-hand threads) to solenoid valve (3) finger tight. Tighten an additional 1-2 turns.
2.
Install solenoid valve (3) with mounting bracket (23) and bracket (10) to cab tilt latch mount (24) with four screws (26)
and nuts (25).
3.
Connect ether fuel line (21) to elbow (22).
4.
Secure ether cold start system harness (20) to bracket (10) with clamp (20), screw (18), and nut (17).
5.
Connect solenoid valve connector (14) to ether cold start system harness connector (13).
6.
Connect connector (15) to 1A fuse holder (16).
7.
Connect two relay harness connectors (8) to ether cold start system harness connectors (9).
8.
Install ether cylinder (Refer to Ether Cylinder Installation).
9.
Install left-front mudflap (WP 0048 00).
0077 00-7
|
|
Privacy Statement - Press Release - Copyright Information. - Contact Us |
