 |
|||
|
|
|||
|
|
|||
| ||||||||||
|
|
 TM 5-2420-224-34
TRANSMISSION REPAIR (CONT)
NOTE
I n s t a l l slotted nut wrench with
n o t c h in position to be easily
visible.
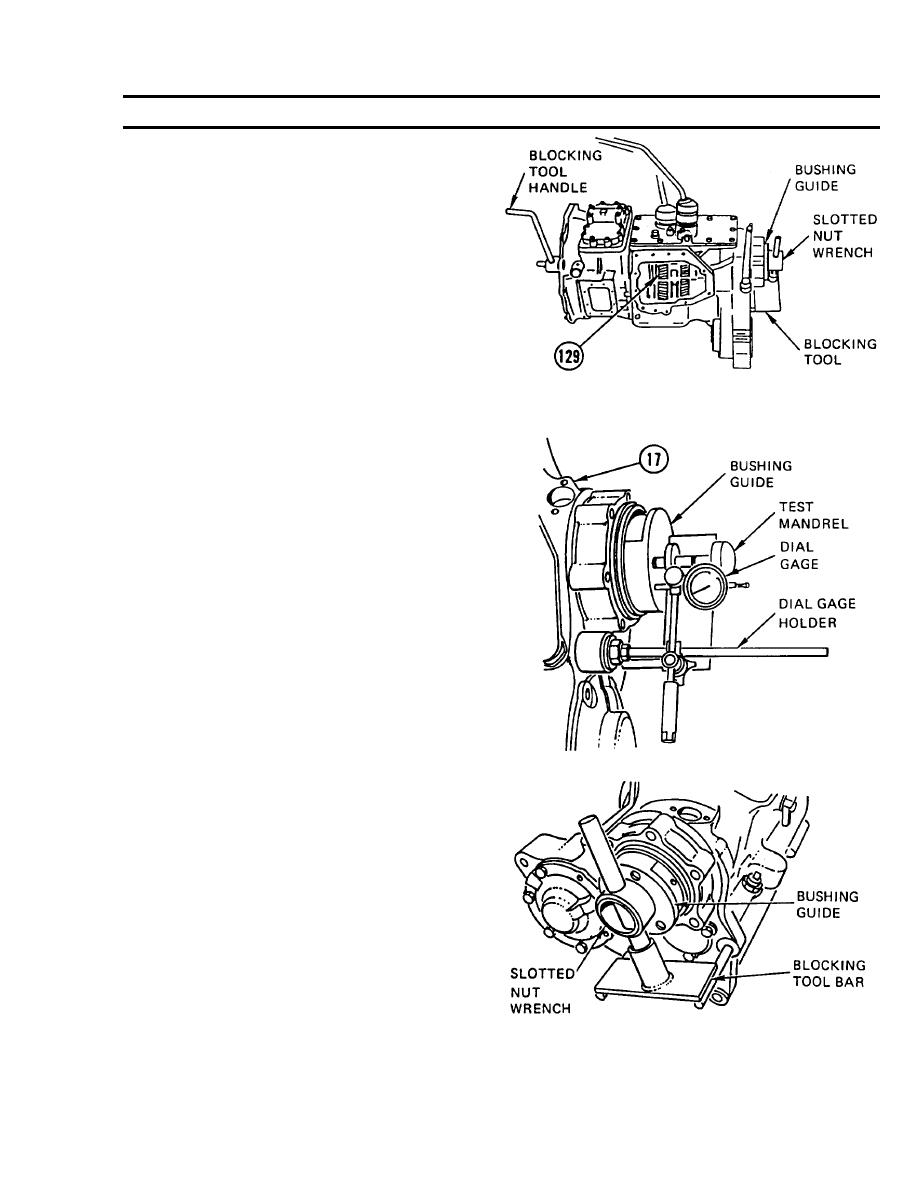
118.
I N S T A L L BUSHING GUIDE, BLOCKING
T O O L , SLOTTED NUT WRENCH and
BLOCKING TOOL HANDLE.
119.
ENGAGE first GEAR and TURN main gear
SHAFT assembly (129) in CLOCKWISE
direction until resistance is felt.
120.
REMOVE SLOTTED NUT WRENCH.
NOTE
Dial gage plunger must be against
bushing guide flange.
121.
INSTALL DIAL GAGE, DIAL GAGE HOLDER,
and test MANDREL on housing (17).
122.
PUSH TEST MANDREL FORWARD and
ZERO DIAL GAGE.
123.
PULL TEST MANDREL BACK and NOTE
READING of end play measurement.
124.
REMOVE TEST MANDREL and DIAL
GAGE.
INSTALL SLOTTED NUT WRENCH and
125.
BLOCKING TOOL BAR.
NOTE
One division on scale of dial gage
is equal to one division on scale
of bushing guide, which is
0.0004 in. (0.01 mm).
126.
MARK INCREMENT on BUSHING GUIDE
that is in line with notch on SLOTTED NUT
WRENCH.
127.
DIVIDE READING obtained in STEP 123 by
Two.
15-49
|
|
Privacy Statement - Press Release - Copyright Information. - Contact Us |
