 |
|||
|
|
|||
|
|
|||
| ||||||||||
|
|
 TM 5-2410-237-23
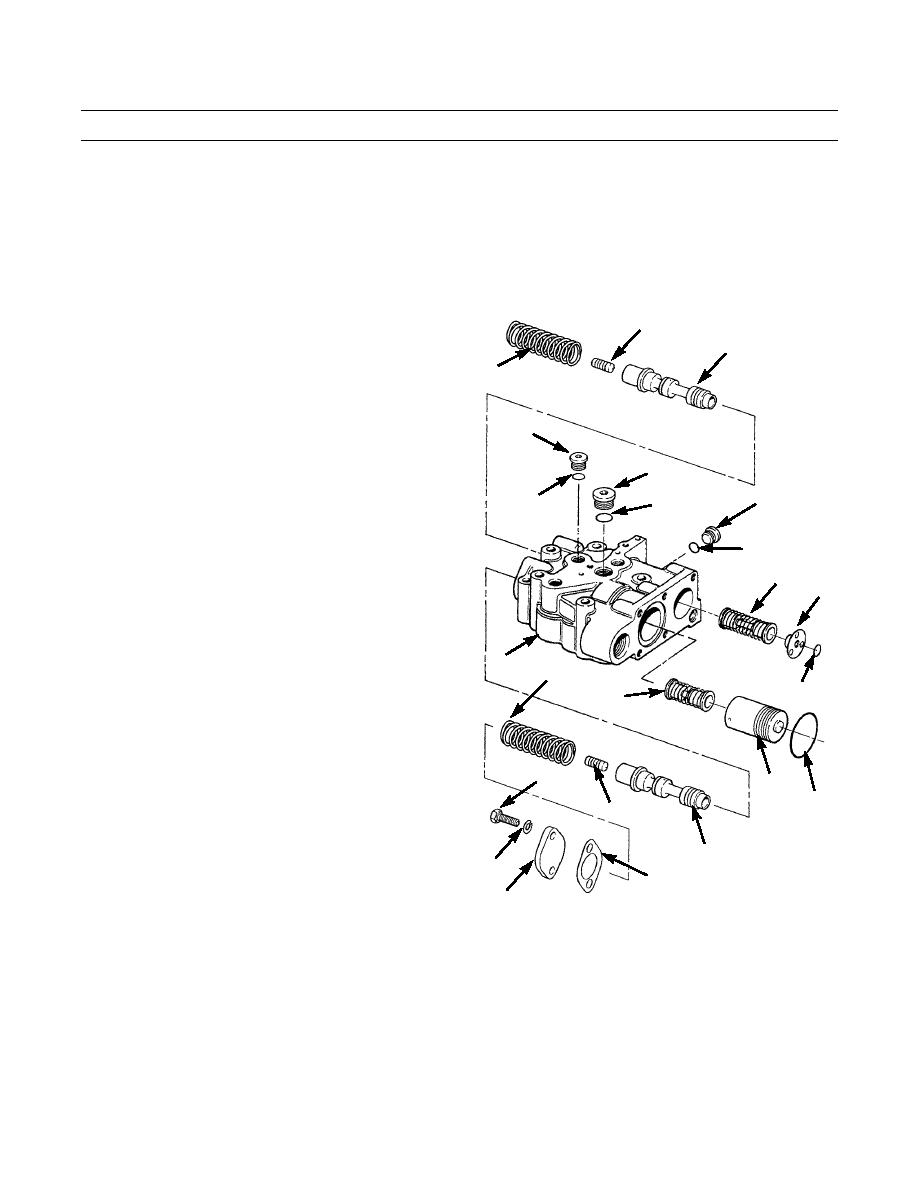
WINCH CONTROL VALVE REPAIR - CONTINUED
0245 20
ASSEMBLY
CAUTION
To prevent contamination of winch, keep work area and winch control valve components clean.
NOTE
Coat all parts with a thin film of lubricating oil before assembly.
1.
Install new preformed packing (99) in valve body
87
(25). Install plug (98).
86
2.
Install new preformed packing (97) in valve body
90
(25). Install plug (96).
3.
Install three new preformed packings (95) in valve
body (25). Install three plugs (94).
94
4.
Install spring assembly (93), new preformed packing
(92), and retainer (91) on valve body (25).
96
5.
Install spring assembly (90) and piston (89) on valve
98
97
body (25).
95
6.
Install new preformed packing (88) on valve body
(25).
99
7.
Install slug (87) in valve spool (86). Install valve spool
93
on valve body (25).
91
8.
Install slug (85) in valve spool (84). Install spring (83)
and valve spool assembly on valve body (25).
9.
Install new gasket (82) and cover (81) on pressure
25
control valve (25).
83
92
10.
Install two new lockwashers (80) and two capscrews
90
(79) on cover (81).
79
89
88
85
84
80
82
81
421-0186
0245 20-9
Change 1
|
|
Privacy Statement - Press Release - Copyright Information. - Contact Us |