 |
|||
|
|
|||
|
|
|||
| ||||||||||
|
|
 TM 5-2410-237-23
WINCH ASSEMBLY REPLACEMENT - CONTINUED
0180 00
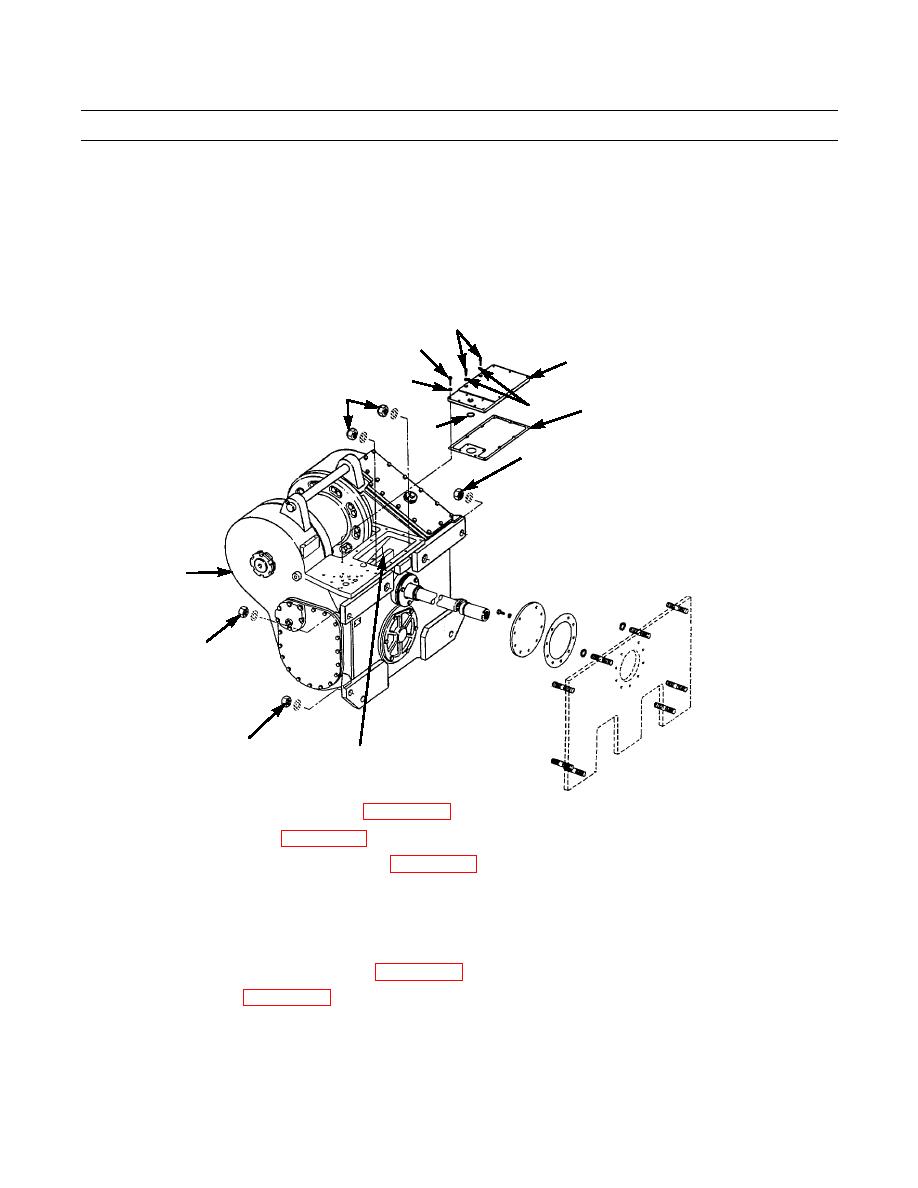
INSTALLATION - CONTINUED
15.
Tighten self-locking nuts (11 and 15) to 1200 lb-ft (1627 Nm).
16.
Remove lifting device and lifting links from winch (2).
17.
Install new O-ring (10), new gasket (9) and cover (7) on cable access opening (8).
18.
Install seven new lockwashers (6) and capscrews (5) to cover (7). Install two new lockwashers (4) and capscrews (3).
3
5
7
6
11
4
9
10
15
2
15
15
8
387-984
19.
Install winch magnetic strainer assembly (WP 0184 00).
20.
Install winch control valve (WP 0181 00).
21.
Install winch wire rope assembly, as required (WP 0188 00).
NOTE
As required, perform the following step to install winch gear pump, if it was removed prior to removing
winch.
22.
Remove plate and install winch gear pump (WP 0189 00).
23.
Refill winch with oil (WP 0179 00).
24.
Check winch for proper operation and leaks (TM 5-2410-237-10).
END OF WORK PACKAGE
0180 00-6
|
|
Privacy Statement - Press Release - Copyright Information. - Contact Us |
