 |
|||
|
|
|||
|
|
|||
| ||||||||||
|
|
 shims determines the pressure at which the relief
valve opens (1,975 25 psi).
(4) Remove spring (11) and pilot valve (12).
Use a small magnetized rod to remove the pilot
valve.
NOTE
The seat (15) for pilot valve (12) is a press fit in body
(14). If replacement is necessary, remove plug
assembly (17) and press the seat downward, removing
it through the opening for the plug assembly. Chill the
replacement seat before installing it in body (14).
(5) Remove bolts (1) and cover (2). Use a -
inch-20 (NC) eyebolt to remove plug (4) beneath
cover (2).
(6) Partially remove bolts (19) securing cover
(18) to dump valve body (5).
(7) Insert a inch diameter rod 10 inches
long into the plug opening until the rod contacts
dump valve (23). Push against rod, compressing
spring (22), until dump valve contacts plug (20).
Tap on end of rod, forcing plug (20) out of body
(5).
(8) Remove bolts (19), cover (18), plug (20),
spring (22), and dump valve (23).
d. Cleaning. Clean all parts with cleaning solvent
(Fed. Spec. P-D-680). Dry parts with a lint free
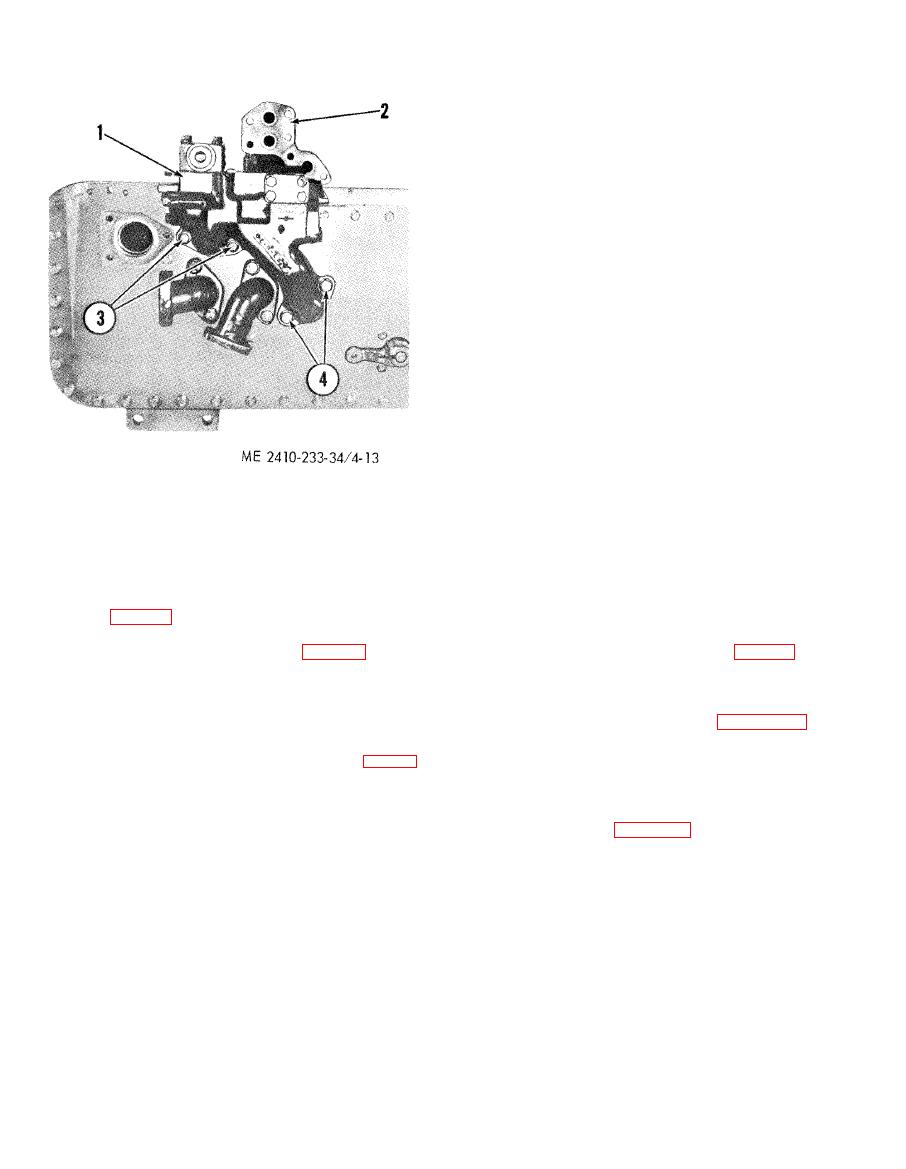
1
Relief valve assembly
cloth. Clear all passages in relief valve of restric-
2
Manifold
3
Bolts
tions with filtered compressed air.
4
Bolts
e. Inspection and Repair.
(1) Inspect springs for weak or damaged
condition and free movement of valves in the bores.
b. Removal.
Inspect valve seating surface and seats in body for
(1) Remove the hydraulic tank from the
nicks, burrs, and proper contact, Replace defective
tractor (para 4-2).
parts.
(2) Remove the blade tilt control valve,
(2) Inspect preformed packing (16, fig. 4-14)
mounting plate and manifold (2) (para 4-2).
for cuts, breaks or deterioration. Replace all
(3) Remove bolts (3) and (4).
defective packing.
NOTE
f. Reassembly.
Bolts (3) secure the relief valve discharge tube (on
inside of tank) to the tank bottom plate.
(1) Reassemble relief valve using figure 4-14
as a guide.
c. Disassembly.
(2) Torque bolts (13) to 24 2 ft-lbs.
(1) Remove bolts and lockwashers (6, fig. 4-
(3) Install sufficient shims (10) to provide a
14) and cover (7).
relief valve opening pressure of 1,975 25 psi.
(2) Remove bolts and lockwashers (13) to
g. Installation. Install relief valve in reverse of
remove pilot valve body (14).
removal. Torque bolts (3) figure 4-13, to 43 2 ft-
(3) Remove shims (10) from between cover
lbs. and bolts (4) to 60 2 ft-lbs.
(7) and spring (11). The total thickness of the
|
|
Privacy Statement - Press Release - Copyright Information. - Contact Us |