 |
|||
|
|
|||
|
|
|||
| ||||||||||
|
|
 TM 5-2410-233-23
RIPPER LIFT CYLINDER REPAIR - CONTINUED
0164 00
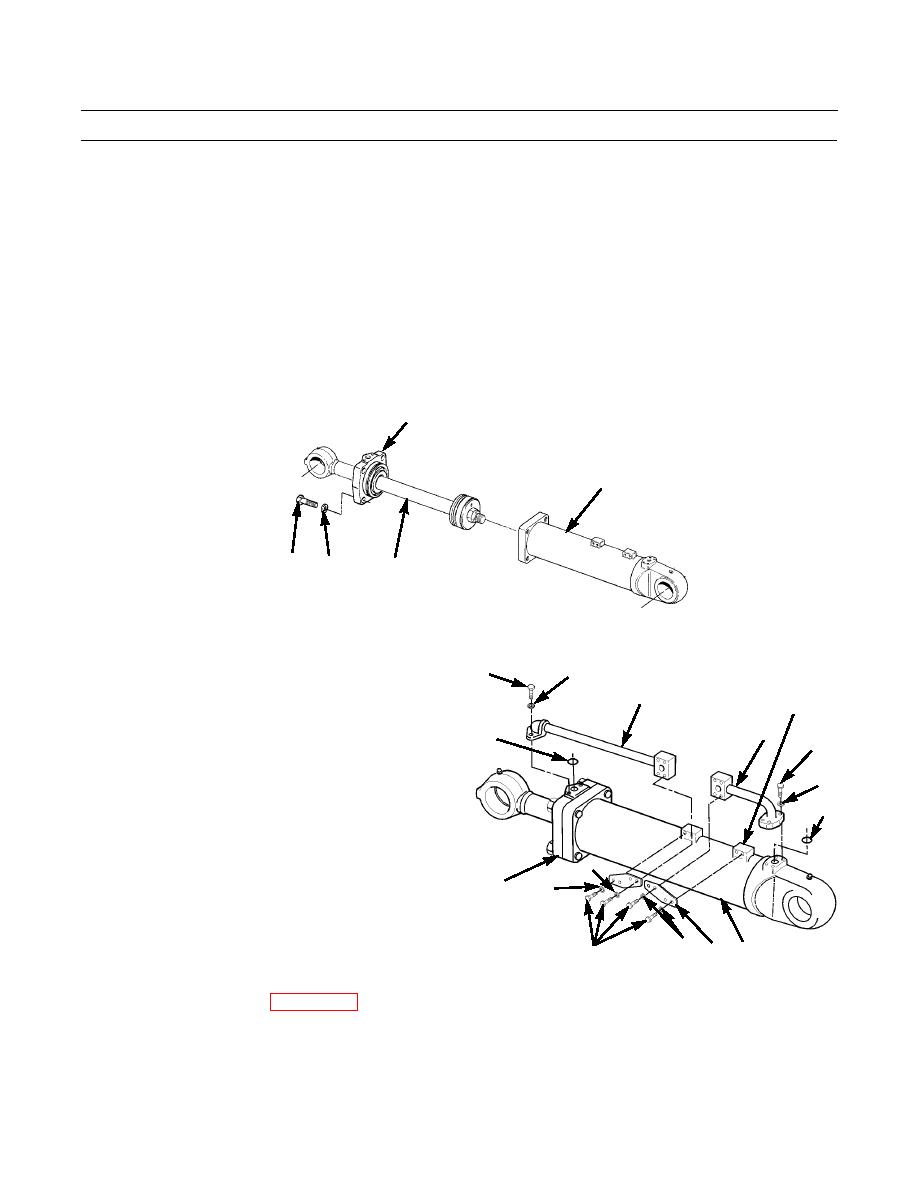
ASSEMBLY - CONTINUED
NOTE
To ensure proper alignment and fit, ensure scribe marks on head and cylinder housing are in alignment.
15.
Install head (1) and piston rod (13) into cylinder housing (2).
NOTE
Tighten capscrews evenly to draw head all the way on cylinder housing.
Piston rod must be fully extended when capscrews are tightened for correct alignment of cyl-
inder housing and head.
16.
Install four washers (12) and capscrews (11) on head (1) and tighten to 465 lb-ft (631 Nm).
1
2
11
12
13
386-571
17.
Install two plates (5) to bosses (6) on cylinder housing
7
8
(2) and secure with eight washers (4) and capscrews
9
6
(3).
9
NOTE
10
7
Insert all washers and capscrews to tube assem-
8
blies and hand-tighten first, then fully tighten.
18.
Install two new O-rings (10) and tube assemblies (9)
10
to cylinder housing (2) and head (1) and secure with
six washers (8) and capscrews (7).
4
1
4
386-570
4
2
5
3
19.
Install ripper lift cylinder (WP 0163 00).
20.
Operate machine and check ripper system for proper operation and leaks.
END OF WORK PACKAGE
0164 00-6
|
|
Privacy Statement - Press Release - Copyright Information. - Contact Us |
