 |
|||
|
|
|||
|
|
|||
| ||||||||||
|
|
 TM 5-2410-233-23
RIPPER LIFT CYLINDER REPAIR - CONTINUED
0164 00
ASSEMBLY
NOTE
Lightly coat bearing sleeves, new O-rings, new preformed packing, new ring, new backup
ring, new piston ring and new seals with clean oil before assembly
Remove protective caps and plugs from openings prior to assembly.
1.
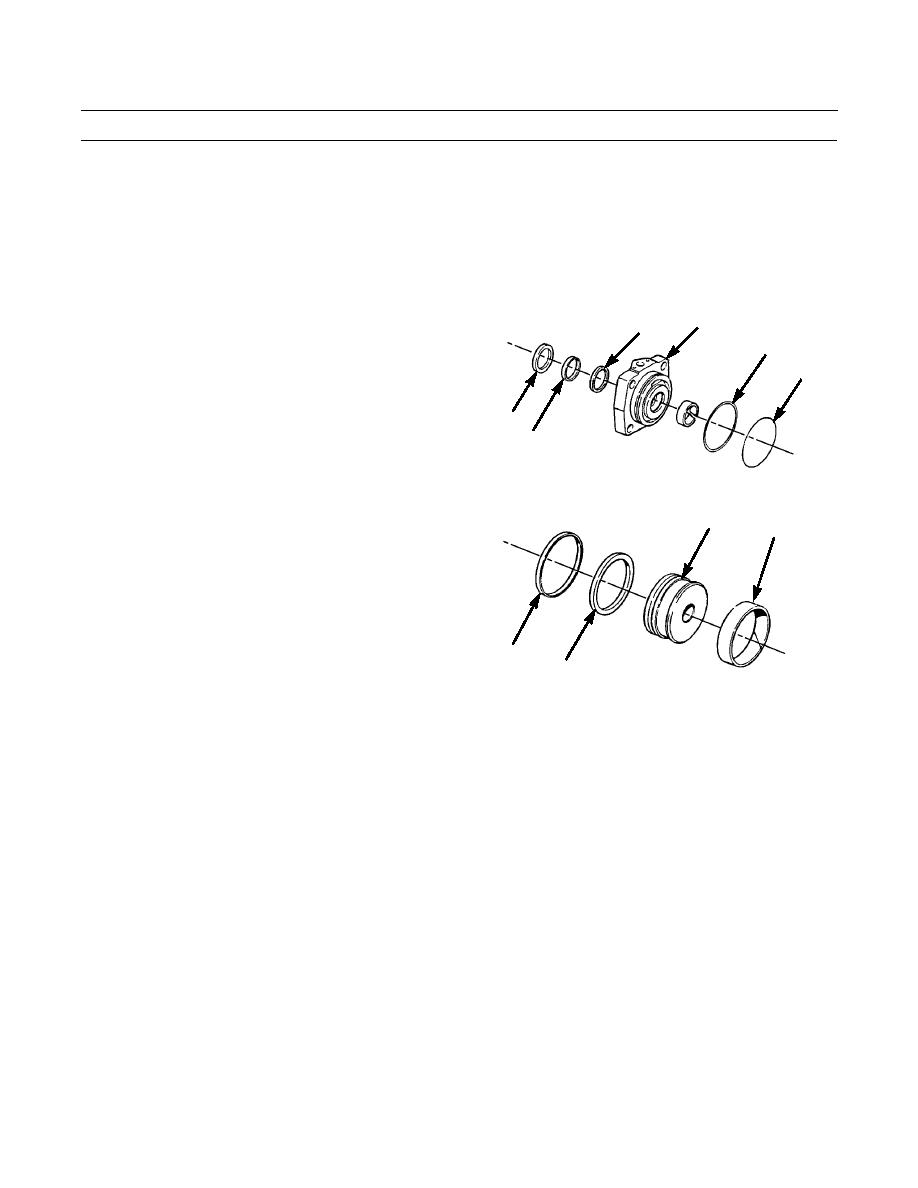
Install new piston ring (27), new ring (26) and new seal (25) on piston (18).
2.
Install new backup ring (24) and new O-ring (23) into
1
22
inner groove on head (1).
24
3.
Install new gasket (22) and new preformed packing
23
(21) in head (1).
4.
Use sandpaper or emery cloth to scuff surfaces of
20
counterbore inside of head (1) and outside diameter of
21
new seal (20). Clean counterbore in head and scuffed
surface of seal thoroughly with quick-cure primer,
until neither component discolors a clean white towel.
18
After cleaning, do NOT touch cleaned surfaces. Han-
27
dle seal by lip only.
NOTE
Quick-cure primer will dry in approximately 30
seconds.
25
26
386-572
5.
Apply quick-cure primer to counterbore of head (1)
and to metal shell of seal (20) and allow to dry.
NOTE
Do NOT allow bearing mount compound to contact sealing lip.
6.
Apply bearing mount compound evenly but not excessively to counterbore of head (1) and to metal shell of seal (20).
7.
Install seal (20) into counterbore of head (1), with sealing lip facing inward. Seat seal firmly against bottom of counter-
bore. Wipe away excess bearing mount compound. Allow compound 15 minutes to dry.
NOTE
Do NOT install shim pack at this time.
8.
Place head (1) on cylinder housing (2) and install two capscrews (11) to hold head in place.
0164 00-4
|
|
Privacy Statement - Press Release - Copyright Information. - Contact Us |