 |
|||
|
|
|||
|
|
|||
| ||||||||||
|
|
 TM 5-2410-233-23
WINCH ASSEMBLY REPLACEMENT- CONTINUED
0139 00
REMOVAL - CONTINUED
8.
Attach a suitable three-point lifting device to each lifting link end and to bar (10).
CAUTION
6
5
7
When removing mounting nuts,
loosen all nuts slightly, then pry
winch away from mounting pad. Con-
tinue this sequence until winch can be
removed.
Remove winch slowly and carefully to
prevent damage to mounting studs,
transmission and drive shaft.
Adjust lifting device as necessary to
remove load from mounting studs.
9.
Remove six nuts (11) and lockwashers (12) from studs
(13). Discard lockwashers.
10.
Use lifting device to move winch (9) straight back
386-046
until winch drive shaft (14) is clear of tractor.
11,12,13,14
10
8
9
11.
Place winch (9) on wood cribbing to prevent tipping.
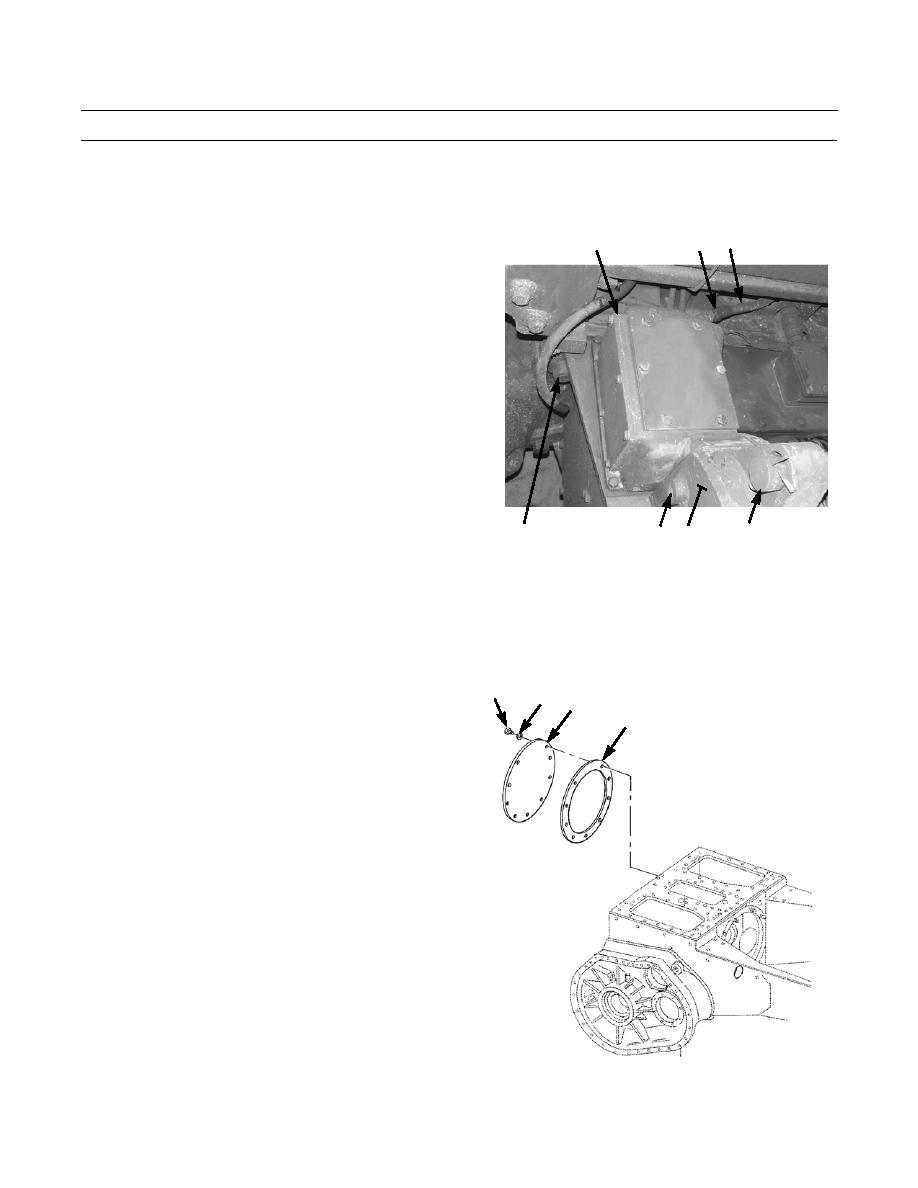
CAUTION
Cover and gasket must be installed to prevent dirt and other damaging contaminants from entering final
drive case if required to operate machine without winch.
NOTE
18
17
16
Round cover, gasket and mounting hardware
15
are listed and illustrated in TM 5-2410-233-23P.
12.
Install gasket (15) and round cover (16) over opening
in final drive case at rear of tractor. Secure with nine
new lockwashers (17) and capscrews (18).
386-048
0139 00-3
|
|
Privacy Statement - Press Release - Copyright Information. - Contact Us |
