 |
|||
|
|
|||
|
|
|||
| ||||||||||
|
|
 TM 5-2410-233-23
TRANSMISSION AND CRANKCASE GUARDS REPLACEMENT - CONTINUED
0129 00
CRANKCASE GUARD REMOVAL
1.
Raise bulldozer blade, install hydraulic jack stands under blade and lower blade onto jack stands (WP 0178 00). Shut
down engine.
NOTE
An 18 in. piece of 2 x 4 wood block should be placed on jack to facilitate crankcase guard removal.
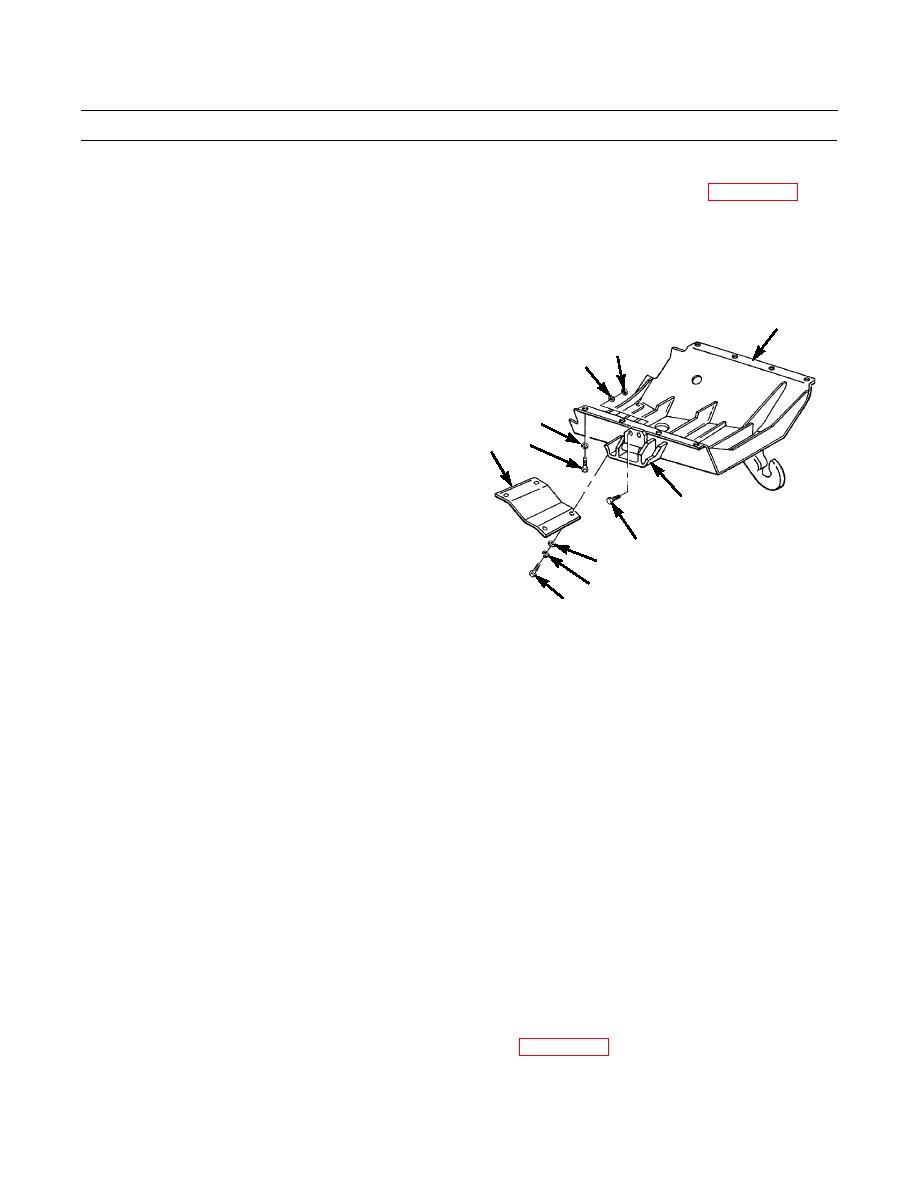
2.
Apply light pressure to crankcase guard (8) with
8
hydraulic floor jack.
15
16
NOTE
Crankcase guard is equipped with a hinge for
ease of access to tractor components.
10
3.
Remove eight capscrews (9) and lockwashers (10) and
9
14
lower hydraulic floor jack and crankcase guard (8).
Discard lockwashers.
18
17
13
386-642
12
11
NOTE
If complete removal of crankcase guard is required, continue with step 4 and 5.
4.
Remove four capscrews (11), lockwashers (12), washers (13) and access cover (14). Discard lockwashers
5.
Remove two nuts (15), lockwashers (16), capscrews (17) and hinge (18) from side of crankcase guard (8). Discard lock-
washer.
CRANKCASE GUARD INSTALLATION
NOTE
An 18 in. piece of 2 x 4 wood block should be placed on jack to facilitate crankcase guard
installation.
Apply antiseize compound to threads of mounting capscrews.
1.
Install hinge (18) on side of crankcase guard (8) with two capscrews (17), new lockwashers (16) and nuts (15).
2.
Place crankcase guard (8) on hydraulic jack and raise into position. Apply light pressure on jack to hold guard in posi-
tion.
3.
Install access cover (14) with four washers (13), new lockwashers (12) and capscrews (11).
NOTE
Do not tighten capscrews on crankcase guard until all capscrews have been installed.
4.
Install eight new lockwashers (10) and capscrews (9). Tighten capscrews.
5.
Raise bulldozer blade and remove hydraulic jack stands from blade (WP 0178 00). Lower blade.
END OF WORK PACKAGE
0129 00-3
|
|
Privacy Statement - Press Release - Copyright Information. - Contact Us |
