 |
|||
|
|
|||
|
|
|||
| ||||||||||
|
|
 TM 5-2410-233-23
TORQUE DIVIDER REPLACEMENT - CONTINUED
0092 00
REMOVAL - CONTINUED
8.
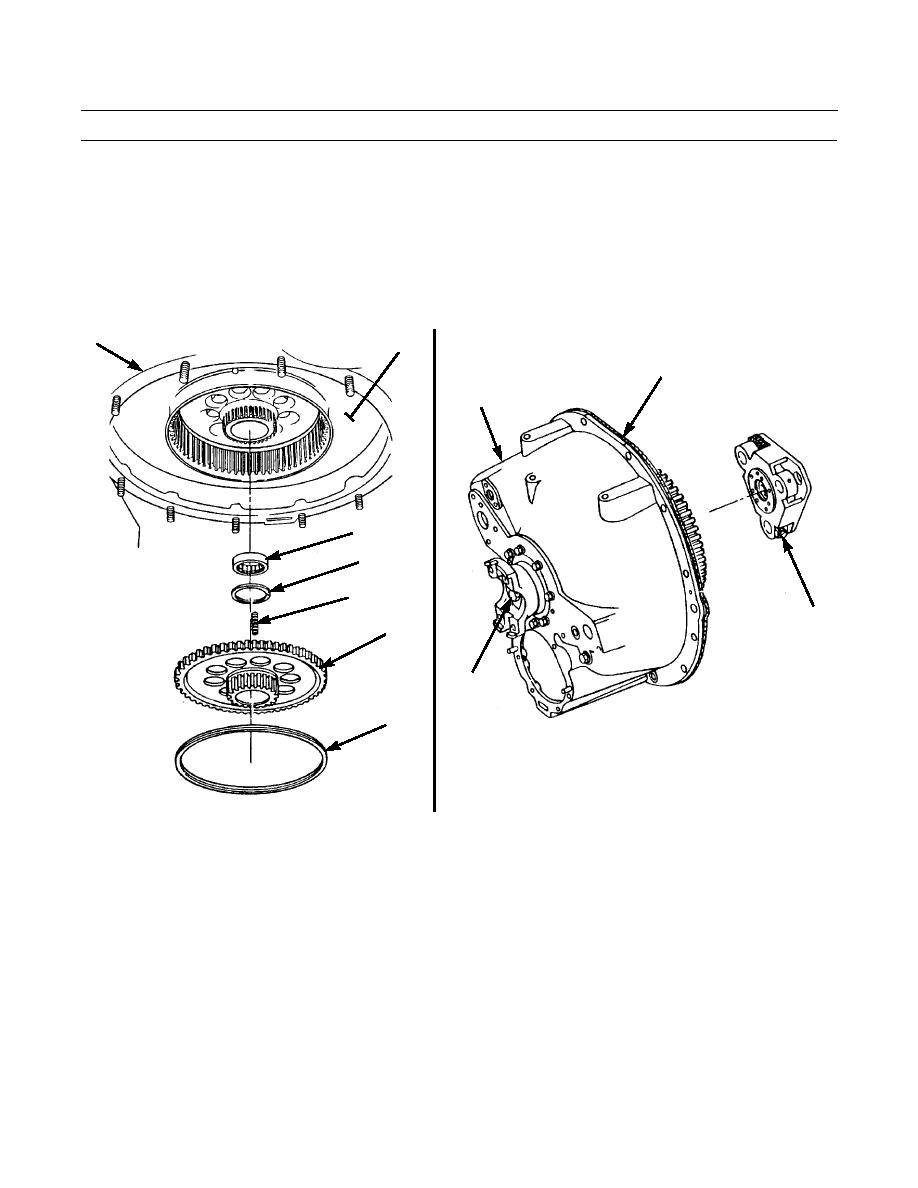
Remove ring (7) and gear (8) from flywheel (9).
9.
Remove three springs (10) from behind gear (8).
10.
Remove retaining ring (11) from flywheel (9).
11.
Remove bearing (12) from flywheel (9).
12.
Remove wire from around torque divider (2) and carefully slide planetary carrier assembly (13) off of output shaft (14).
13.
Remove gasket (15) from torque divider (2) or flywheel housing (6). Discard gasket.
6
9
15
2
12
11
10
13
8
14
7
386-829
386-828
INSTALLATION
1.
Install bearing (12) into flywheel (9).
2.
Install retaining ring (11) and three springs (10) into flywheel (9).
3.
Install gear (8) and ring (7) into flywheel (9). Be sure to align marks between ring and flywheel.
4.
Slide planetary carrier assembly (13) onto output shaft (14) and wrap a wire around torque divider (2) and planetary car-
rier assembly to prevent assembly from sliding off shaft during installation.
NOTE
Ensure mating surfaces on flywheel housing and torque divider are clean before installing new gasket.
5.
Install two lifting links (1) with 5/8 -11x 1-1/2 in. bolts into housing of torque divider (2). Place new gasket (15) on fly-
wheel housing (6).
0092 00-3
|
|
Privacy Statement - Press Release - Copyright Information. - Contact Us |
