 |
|||
|
|
|||
|
|
|||
| ||||||||||
|
|
 TM 5-2410-233-23
ENGINE TRUNNION REPLACEMENT
THIS WORK PACKAGE COVERS
Removal, Installation
INITIAL SETUP
Tools and Special Tools
Materials/Parts
Tool kit, general mechanic's (Item 112, WP 0185 00)
Detergent (Item 10, WP 0184 00)
Shop equipment, general purpose repair (Item 97, WP
O-ring (4)
Equipment Condition
Front engine support removed (WP 0020 00)
REMOVAL
1.
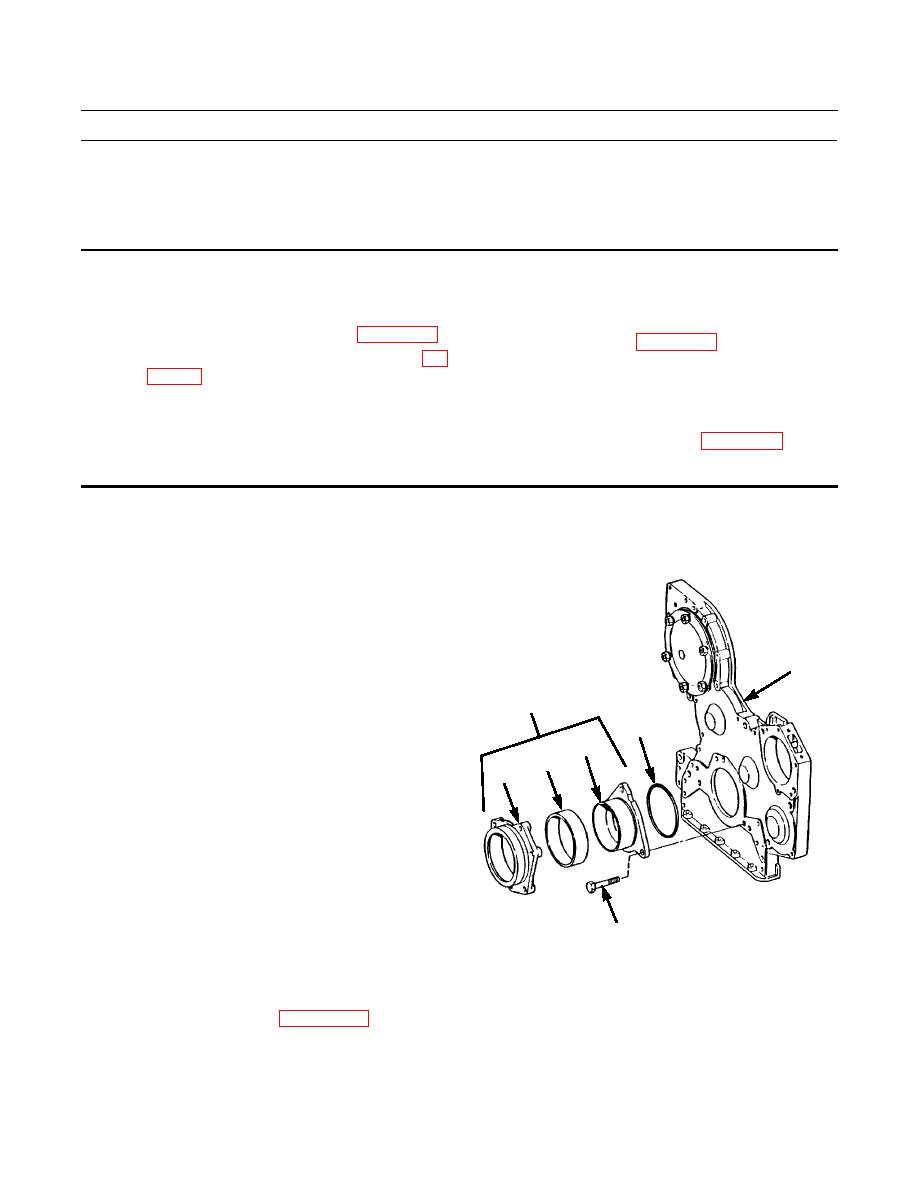
Remove three capscrews (1) and trunnion assembly
(2) from front housing (3).
2.
Remove and discard O-ring (4).
3.
Separate trunnion supports (5 and 6) and sleeve (7).
Discard sleeve.
3
INSTALLATION
2
4
NOTE
6
7
If any component of trunnion assembly is dam-
5
aged, replace all components (trunnion sup-
ports and sleeve) as an assembly.
1.
Install new O-ring (4) into front housing (3).
2.
Install sleeve (7) into bore of support (5). Install trun-
nion support (6) into support (5).
3.
Lubricate inside diameter of sleeve (7) with 3% deter-
386-181
gent solution.
1
4.
Position trunnion assembly (2) on front housing (3)
and install three capscrews (1).
5.
Tighten capscrews (1) to 75 lb-ft (102 Nm).
6.
Install front engine support (WP 0020 00).
END OF WORK PACKAGE
|
|
Privacy Statement - Press Release - Copyright Information. - Contact Us |