 |
|||
|
|
|||
|
Page Title:
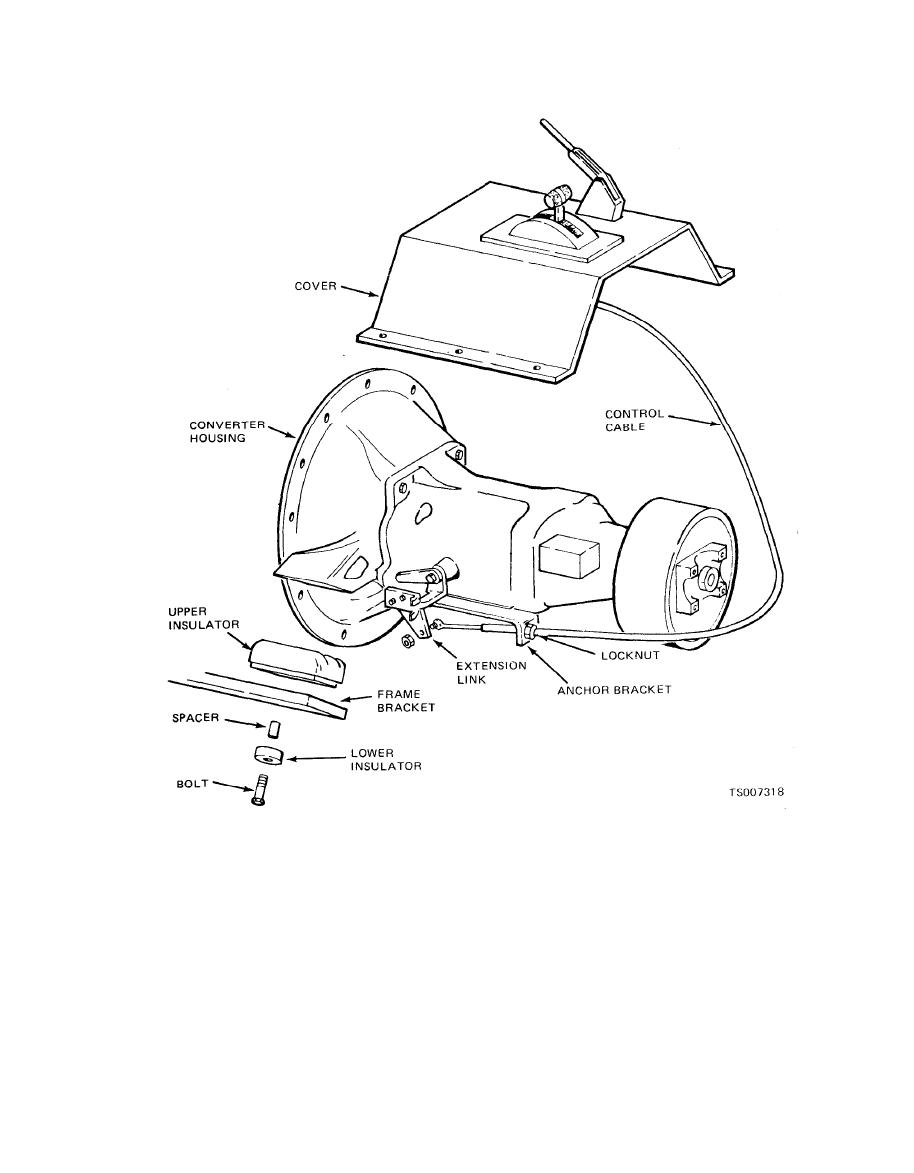
Figure 2-3. Transmission Mounting. |
|
||
| ||||||||||
|
|
 TM 10-3930-633-34
pulley attaching bolt to turn the converter to gain
(4) Raise the vehicle and block the frame
access to the nuts.
securely.
(8) With the wrench on the crankshaft pulley
(5) Place a drain pan under the transmission
attaching bolt, turn the converter to gain access
fluid pan. Starting at the rear of the pan and
to the converter drain plug. Then, remove the
working toward the front, loosen the attaching
plug. Place a drain pan under the converter to
bolts and allow the fluid to drain; finally remove
catch the fluid. After the fluid has drained from
all of the pan attaching bolts except two at the
the converter, reinstall the plug.
front, to allow the fluid to further drain. After the
(9) Wedge the converter to hold it in place
fluid has drained, install two bolts on the rear side
when the transmission is removed.
of the pan to temporarily hold it in place.
(10) Disconnect the starter cable from the
(6) Remove the converter drain plug access
starter, and disconnect the transmission to body
cover from the lower end of the converter housing.
ground cable from the transmission. Remove the
(7) Remove the converter-to-flywheel at-
starter (see TM 10-3930-633-12).
taching nuts. Place a wrench on the crankshaft
|
|
Privacy Statement - Press Release - Copyright Information. - Contact Us |
