 |
|||
|
|
|||
|
|
|||
| ||||||||||
|
|
 TM 10-3930-633-12
d. Installation.
b. Testing.
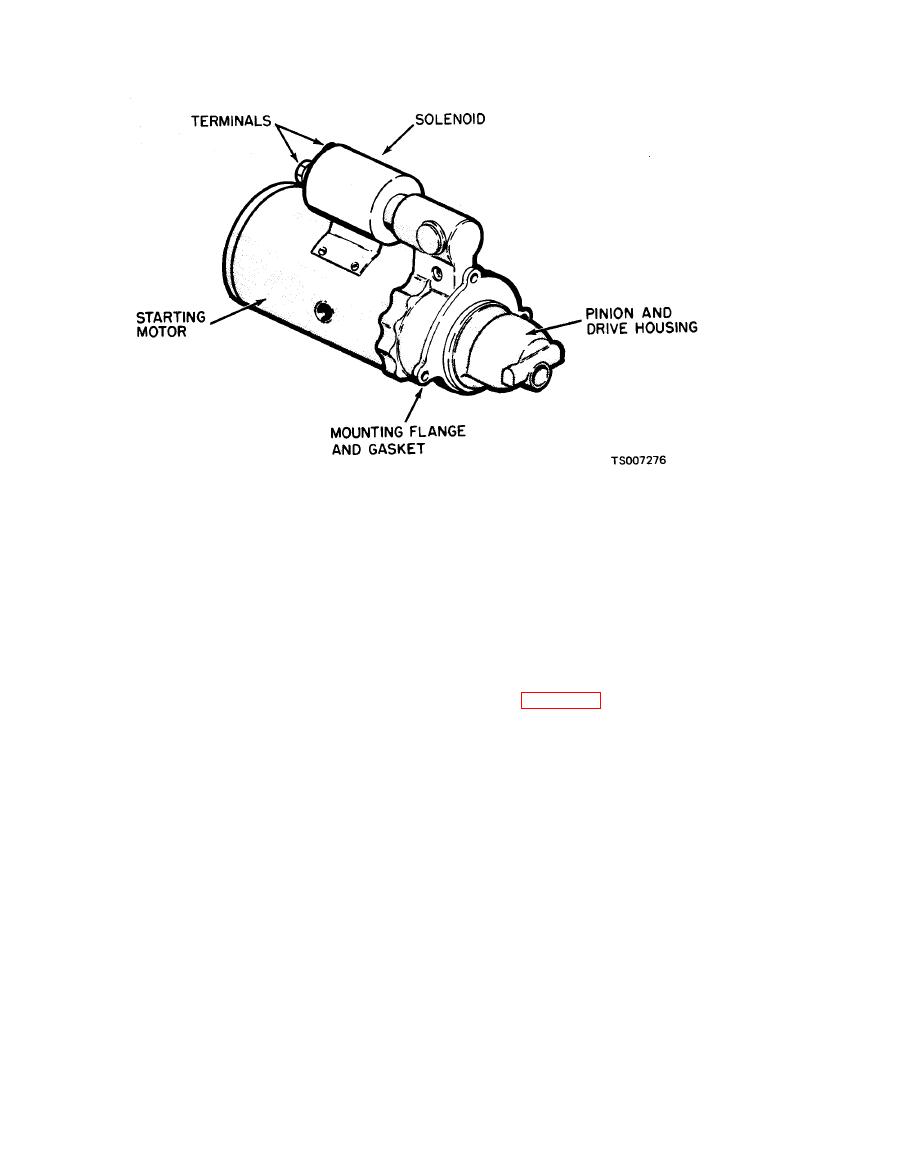
(1) Position the starting motor against the
(1) Use a battery known to be in good
flywheel housing so that mounting holes line up
condition and an accurate voltmeter. Connect the
and install three mounting bolts. Torque bolts to
positive lead of the voltmeter to the positive
12-15 ft/lbs. Use of a new gasket when installing
terminal of the battery, and the negative lead to
motor is advised.
the negative (grounded) terminal of the battery.
(2) Connect the battery cable to the battery
Record the voltage reading.
and to the starting motor. Connect wiring as
(2) Pull the high tension lead from the
shown in figure 4-7.
ignition coil to prevent the engine from starting
(3) Check the operation of the starting
during the starting motor test.
motor. Make sure it cranks the engine as
(3) Connect the positive lead of the volt-
required.
meter to ground and the negative lead of the
voltmeter to starter switch terminal. Turn and
hold the ignition switch to the start position and
Ignition tune-up is the orderly and systematic
read the voltmeter.
process of checking the engine and accessory
(4) Compare the voltmeter reading with the
equipment to maintain or restore satisfactory
previously recorded voltmeter reading. If the
engine performance. Ignition tune-up must be
voltage drop is more than 4 volts, or if the second
accomplished semi-annually (500 hours) and more
reading is less than 8 volts, the starting motor is
frequently if engine performance indicates the
probably faulty.
need for these services. Perform ignition tune-up
c. Removal.
as outlined in the following paragraphs after
(1) Disconnect the positive battery cable
checking the following items:
from the battery.
a. Air Cleaner. Be sure air cleaner has
(2) Disconnect and tag the electrical leads
received recent service and is not restricted.
from the starting motor.
b. Carburetor. Check approximate idle speed
(3) Remove the starting motor from the
and mixture adjustment. (These will have to be
flywheel housing, after removal of three mounting
readjusted after the tune-up. )
bolts. Pull straight out on the starting motor to
disengage the pinion gear from the ring gear.
|
|
Privacy Statement - Press Release - Copyright Information. - Contact Us |
