 |
|||
|
|
|||
|
|
|||
| ||||||||||
|
|
 TM 55-1740-200-14
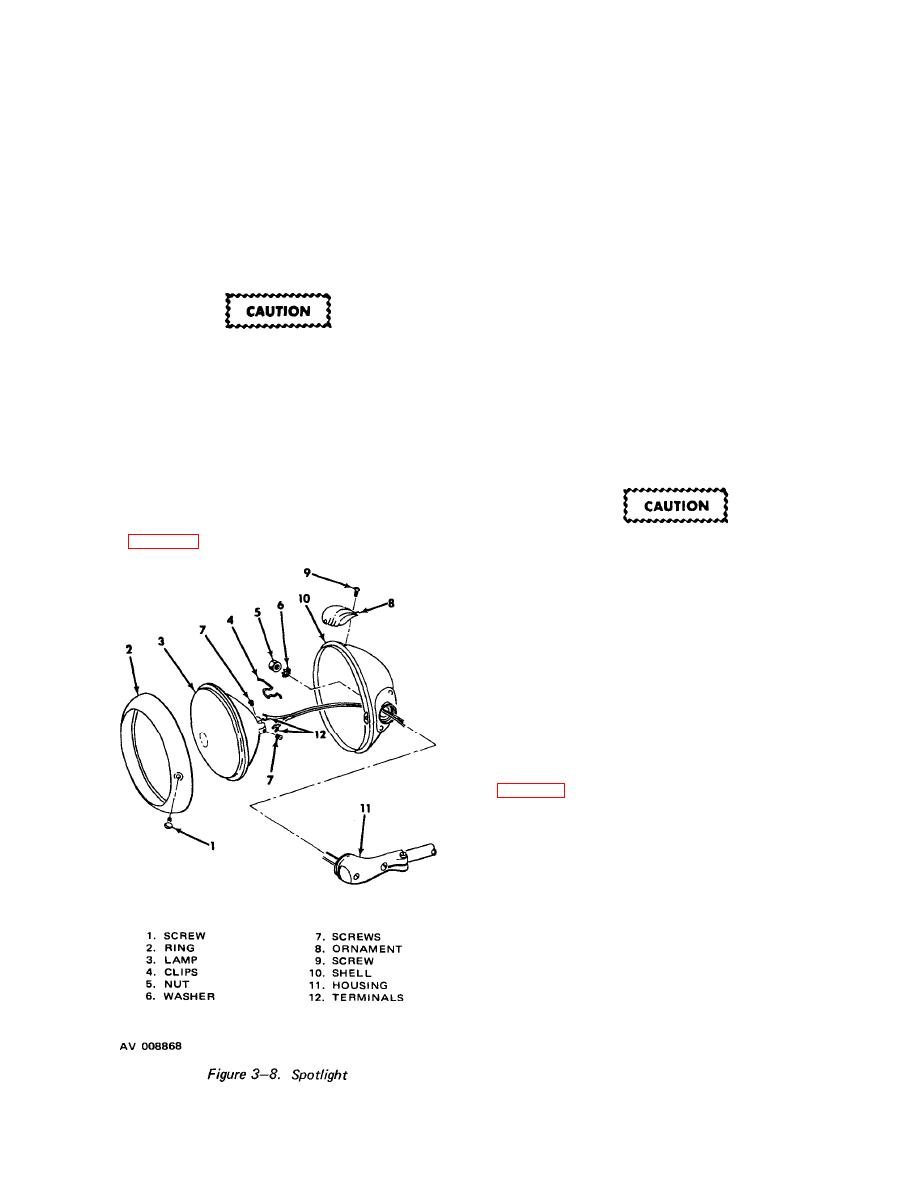
a. Remove screw (9) and ornament (8). Remove screw
3-68. REPLACEMENT. Replace headlight and
(1) and retainer ring (2).
components as follows:
b. Loosen two screws (7) and disconnect terminals
a. Install washers (3 and 4) on housing assembly (11)
(12). Remove four clips (4) and remove lamp unit (3)
and secure housing assembly to bracket with washer (2)
from retainer ring (2).
and nut (l).
c. Remove nut (5) and washer (6) and remove shell
b. Install wiring assembly (10) in housing assembly
(10) from housing (11).
and plug in leads.
3-71. REPAIR. Replace broken, cracked or burned out
lamp unit. Inspect all parts for damage and corrosion.
Clean corroded parts and replace non-repairable parts.
When replacing lamp unit always use proper
Inspect threads on all hardware before installation.
voltage lamp.
3-72. REPLACEMENT. Replace spotlight components
c. Plug lamp (9) in wiring assembly (10). Install
as follows:
retainer (7) and secure with three screws (8). Install rim
(6) and secure with screw (5).
a. Place terminals (12) through shell (10). Secure shell
(10) to housing (11) with washer (6) and nut (5).
3-69. SPOTLIGHT.
3-70. REMOVAL OF LAMP. Remove the spotlight
When replacing lamp unit always use proper
lamp (figure 3-8) as fellows:
voltage lamp.
b. Install lamp (3) in retainer ring (2) with four clips
(4). Secure terminal lugs (12) to lamp with screws (7).
c. Install lamp and ring assembly in housing (10) and
secure with screw (1). Install ornament (8) and secure
with screw (9).
3-73. FLOODLIGHT.
3-74. REMOVAL. Remove the floodlight assembly
(figure 3-9) as follows:
a. Remove screw (1) and remove ring (2). Remove
three clips (6) and remove lamp (3) from housing (7).
b. Loosen screw (4) and remove terminal (5). Remove
screw (11) and grounding bar (12).
c. Remove nut (10) and washer (9) and remove
housing (7) from bracket (8).
3-75. REPAIR. Replace broken, cracked or burned out
lamp unit. Inspect terminal and ground bar for corrosion,
clean if required. Inspect all parts for damage and replace
non-repairable parts. Inspect all hardware before
installation.
|
|
Privacy Statement - Press Release - Copyright Information. - Contact Us |
