 |
|||
|
|
|||
|
|
|||
| ||||||||||
|
|
 TM 55-1740-200-14
(6), washers (5) and washers (4). Install ground cable (2)
b. Remove screw (11), washer (9) and nut (8) and
and cable (7) on battery (12) terminal posts.
remove cable (7). Remove screw (23), three washers (20,
21 and 22) and nut (19) and remove cable (10).
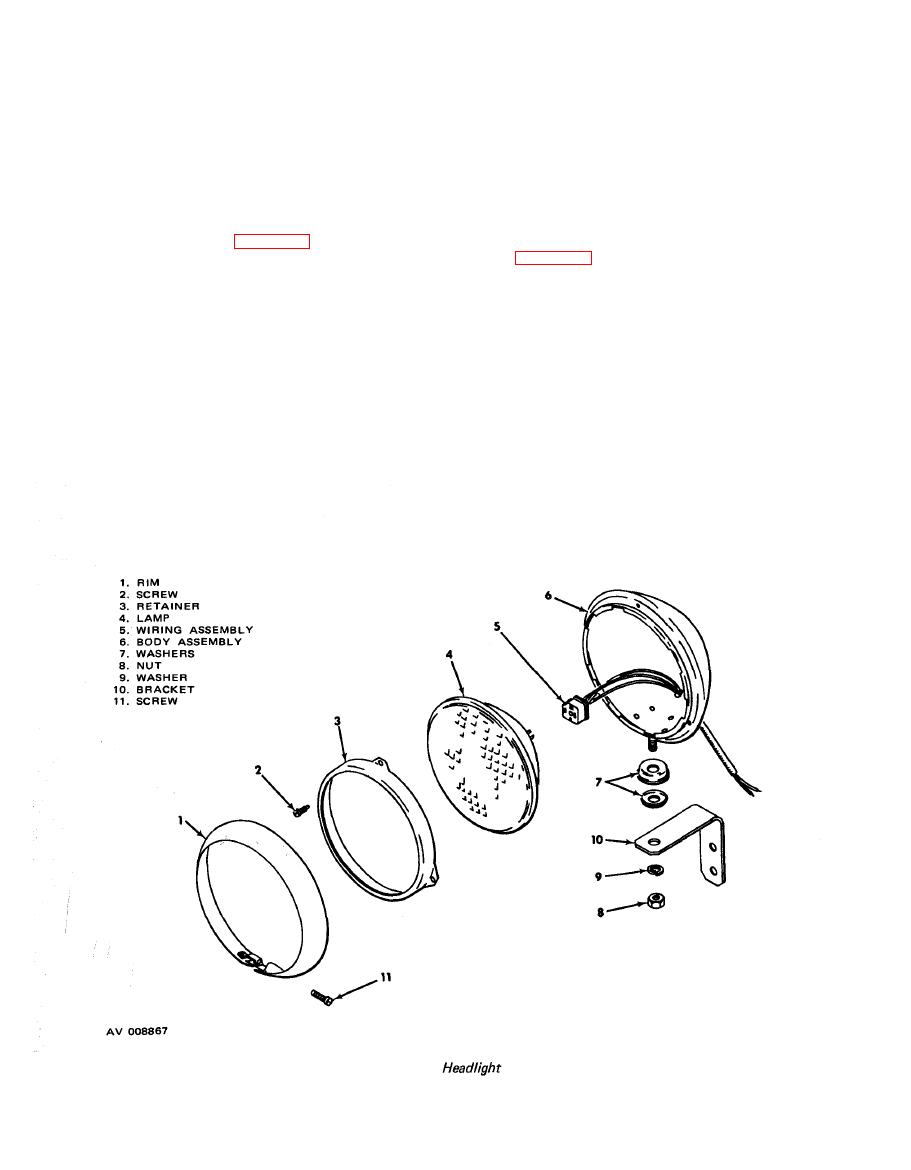
365. HEADLIGHTS.
c. Remove four nuts (17 and 24) and two washers
(18) and remove two rods (l). Remove one screw (14),
washer (15) and nut (16) and remove tray (13).
366. REMOVAL. The tractor is equipped with two
headlights. Removal of components is the same for both
364. REPLACEMENT. See figure 36 and install the
units. See figure 37 and remove the headlights and
tractor battery as follows:
components as follows:
a. Install tray (13) and secure with one screw (14),
washer (15) and nut (16). Secure two rods (1) with four
a. Remove screw (5) and remove tim (6). Remove
nuts (17 and 24) and two washers (18).
three screws (8) and remove retainer (7).
b. Attach cable (10) to frame with screw (23), three
b. Remove lamp (9) from housing assembly (11).
washers (20, 21 and 22) and nut (19). Connect cable (7)
Unplug wiring assembly.
to cable (10) with screw (11), washer (9) and nut (8).
c. Remove nut (1) and washers (2, 3 and 4) and
c. Place battery (12) in tray (13) and position battery
remove housing assembly (11) from bracket.
holder (3) on battery. Secure holder with two wing nuts
|
|
Privacy Statement - Press Release - Copyright Information. - Contact Us |
