 |
|||
|
|
|||
|
|
|||
| ||||||||||
|
|
 TM 9-2320-360-34-2
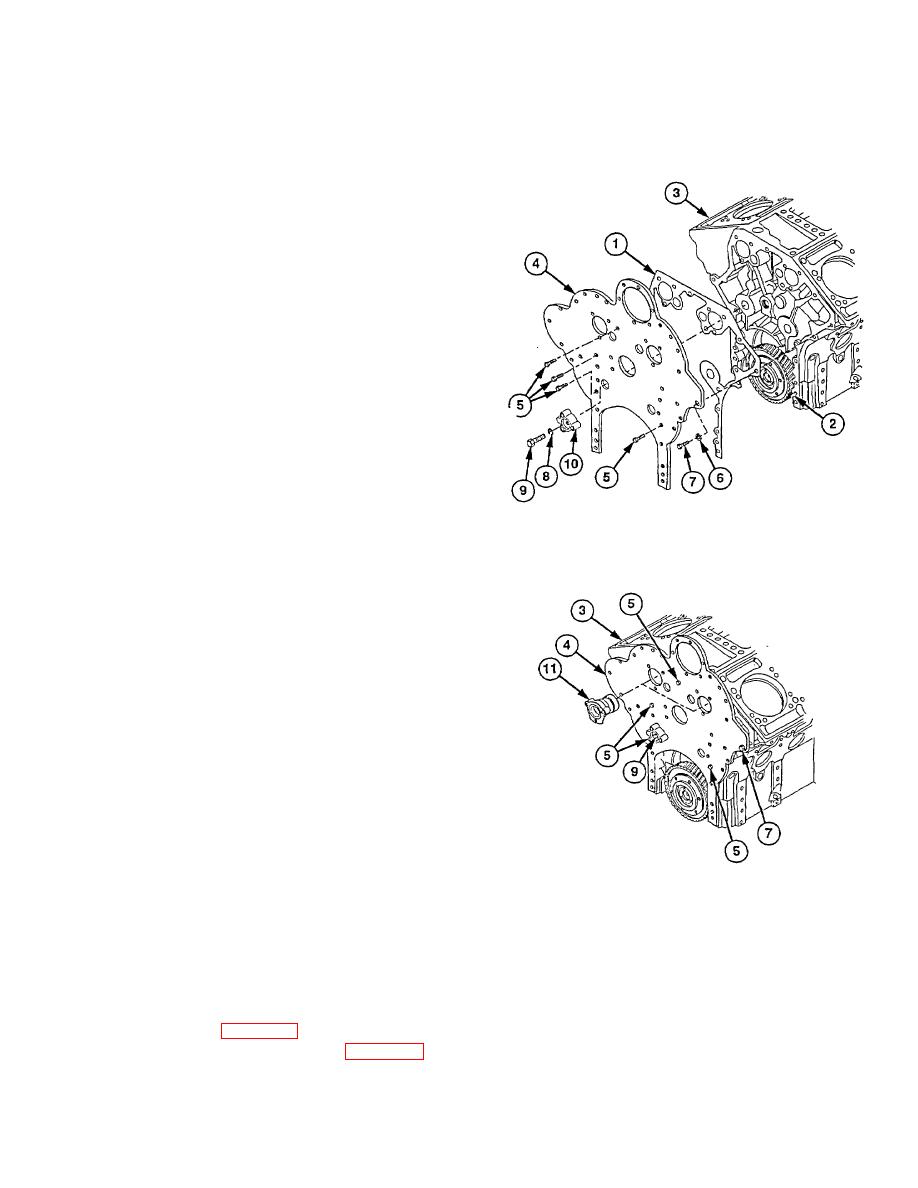
d. Installation
(1) Coat new gasket (1) with grease and Install over
dowels (2) onto engine block (3).
(2) Install rear end plate (4) on dowels (2).
(3) Position four screws (5) on rear end plate (4).
Do not tighten.
(4) Position new lockwasher (6) and screw (7) on
rear end plate (4). Do not tighten.
NOTE
Special washer is installed in same
position as noted during removal.
(5) Install special washer (8) on screw (9) with
grooved side facing head of screw (9).
NOTE
Align dowel in dummy hub with hole
in rear end plate.
(6) Install dummy hub (10), special washer (8), and
screw (9) on rear end plate (4).
NOTE
Camshaft
end
bearings
are
temporarily installed to align rear
end plate.
Holes in front and rear end plates
for camshaft end bearings are not
the same size. Smaller hole is
accurately machined for alignment
purposes and is always located on
right side of engine as viewed
from the rear.
(7) Install two camshaft end bearings (11) in rear
end plate (4) and engine block (3).
(8) Tighten four screws (5) to 31-35 lb-f (41-47
Nm).
(9) Tighten screw (7) to 103-110 lb-ft (140-149
Nm).
(10) Tighten screw (9) to 90 lb-ft (122 Nm).
(11) Remove two end bearings (11) from rear end
plate (4) and engine block (3).
e. Follow-On Maintenance
(1) Install Idler gear (para 19-13).
(2) Install camshafts and end bearings (para 19-12).
(3) Install blower drive support (para 4-8).
19-33
|
|
Privacy Statement - Press Release - Copyright Information. - Contact Us |
