|
| |
TM 9-2320-360-34-1
(5)
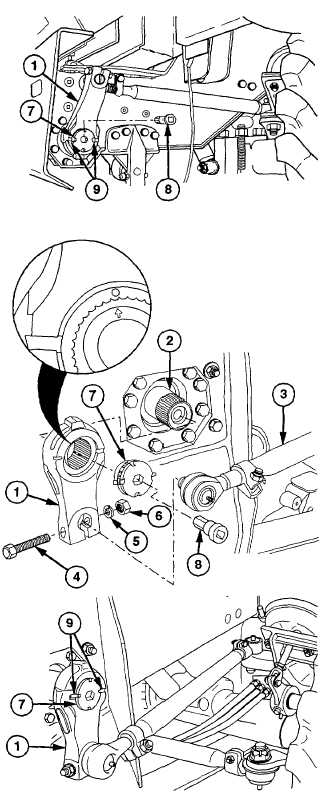
Coat new retainer (7) with antiseize
compound.
(6)
Install retainer (7) on pitman arm (1) using
3/4 in. sockethead screw socket (8).
(7)
Tighten retainer (7) to 450 Ib-ft (610 Nm).
(8)
Engage locktabs (9) with slots on pitman
arm (1).
e.
Rear Pitman Arm Installation
(1)
Coat inside surfaces of pitman arm (1)
with antiseize compound.
(2)
Align timing marks on steering gear (2)
and pitman arm (1).
(3)
Position pitman arm (1) on steering gear
(2).
NOTE
It may be necessary to raise rear axle
to permit installation of drag link.
(4)
Install drag link (3) on pitman arm (1) with
screw (4), new lockwasher (5), and nut
(6). Torque to 90 lb-ft (122 Nm).
(5)
Coat new retainer (7) with antiseize
compound.
(6)
Install retainer (7) on pitman arm (1) using
3/4 in. sockethead screw socket (8).
(7)
Tighten retainer (7) to 450 lb-ft (610 Nm).
(8)
Engage locktabs (9) with slots on pitman
arm (1).
f.
Follow-On Maintenance
(1)
Start engine (TM 9-2320-360-10).
(2)
Road test vehicle to check for proper
operation of steering.
(3)
Shut off engine (TM 9-2320-360-10).
13-9
|