|
| |
TM 9-2320-360-34-1
(3)
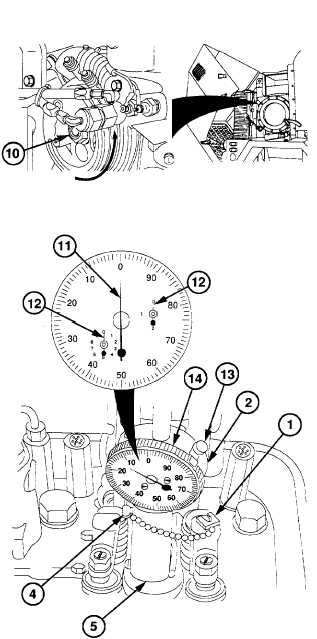
Turn
camshaft
(10)
slowly
counterclockwise until large dial hand (11)
starts moving.
(4)
Continue turning camshaft (10) slowly
counterclockwise until large dial hand (11)
stops moving.
(5)
Turn camshaft (10) slowly in opposite
direction until large dial hand (11) barely
starts to move. Piston is now at top-dead
center.
NOTE
Dial indicator must be zeroed before
piston
downward
travel
can
be
measured. Do steps (6) thru (8) to
zero dial indicator.
(6)
Loosen clamp screw (4) and remove
slotted spacer (1).
(7)
Lower timing tool (5) until two small dial
hands (12) are at zero and the large dial
hand (11) is near zero. Tighten clamp
screw (4).
(8)
Loosen bezel screw (13) and rotate outer
ring (14) of dial until zero lines up with
large dial hand (11). Tighten bezel screw
(13).
CAUTION
If pulley loosens during procedure,
tighten to torque values specified in
para 19-12. Failure to comply may
result in loss of crankshaft pulley and
possible engine damage.
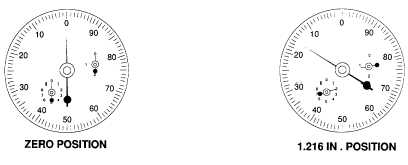
(9)
Zero dial indicator (2) and turn camshaft
(10) slowly counterclockwise, until dial
indicates exactly 1.216 in. (30.89 mm).
3-63
|


