|
| |
TM 9-2320-356-BD
Procedural Steps:
Option 1:
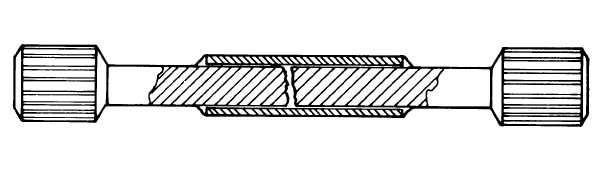
Weld using Tubing or a Sleeve.
1.
Gain access to the drive shaft and remove both broken ends.
2.
Use heavy steel tubing or machine a sleeve that will fit the broken shaft.
3.
Install sleeve or tube on shaft.
Ensure that the proper length is maintained.
4.
Weld ends of sleeve to shaft.
5.
Install blower drive shaft.
6.
Record the BDAR action taken.
When the mission is completed, as soon as
practicable,
repair using standard maintenance procedures.
Option 2:
Weld Without a Sleeve.
NOTE
Try to determine the 1ength of the shaft before
turning it on a 1athe.
1.
Record the length of the shaft.
Use a 1athe to square off and chamfer each
half of the broken shaft.
2.
If the shaft is damaged but not broken, cut through the damaged area and
perform step 1.
3.
Center and dri11 each half with the proper size dri11 to tap each half the same
s i ze, approximately 1/4 to 3/8 inch i n d i ameter.
4.
Tap each side approximately 1 inch deep.
5.
Cut off a bolt with the same thread size as the shaft halves and that matches
the proper tapped length.
6.
Screw the two halves together as close to the overall length of a new shaft.
Check by inserting the shaft in the blower housing.
5-11
|