 |
|||
|
|
|||
|
Page Title:
Illustration 222 Schematic Drawing |
|
||
| ||||||||||
|
|
 88
TM 9-2320-312-24-2
Truck Engine
Disassembly and Assembly Section
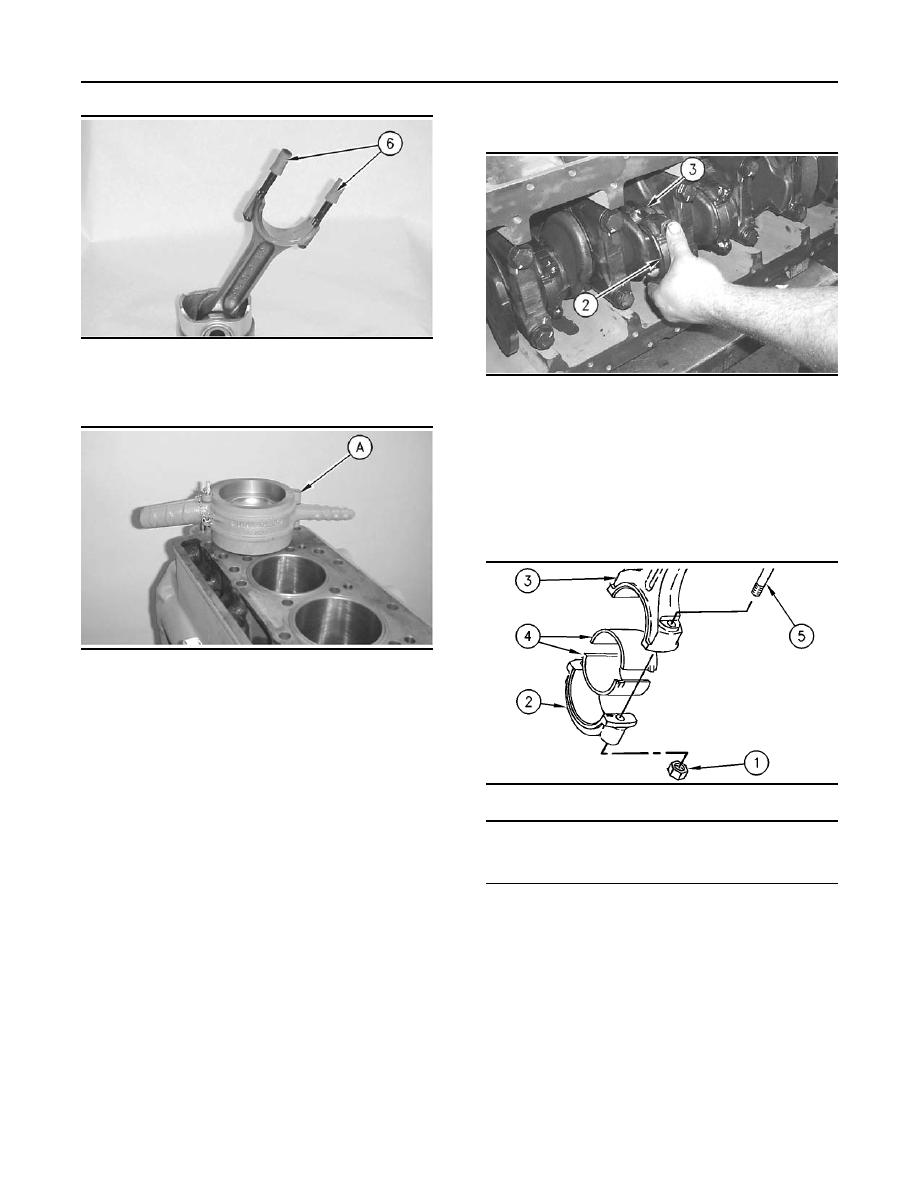
9. Remove the hoses that were installed in Step 4
from the connecting rod bolts.
g00746584
Illustration 222
4. Install short pieces of rubber hose (6) over both
g00678200
Illustration 224
connecting rod bolts.
10. Install connecting rod bearing cap (2) on the
connecting rod (3). Ensure that the number on
connecting rod bearing cap (2) matches the
number on the connecting rod (3). Ensure that
the numbers are on the same side.
11. Lubricate connecting rod cap bolts with
4C-5593 Anti-Seize Compound.
g00634923
Illustration 223
Note: Each piston ring end gap must be positioned
120 degrees from each other.
5. Install Tool (A) in order to compress the piston
rings.
6. With the number one crankshaft throw at the
g00610272
Illustration 225
bottom center, install the piston and connecting
rod in the engine. Ensure that the proper piston
NOTICE
and connecting rod are in the corresponding
Loose connecting rod nuts can result in the separation
cylinder with the bearing retainer notch toward
of the rod cap and result in major engine damage.
the right side of the engine.
Note: The etched number on the connecting rod
12. Install connecting rod cap nuts (1). Tighten nuts
must be on the right side of the engine in the
(1) to a torque of 54 7 Nm (40 5 lb ft).
corresponding cylinder.
7. Line up the piston and the connecting rod with
the crankshaft. Use a soft hammer and tap the
piston into the cylinder bore until Tool (A) comes
off of the piston.
8. Use a soft hammer in order to tap the piston into
the cylinder bore while you guide connecting rod
(3) onto the crankshaft.
|
|
Privacy Statement - Press Release - Copyright Information. - Contact Us |
