 |
|||
|
|
|||
|
|
|||
| ||||||||||
|
|
 TM 9-2320-312-24-1
HEATER/AC UNIT REPLACEMENT - CONTINUED
0150 00
INSTALLATION
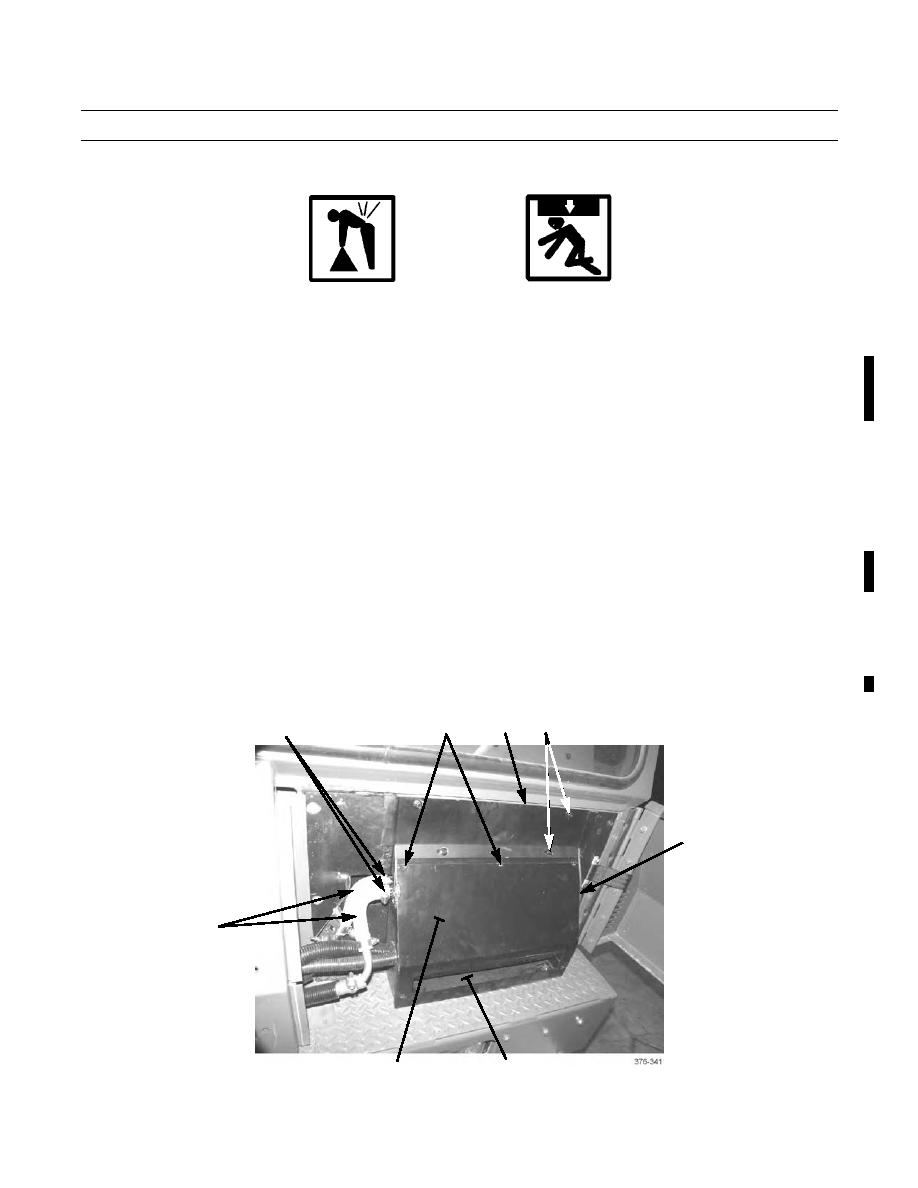
1.
Remove all traces of old strip caulk, sealing material, and rubber strip material before installing heater/AC unit (1).
WARNING
Use extreme caution when handling heavy parts. Provide adequate support and use assistance during
procedure. Failure to follow this warning may result in injury to personnel.
2.
With assistance, position heater/AC unit (1) through opening in front of cab.
2.1.
Install two flex hoses (23) to top of heater/AC unit (1) and tighten two clamps (22).
3.
Secure heater/AC unit (1) to top of instrument panel frame (21) with three screws (20) and nuts (19).
4.
Install mounting panel (15) with six screws (14). Install mounting panel (13) with six screws (12).
5.
Position two grommets (18) and A/C lines (17) through slotted openings in housing of heater/AC unit (1).
NOTE
Apply refrigerant oil to preformed packings of A/C lines before they are connected. Do NOT reuse pre-
formed packings.
6.
Connect two A/C lines (17) to expansion valve (16).
7.
Install mounting panel (7) with four screws (8).
8.
Connect fresh/recirculate air control cable (9) to front panel (10).
CAUTION
Use caution not to damage evaporator coil fins.
Ensure fresh air control cable is free to function and is not pinched.
9.
Install front panel (10) with five screws (6).
10.
Connect two coolant hoses (11) to heater/AC unit (1) and tighten two hose clamps (5).
8
7
6
5
9
11
1
10
0150 00-5
Change 1
|
|
Privacy Statement - Press Release - Copyright Information. - Contact Us |
