 |
|||
|
|
|||
|
|
|||
| ||||||||||
|
|
 TM 9-2320-312-24-1
POWERPACK REPLACEMENT - CONTINUED
0138 00
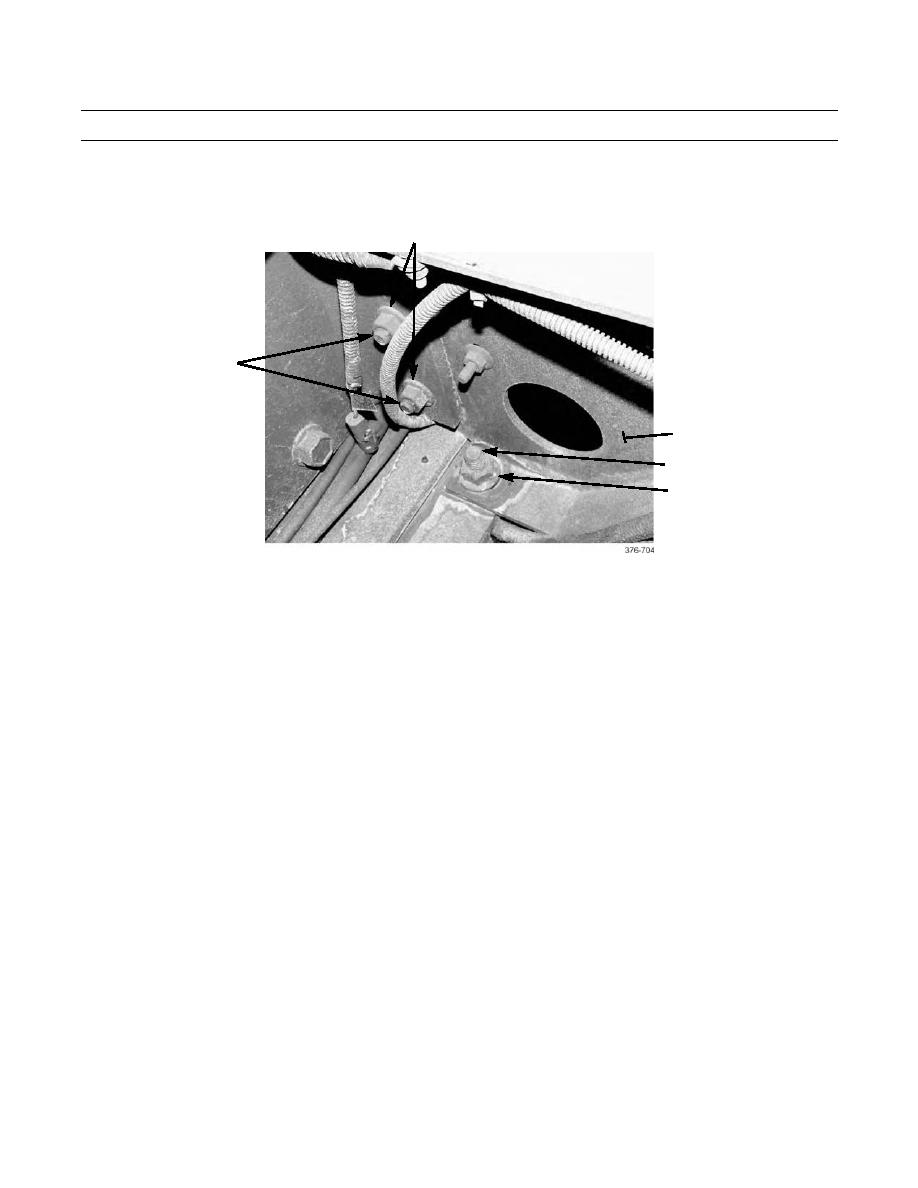
REMOVAL - CONTINUED
d.
On each side of crossmember (1), remove three nuts (7) and bolts (6). Remove nut (9) and bolt (8).
7
6
1
8
9
NOTE
If any air or fluid hose or electrical wiring interferes with positioning of crossmember against left frame
rail, disconnect to free up crossmember.
e.
Remove crossmember (1) from between frame rails and reposition out of the way against left frame rail.
3.
Prepare suitable cribbing to support powerpack after removal from vehicle.
4.
Place a suitable support under transmission (20) and raise so that transmission is fully supported.
5.
Remove two locknuts (11), bolts (12), spring cap (21), tail shaft support spring (18), and spacers (19) from trans-
mission mounting bracket (10). Discard locknuts.
6.
Remove nut (15), bolt (16), clamp (14), and release air dryer-to-compressor air hose (13) from attachment to stand-
off bracket (17).
7.
Position suitable overhead lifting device over powerpack and rig for lifting:
a.
Attach a three-point lifting device to lift points at front left and right rear of engine and to transmission mount-
ing bracket (10).
b.
Check to ensure powerpack is securely rigged with rigging positioned to ensure a safe and balanced lift.
c.
Take up all slack in rigging until powerpack is supported by lifting device.
0138 00-4
|
|
Privacy Statement - Press Release - Copyright Information. - Contact Us |
