 |
|||
|
|
|||
|
|
|||
| ||||||||||
|
|
 TM 9-2320-312-24-1
ELECTRICAL GENERAL MAINTENANCE INSTRUCTIONS - CONTINUED
0120 00
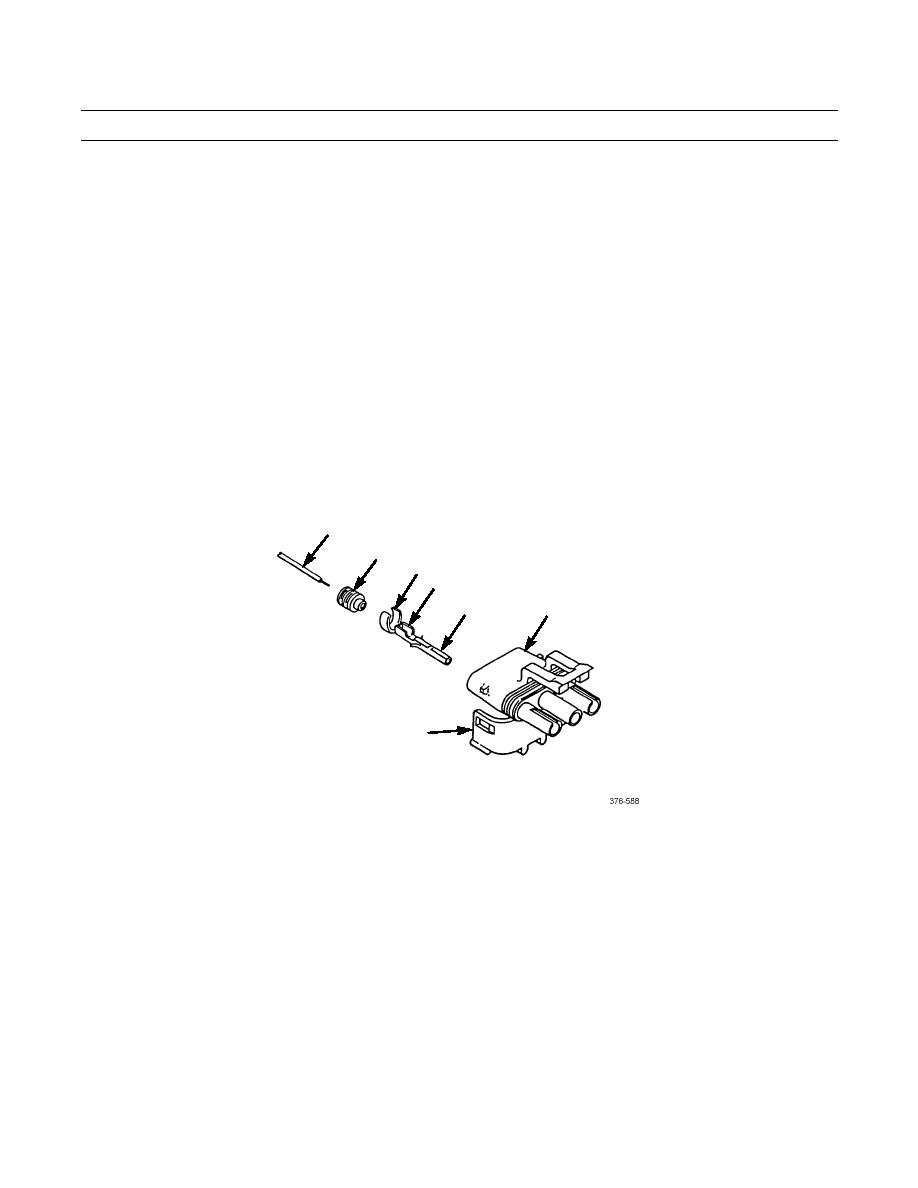
SEALED CONNECTOR REPAIR
1.
Open hinged cover (9) of connector (8) for access to rear of connector.
NOTE
Perform steps 2 through 9 for each wire of connector.
Tag and mark position of wires in sealed connector to ensure correct installation.
2.
Using pin removal tool, position tool over pin (7) and push inward to retract two barbs of pin.
3.
Remove wire (3), with pin (7) and seal (4) attached, from rear of connector (8).
4.
If defective, remove pin (7) and seal (4) from wire (3) by opening tabs (5 and 6) of pin.
5.
Position new seal (4) and pin (7) on wire (3).
6.
Using crimping tool, securely crimp tabs (6) of pin (7) over metal strands of wire (3).
7.
Slide seal (4) next to pin (7) and crimp tabs (5) of pin over end of seal.
8.
Push pin (7) into rear of connector (8) until fully seated.
9.
Close hinged cover (9) of connector (8).
3
4
5
6
7
8
9
ELECTRICAL CONNECTOR REPAIR
NOTE
Tag and mark position of wires in electrical connector to ensure correct installation.
1.
If repairing a trailer electrical connector, loosen two screws (12) of nut (11).
2.
Unscrew nut (11) from shell (16) and slide nut back over wires (10).
3.
Push grommet (13) back on wires (10).
4.
Using pin extractor, push pins (14) out through rear of insert (15).
5.
Push insert (15) out through rear of shell (16).
6.
Unsolder wires (10) from pins (14).
7.
Position wires (10) into solder wells of pins (14) and solder (TB SIG 222).
0120 00-2
|
|
Privacy Statement - Press Release - Copyright Information. - Contact Us |