 |
|||
|
|
|||
|
|
|||
| ||||||||||
|
|
 TM 9-2320-303-24-2
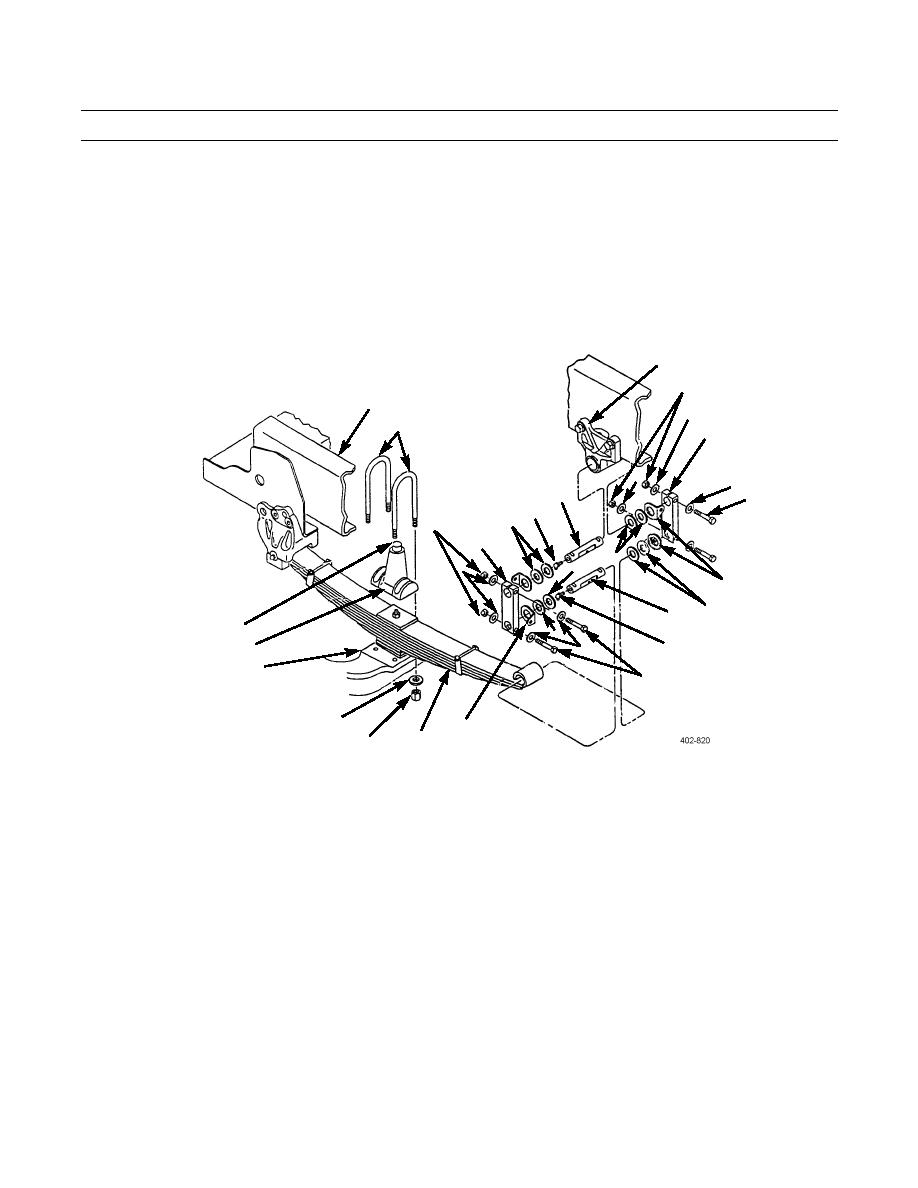
FRONT SPRING REPLACEMENT - CONTINUED
0282 00
REMOVAL
1.
Using floor jack and two trestles, lift and support frame (1) and front axle (15) to relieve weight from spring (12).
NOTE
Axle stop is offset to one side to align with frame. Note position of axle stop prior to removal to aid in instal-
lation.
2.
Remove four nuts (13), washers (14), two U-bolts (2), and axle stop (16) from front axle (15) and spring (12).
3
4
1
5
2
6
5
5
10
7
11
9
4
6
9
5
9
8
9
10
17
9
5
16
11
15
7
14
8
12
13
7
3.
Remove stop cushion (17) from axle stop (16) if excessively worn or damaged (WP 0119 00).
NOTE
Perform step 4 to separate rear of spring from spring shackles.
4.
Remove grease fitting (11), two nuts (4), four washers (5), two screws (7), two wear plates (8), four shims (9), and pin
(10).
5.
Repeat step 4 to remove two spring shackles (6) from rear spring hanger (3).
6.
Remove grease fitting (25), four screws (26), washers (27), and two saddle caps (18).
7.
Lower front axle (15) to allow spring (12) to clear front spring hanger (28). Remove two washers (19) and pin (24) from
front of spring.
NOTE
Note position and number of shim(s) prior to removal to aid in installation.
0282 00-2
|
|
Privacy Statement - Press Release - Copyright Information. - Contact Us |
