 |
|||
|
|
|||
|
Page Title:
REAR SLACK ADJUSTER REMOVAL - CONTINUED |
|
||
| ||||||||||
|
|
 TM 9-2320-302-20-2
SLACK ADJUSTER AND S-CAM REPLACEMENT- CONTINUED
0180 00
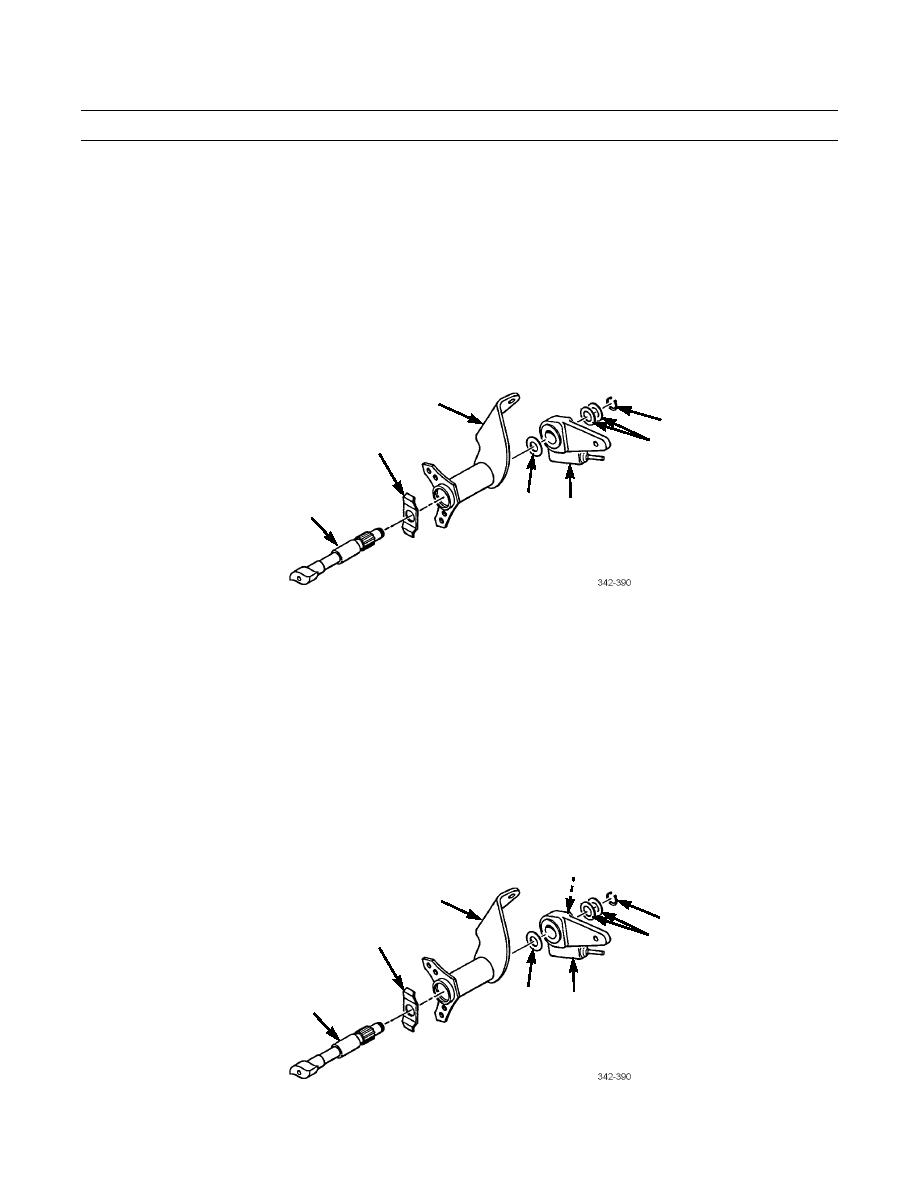
REAR SLACK ADJUSTER REMOVAL - CONTINUED
NOTE
Note position of washers for installation.
2.
Remove retaining ring (21) and washers (22) from s-cam (18).
3.
Remove slack adjuster (23) and washer (24) from splined shaft of s-cam (18).
4.
Mark position of s-cam (18) on mounting bracket (20) and remove s-cam and special washer (19) from mounting
bracket.
20
21
22
19
24
23
18
FRONT SLACK ADJUSTER INSTALLATION
1.
Lightly coat splines of s-cam (6) with antiseize compound.
2.
Install s-cam (6) and special washer (7) on mounting bracket (8).
3.
Install washer (12) and slack adjuster (11) on s-cam (6) with head of screw (25) toward vehicle.
NOTE
If repeating installation because measurement in step 12 exceeded 0.06 in (1.5 mm), add another washer as a
spacer.
4.
Install washers (10) and retaining ring (9) on s-cam (6).
25
8
9
7
10
12
11
6
0180 00-3
|
|
Privacy Statement - Press Release - Copyright Information. - Contact Us |
