 |
|||
|
|
|||
|
Page Title:
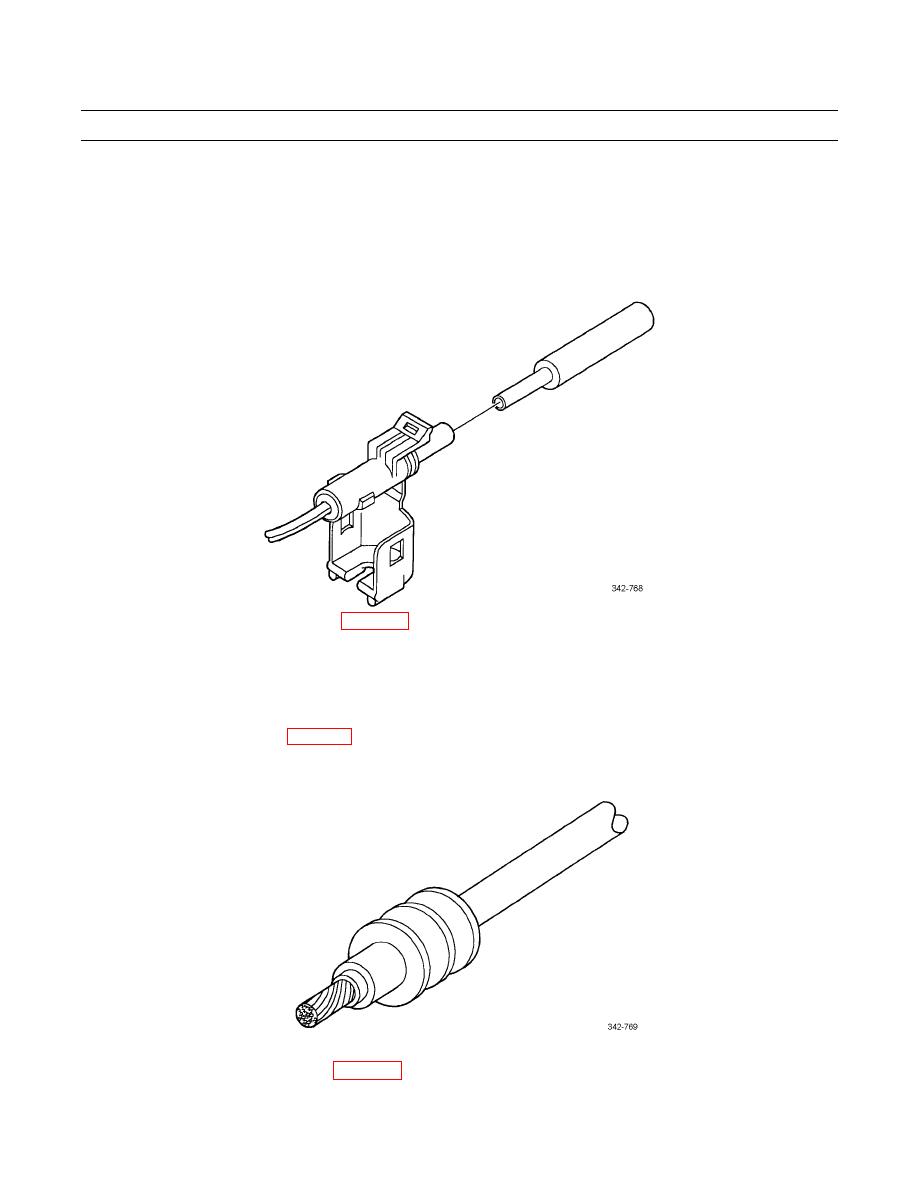
Figure 11. Removal Tool Procedure. |
|
||
| ||||||||||
|
|
 TM 9-2320-302-20-2
ELECTRICAL CONNECTORS MAINTENANCE - CONTINUED
0151 00
COMMERCIAL CONNECTOR REPAIR - CONTINUED
(3)
Grasp cable to be removed and push terminal to forward position.
(4)
Insert removal tool straight into front of connector cavity until it rests on cavity shoulder.
(5)
Grasp cable and push forward through connector cavity into tool while holding tool securely in place (Fig-
ure 11).
Figure 11. Removal Tool Procedure.
(6)
Tool will press locking tangs of terminal. Pull cable rearward (back through connector). Remove tool from
connector cavity.
(7)
Cut wire immediately behind cable seat and slip new cable seal onto wire.
(8)
Strip end of cable using strippers to leave 0.2 +/- 0.02 in (5.0 +/- 0.5 mm) of bare conductor. Position cable
seal as shown (Figure 12).
Figure 12. Proper Cable Seal Position.
0151 00-15
|
|
Privacy Statement - Press Release - Copyright Information. - Contact Us |
