|
| |
TM 5-2420-222-34
8-10.
GEAR SHIFTERS AND SHIFTER SHAFTS MAINTENANCE. (Con’t)
b.
CLEANING AND INSPECTION
WARNING
Dry cleaning solvent, P-D-680, Is toxic and flammable. Always wear protective
goggles and gloves, and use only In a well-ventilated area. Avoid contact with
skin, eyes, and clothes, and DO NOT breathe vapors. DO NOT use near open
flame or excessive heat. The solvent's flash point Is 100°F-138°F (38°C-59°C). If
you become dizzy while using cleaning solvent, immediately get fresh air and
medical help. If solvent contacts eyes, Immediately wash your eyes and get
medical aid.
1.
Clean all metal parts with dry cleaning solvent. Dry thoroughly with clean, dry rags.
2.
Inspect ball bearings (see TM 9-214).
3.
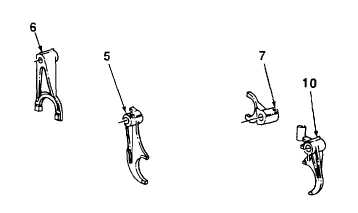
Inspect shifter forks, shafts, remote control lever, and pin for cracks, breaks, bends, grooves, and excessive wear.
Replace if defective.
4. Inspect four springs for cracks, bends, and breaks. Using spring tester, measure free length of springs. Free length
must be 0.960 in. (24.384 mm).
5.
Using spring tester and torque wrench, compress springs to 0.640 in. (16.256 mm) and read compression force on
torque wrench. Compression force must be 13-17 lb.-ft. (18-23 N•m).
6.
Inspect all other metal parts for cracks, breaks, and abnormal bends.
7.
Inspect shifter forks for damaged threads.
c.
REPAIR
Restore damaged shifter fork (5, 6, 7, and 10)
threads using screw threading set.
d.
INSTALLATION
1.
Install pin (28) in transmission (11).
2.
Install expansion plug (21) and spring (22) in
transmission (11).
3.
Tap new spring pin (24) in transmission (11)
and expansion plug (21).
TA701389
8-50
|