|
| |
TM 5-2420-222-20-2
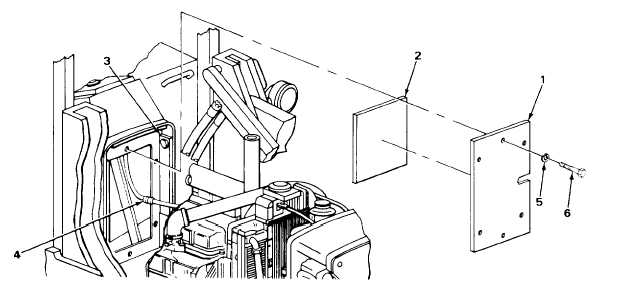
COWL FRONT COVER - CONTINUED
ACTION
LOCATION
ITEM
REMARKS
ASSEMBLY - CONTINUED
9.
Cowl front cover (1)
Cowl barrier (2)
a.
If removed, apply metal adhesive in
0.06 to 0.18-inch (1.52 to 4.57 mm)
wide beads, in 2.00-inch (50.8 mm) or
smaller squares.
Make sure that outside bead is within
0.25-inch (6.35 mm) of edge with no
gaps.
b.
Line up and press into place to transfer
some metal adhesive.
c.
Take off and allow metal adhesive to
set for two minutes.
d.
Line up and press firmly into place.
INSTALLATION
10.
Cowl support (3) and
Cowl front cover (1)
Place in position.
capillary tube
with assembled cowl
grommet (4)
barrier (2), if
present
11.
Cowl support (3) and
Six new lockwashers
a.
Screw in part way.
cowl front cover (1)
(5) and screws (6)
b.
Using 7/16-inch, 3/8-inch drive socket
and ratchet handle, tighten.
TA243220
2-1024
|