 |
|||
|
|
|||
|
|
|||
| ||||||||||
|
|
 TM 5-2410-237-23
WINCH ASSEMBLY REPAIR - CONTINUED
0245 19
ASSEMBLY - CONTINUED
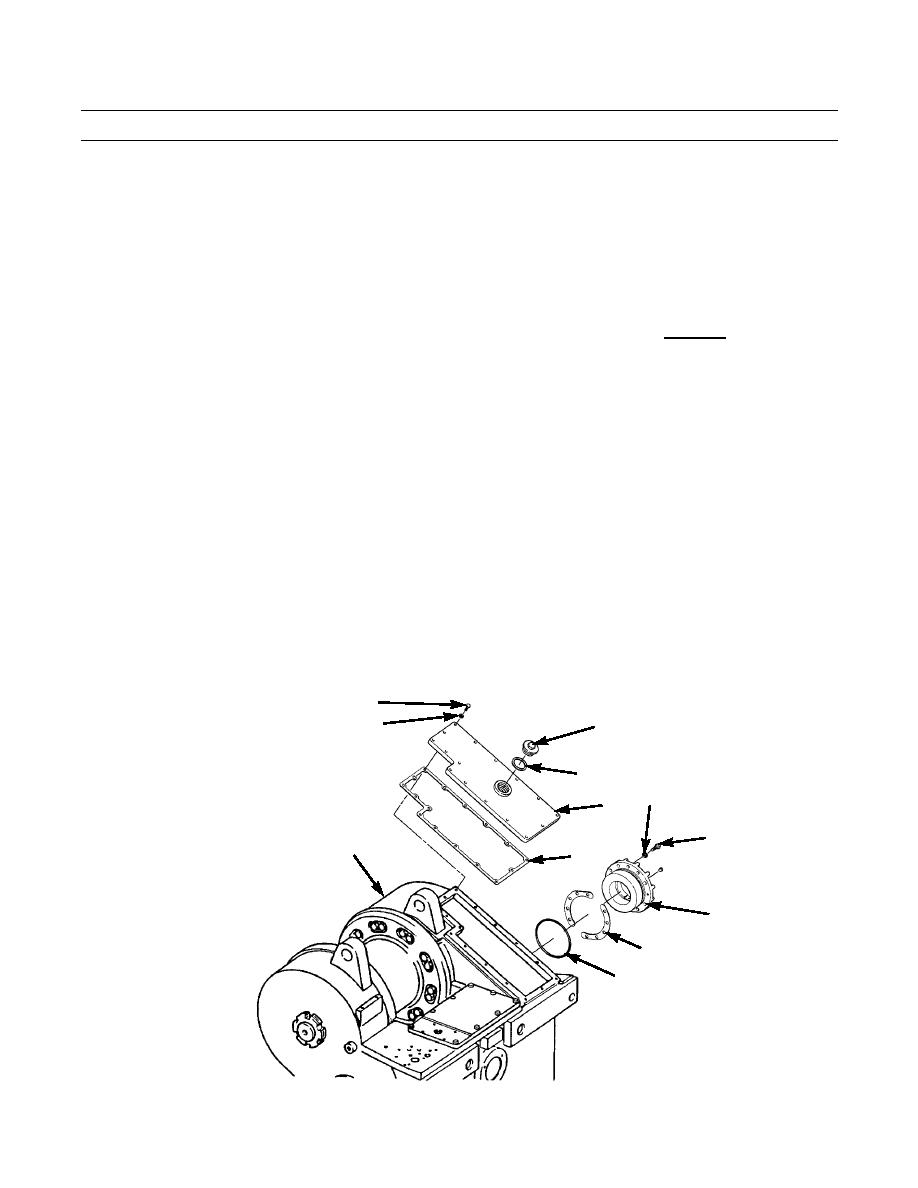
k.
Install bearing cage (10) in case (5) without O-ring (13) or new shims (11).
l.
Install three capscrews (8) in bearing cage (10).
m.
Install plug (12) in bearing cage (10).
n.
Install dial indicator to check end play of idler gear assembly:
(1)
Tighten three capscrews (8) evenly until zero end play is measured.
(2)
Measure and record gap between bearing cage (10) and case (5) at three capscrew locations.
Obtain new shims (11) with a total thickness equal to 0.002 in. (0.056 mm) more than average gap mea-
(3)
sured in step (2).
o.
Remove three capscrews (8) and bearing cage (10) from case (5).
p.
Install new O-ring (13) on bearing cage (10).
q.
Position new shims (11) on bearing cage (10).
CAUTION
Tighten capscrews (8) evenly to avoid damaging O-ring (13).
NOTE
Capscrews installed part way in forcing screw holes will keep shims in position while bearing cage is being
installed.
r.
Install 10 capscrews (8) and washers (9). Tighten capscrews evenly.
s.
Measure and record gap between bearing cage (10) and case (5) at three capscrew locations. If end play is not
0.001-0.003 in. (0.03-0.08 mm), remove bearing cage (10) and adjust shims (11) as necessary.
t.
Install new gasket (4) and access cover (3) on case (5) with 16 new lockwashers (2) and bolts (1).
u.
Install new gasket (7) and plug (6) on access cover (3).
1
6
2
7
9
3
8
5
4
10
11
13
421-0187
Change 1
0245 19-44
|
|
Privacy Statement - Press Release - Copyright Information. - Contact Us |
