 |
|||
|
|
|||
|
|
|||
| ||||||||||
|
|
 TM 5-2410-237-23
WINCH ASSEMBLY REPAIR - CONTINUED
0245 19
ASSEMBLY - CONTINUED
z.
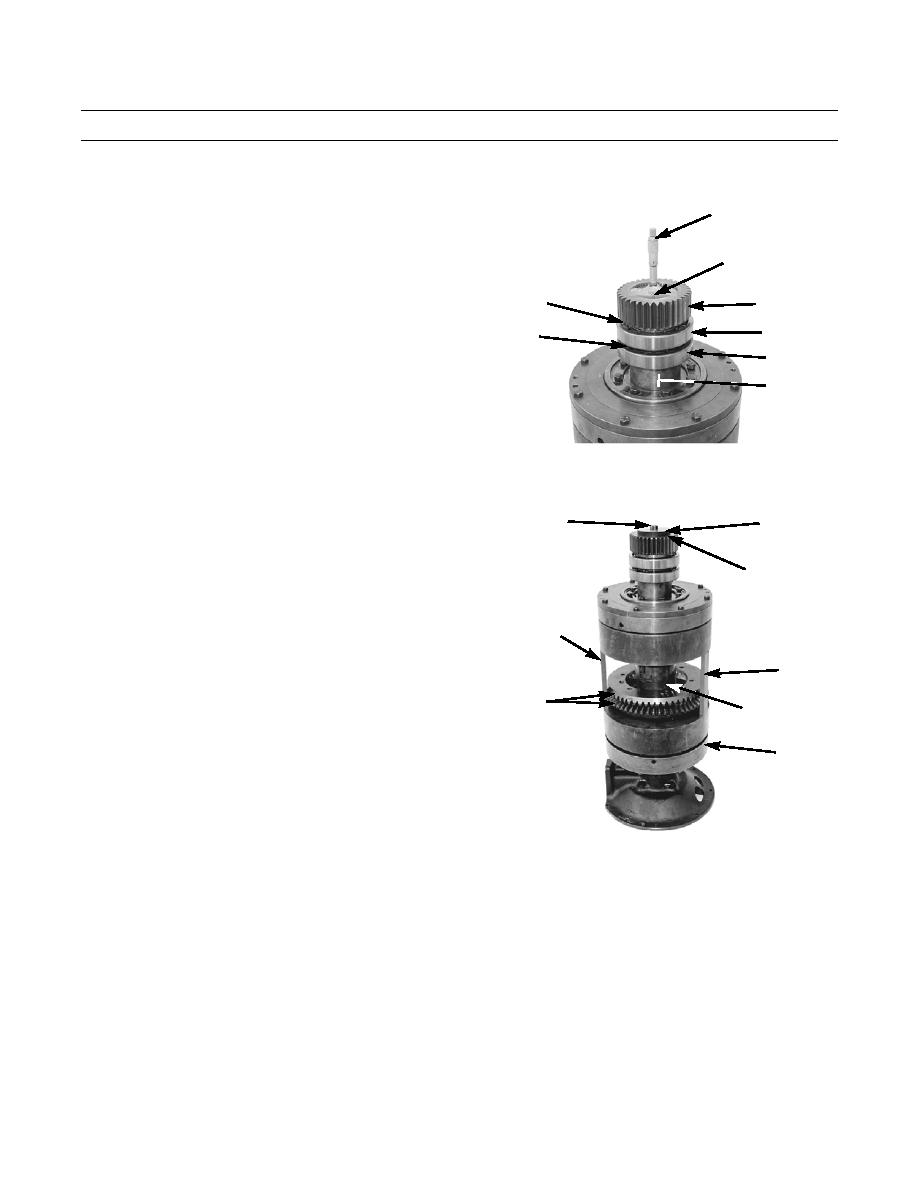
Install spacer (207) on clutch shaft (155).
DEPTH
aa.
Install bearings (209 and 208) and spacers (206
and 205) on clutch shaft (155).
155 (HIDDEN)
ab. Put gear (204) in position on clutch shaft (155)
205
204
and install washer (202) and capscrew (201).
208
206
ac.
Tighten capscrew (201) to pull clutch shaft (155)
209
through bearings and gear.
207
ad. Remove capscrew (201) and washer (202).
ae.
Measure and record distance between end of
clutch shaft (155) and face of gear (204) with
421-0315
depth micrometer.
af.
Remove three gaging bars from between clutch
201
202
housings (196).
203 (HIDDEN)
GAGING
BAR
GAGING
BAR
200
155
196
421-0224
ag. Install new shims (203), with a total shim thickness equal to thickness recorded in step ae above.
ah. Install washer (202) and capscrew (201). Tighten capscrew to 100 lb-ft (136 Nm).
ai.
Put bevel gears (200) in position on clutch housings (196).
aj.
Install one bevel gear (200) to clutch housing (196) with nine capscrews (199). Tighten capscrews to 85 lb-ft (115
Nm).
ak. Repeat step aj to install other bevel gear (200) to other clutch housing (196).
al.
Loosen capscrews (178) to release clutch so that it turns freely.
Change 1
0245 19-24
|
|
Privacy Statement - Press Release - Copyright Information. - Contact Us |
