 |
|||
|
|
|||
|
|
|||
| ||||||||||
|
|
 TM 5-2410-237-23
DASH ASSEMBLY REPLACEMENT - CONTINUED
0160 00
REMOVAL - CONTINUED
WARNING
Use extreme caution when handling heavy parts. Provide adequate support and use assistance during pro-
cedure. Ensure that any lifting device used is in good condition and of suitable load capacity. Keep clear of
heavy parts supported only by lifting device. Failure to follow this warning may result in death or injury to
personnel.
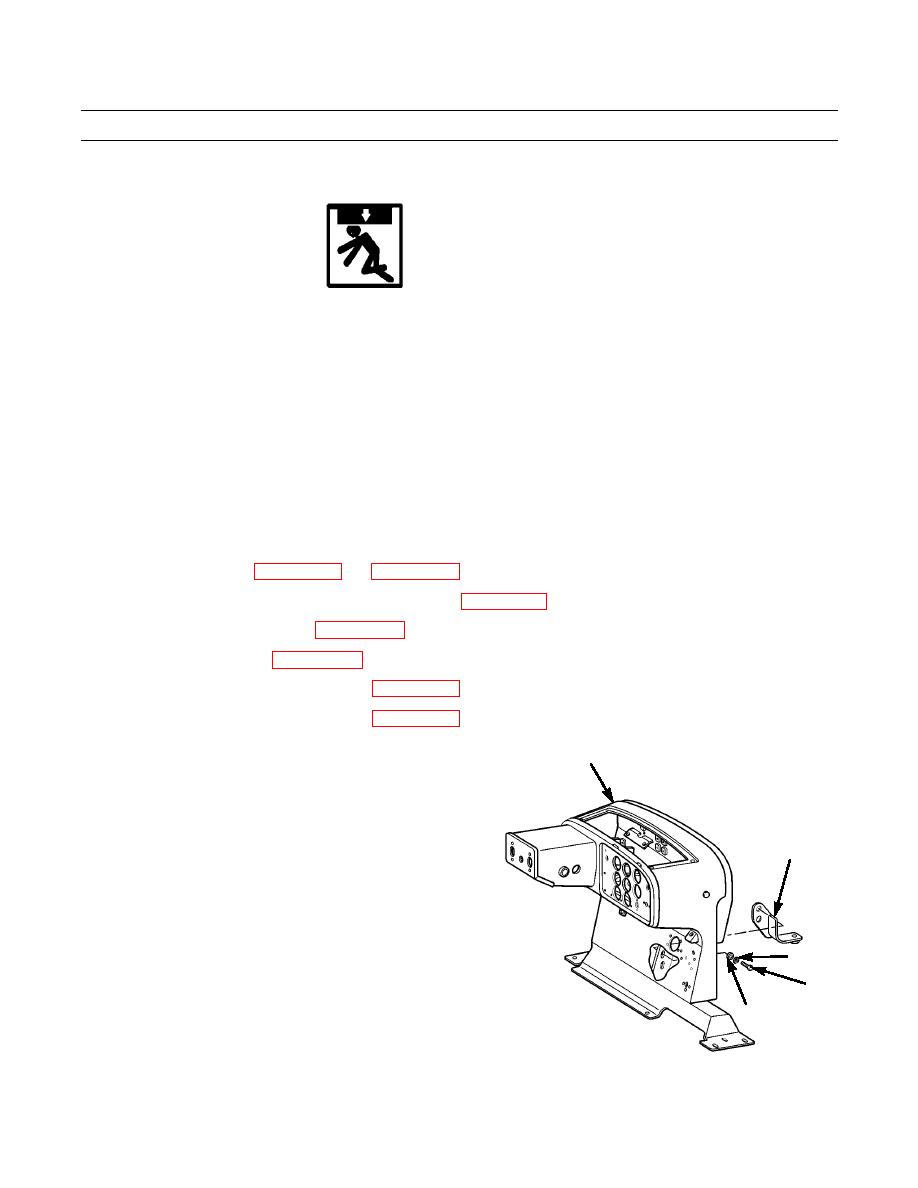
12.
Install two lifting links (39) with 3/8-16 x 1-1/2 in. bolts in top of dash assembly (40) and fasten a nylon sling and a suit-
able lifting device to lifting links.
13.
Remove six capscrews (41), washers (42) and lockwashers (43). Discard lockwashers.
14.
Remove dash assembly (40) using lifting device.
NOTE
Perform steps 15-21 as required to remove remaining components from dash.
15.
Remove electrical gages (WP 0081 00 thru WP 0084 00).
16.
Remove heater switch, if equipped with winterization kit (WP 0193 00).
17.
Remove engine oil pressure gage (WP 0231 00).
18.
Remove governor linkage (WP 0058 00).
19.
Remove steering clutch levers and linkage (WP 0148 00).
20.
Remove steering brake pedals and linkage (WP 0146 00).
21.
Remove capscrew (44), lockwasher (45) and washer
40
(46) and remove support assembly (47) from dash
assembly (40). Discard lockwasher.
47
45
44
46
387-330
0160 00-5
|
|
Privacy Statement - Press Release - Copyright Information. - Contact Us |
