 |
|||
|
|
|||
|
|
|||
| ||||||||||
|
|
 TM 5-2410-237-23
TRANSMISSION OIL COOLER REPLACEMENT - CONTINUED
0109 00
REMOVAL - CONTINUED
NOTE
Perform steps 10-14 as needed to separate head and access cover from oil cooler.
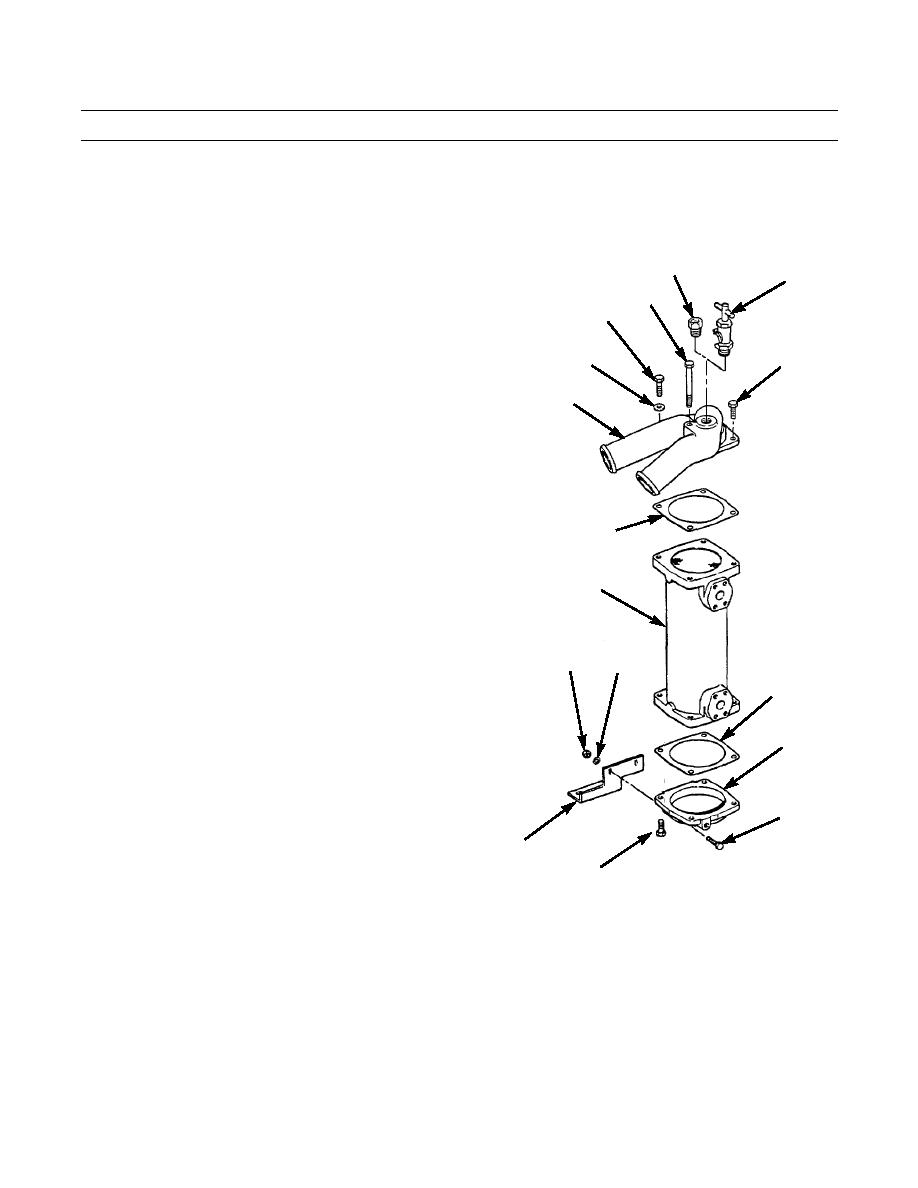
10.
Remove two capscrews (21), washers (22), capscrew
31
32
(23) and capscrew (24).
23
11.
Separate head (3) from oil cooler (4). Remove gasket
21
(25) and discard.
12.
Remove two nuts (26), washers (27), capscrews (28)
22
24
and bracket (20) from access cover (9).
13.
Remove four bolts (29) and separate access cover (9)
3
from oil cooler (4). Remove and discard gasket (30).
14.
Remove plug (31) (without winterized cab) or valve
(32) (with winterized cab) from head (3).
25
4
26
27
30
9
28
20
387-376
29
INSTALLATION
NOTE
Perform steps 1-4 as needed to assemble head and access cover to oil cooler.
1.
Install plug (31) (without winterized cab) or valve (32) (with winterized cab) into head (3).
2.
Position new gasket (30) and access cover (9) on oil cooler (4) and install four bolts (29).
3.
Install bracket (20) to bonnet (9) with two capscrews (28), washers (27) and nuts (26).
4.
Position new gasket (25) and head (3) on oil cooler (4) and install two capscrews (21), washers (22), capscrew (23) and
capscrew (24).
0109 00-4
|
|
Privacy Statement - Press Release - Copyright Information. - Contact Us |
