 |
|||
|
|
|||
|
|
|||
| ||||||||||
|
|
 TM 5-2410-237-23
RADIATOR MAINTENANCE - CONTINUED
0068 00
ASSEMBLY - CONTINUED
NOTE
48
49
49
Do NOT use oil petroleum-based products
or abrasive liquids on seals.
50
51
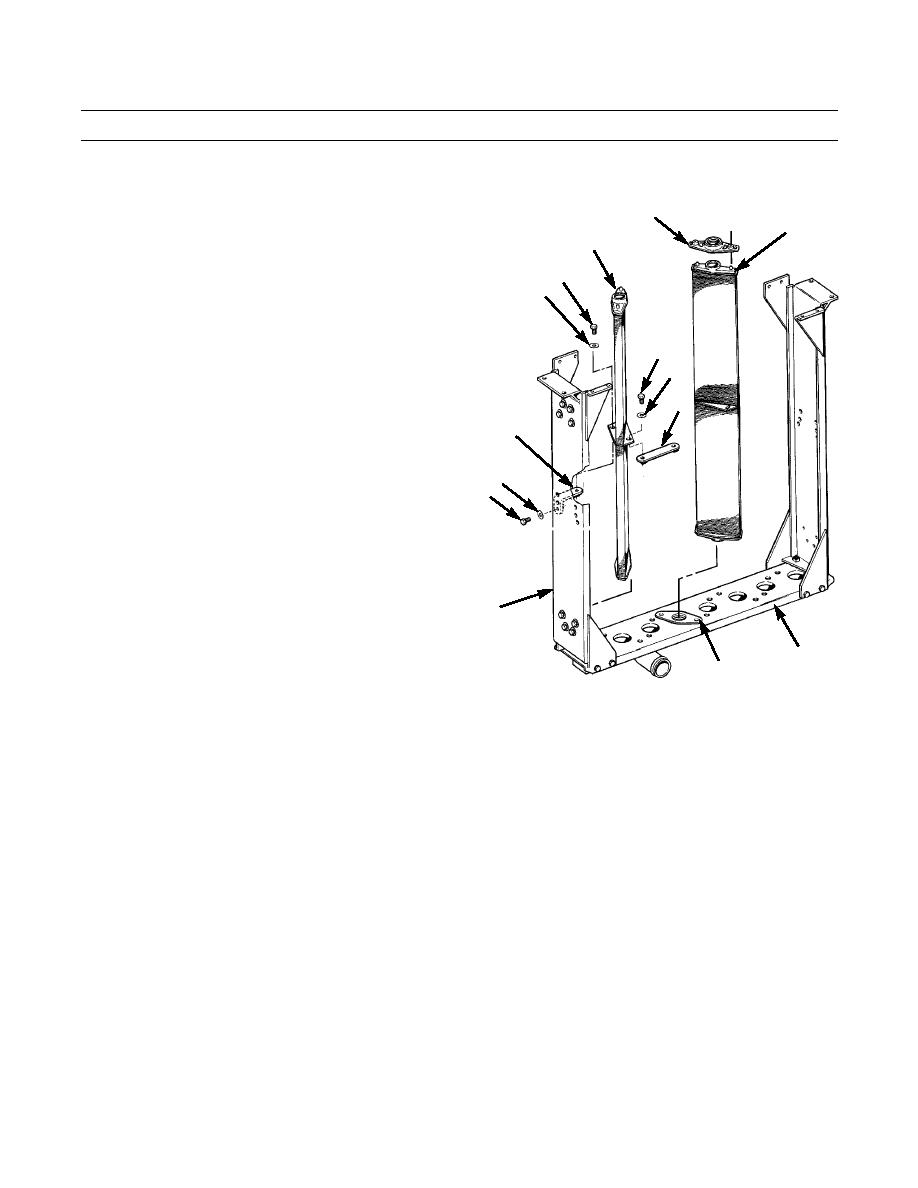
5.
Ensure seal holes in bottom tank (56) are clean and
serviceable. Apply liquid detergent to all sealing areas
and to eight new seals (55). Install seals in bottom
tank.
50
51
6.
Install one end of core (49) in seal (55).
54
NOTE
52
Do NOT tighten capscrews until radiator
51
is assembled.
50
7.
Install strap (54) at center tabs in core (49) with two
capscrews (50) and washers (51).
8.
If removed, install bracket (52) with two capscrews
(50) and washers (51).
53
9.
Repeat step 6 through 8 to install remaining seven
cores (49).
56
10.
Ensure seal holes in top tank (36) are clean and ser-
55
387-550
viceable. Apply liquid detergent to all sealing areas
and to eight new seals (48). Install seals in top tank.
11.
With assistance, carefully position top tank (36) over cores (49) and line up seals (48) with core necks. Press down on
top tank to seat on seals. Use a gentle rocking motion.
12.
Install top tank (36) on frame (53) with four capscrews (46) and washers (47).
13.
Install bracket (45) on top tank (36) with two capscrews (43) and washers (44).
14.
Repeat steps 12 and 13 at other end of top tank (36).
NOTE
Ensure back of "V"s are within 1/8 in. of each other at rear by pinching together.
15.
Adjust cores (49) to obtain a 0.25 in. (6.25 mm) gap between cores, at middle by stiffeners of "V" at front of radiator. As
adjustments are made, tighten capscrews (50) on straps (54) between cores.
16.
Tighten balance of capscrews (50) on radiator.
NOTE
Place back side of radiator on wood blocks for steps 17 and 18.
17.
Install baffle (42) on top front of radiator with five capscrews (40) and washers (41).
18.
Install baffle (39) on bottom front of radiator with four capscrews (37) and washers (38).
0068 00-6
|
|
Privacy Statement - Press Release - Copyright Information. - Contact Us |
