 |
|||
|
|
|||
|
|
|||
| ||||||||||
|
|
 TM 5-2410-237-23
RADIATOR MAINTENANCE - CONTINUED
0068 00
DISASSEMBLY - CONTINUED
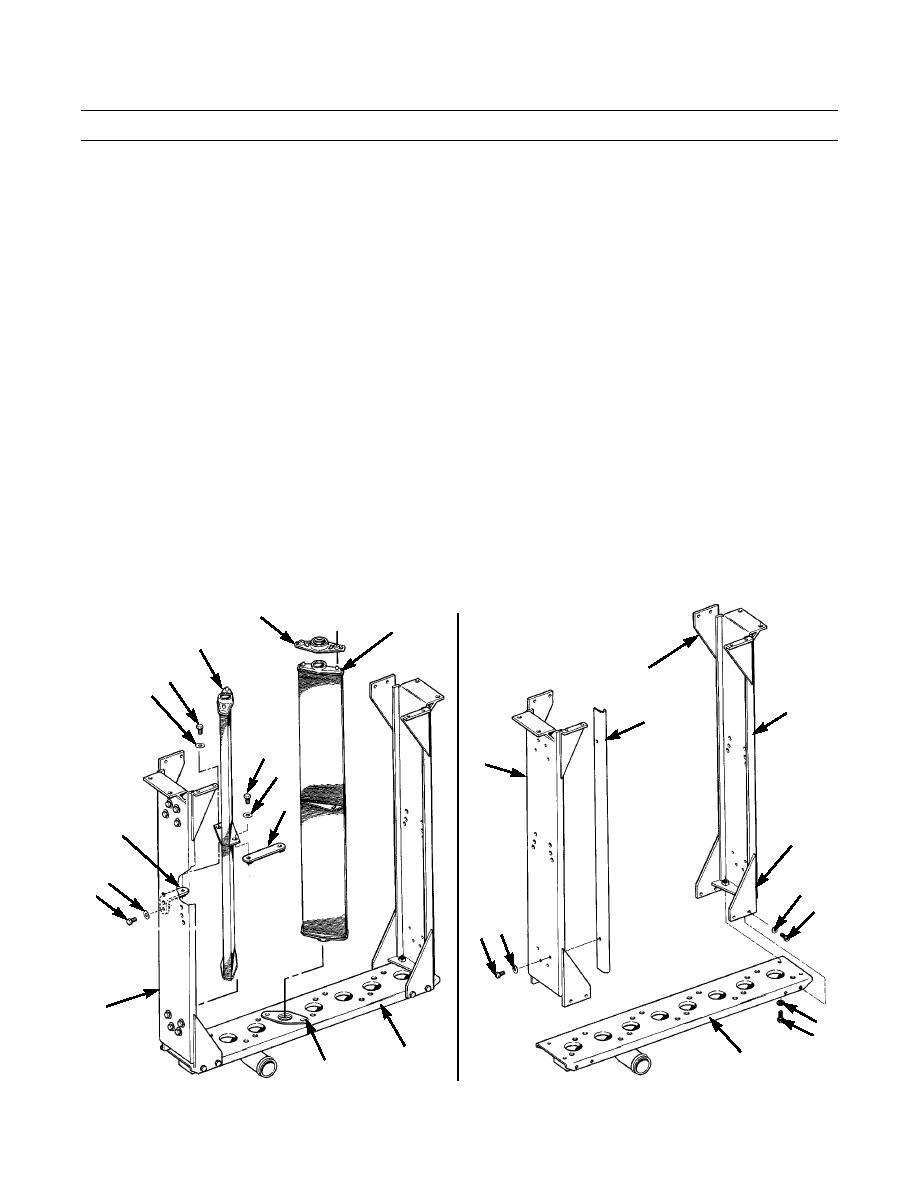
10.
If installed, repeat step 9 for bracket (52) on other side of core (49) assembly.
11.
Remove six capscrews (50), washers (51) and three straps (54) from one side of core (49) assembly.
12.
Remove eight capscrews (50), washers (51) and four straps (54) from other side of core (49) assembly.
13.
Remove eight cores (49) and seals (55) from bottom tank (56). Discard seals and cores.
14.
Remove six capscrews (57), washers (58) and frame (53) from one end of bottom tank (56).
15.
Remove two capscrews (59), washers (60) and strap (61) from inside of frame (53).
16.
Repeat steps 14 and 15 for frame (53) at other end of bottom tank (56).
ASSEMBLY
1.
Position bottom tank (56) securely on wood blocks.
NOTE
Open side of "U" bend in strap (61) must face front of radiator. Front of frame (53) is side with two straight
mounting supports.
2.
Install strap (61) in frame (53) with two capscrews (59) and washers (60).
3.
Install frame (53) on one end of bottom tank (56) with six capscrews (57) and washers (58).
NOTE
Ensure front of frame is on side opposite outlet tube in tank.
4.
Repeat steps 2 and 3 for frame (53) on other end of bottom tank (56).
48
49
49
50
TOP
51
53
61
50
53
51
54
52
BOTTOM
51
58
50
57
59 60
53
58
5
56
56
55
387-550
387-551
0068 00-5
|
|
Privacy Statement - Press Release - Copyright Information. - Contact Us |
