 |
|||
|
|
|||
|
Page Title:
Figure 5-5. Radiator disassembly. |
|
||
| ||||||||||
|
|
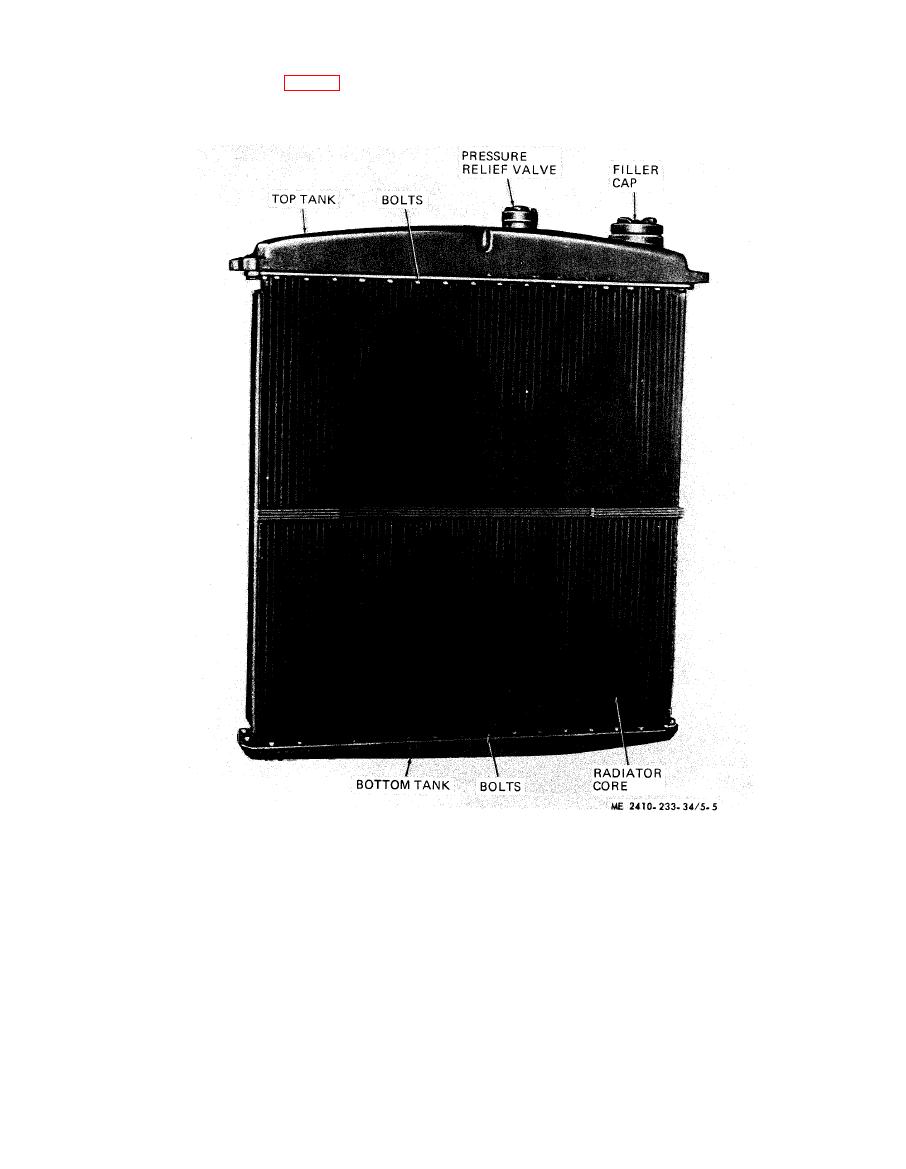 b. Disassembly.
the bolts holding reinforcing strips and radiator
(1) Remove top tank (fig. 5-5) by removing
core to the top tank.
(2) Remove bottom tank in similar manner.
corrode the tubes. Be careful not to bend the fins
c. Cleaning.
and straighten any that may be bent.
(1) Clean the radiator core of all ac-
e. Installation. Install radiator in reverse order
cumulation of debris between the fins and tubes
of removal procedure.
with water or compressed air.
f. Relief Valve Test.
(2) Clean the inside of the radiator core,
(1) Tighten the radiator cap to seal the
bottom tank and top tank using a steam cleaner.
cooling system. Install a pressure gage capable of
Flush steam cleaner solvent from core and tanks
indicating 25 psi into the radiator tank top using
with fresh water.
appropriate fittings. Connect an air pressure
d. Inspection and Repair. Assemble radiator
regulating valve and an air source.
core and tanks. Cap openings and test radiator
CAUTION
under water with 8 to 10 pounds air pressure. Note
Do not apply a pressure greater than 16
source of air bubbles and solder the leaks. Be sure
psi.
to wash off the acid after soldering as the acid will
|
|
Privacy Statement - Press Release - Copyright Information. - Contact Us |
