 |
|||
|
|
|||
|
Page Title:
Section III. HYDRAULIC CYLINDERS |
|
||
| ||||||||||
|
|
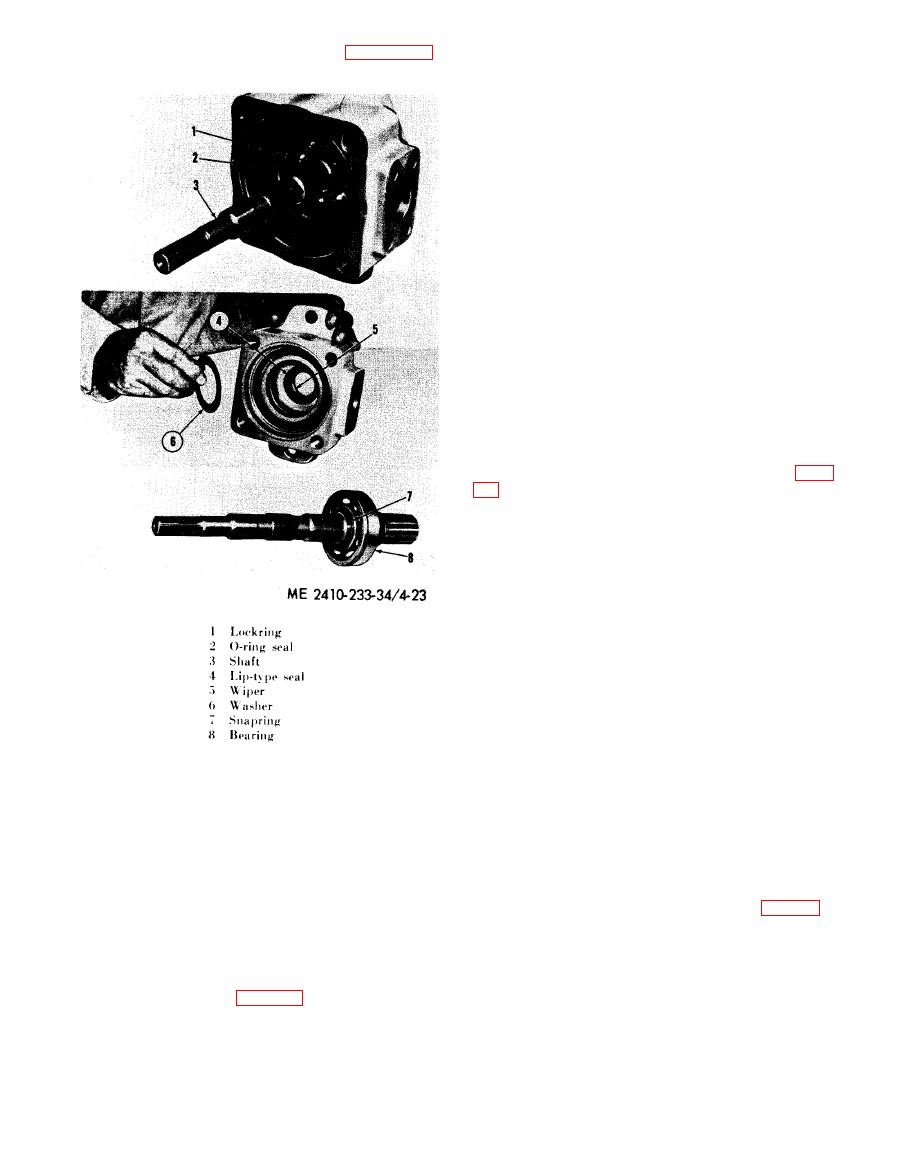
 (5) Pump shaft removal. Refer to figure 4-23
d. Cleaning. Clean all parts with cleaning solvent
and remove the shaft, seal and bearing.
(Fed. Spec. P-D-680). Dry parts with a lint free
cloth. Clear all passages in hydraulic pump of
restrictions with filtered compressed air.
e. Inspection and Repair.
(1) Inspect the pump bearings for scoring,
damage, and wear. Replace bearings which are
scored, damaged or worn excessively.
(2) Inspect the plates, ring, rotor, and vanes
for damage and wear. Install cartridge kits if parts
are found damaged or worn excessively.
(3) Inspect pump housing for cracks, breaks,
and other damage. Replace defective parts.
(4) Install new seals, washers, and packing.
f. Reassembly.
(1) Reverse disassembly procedure and
assemble the hydraulic pump. During assembly,
immerse each pump part in clean hydraulic oil.
(2) Pump rotation is counterclockwise when
viewed from the drive spline end. Be sure that the
leading chamfered edge of the vanes, arrow on the
ring, and arrow on the rotor, all point in the
direction of pump rotation.
(3) Tighten bolts to torque valve given in table
g. Installation. Refer to TM 5-2410-233-20 and
install the hydraulic pump on the tractor.
Figure 4-23. Shaft, seal, and bearing removal.
Section Ill. HYDRAULIC CYLINDERS
4-8. Hydraulic Lift Cylinders
(4) Retract piston rod (1) and wire the rod end
to the head of the cylinder. Remove the cylinder
a. General. Both blade lift cylinders are removed
with the rod in the retracted position.
and installed in a similar manner. The hydraulic
(5) Attach a hoist to the cylinder (3, fig. 4-25).
system need not be drained to remove cylinders;
(6) Disconnect the hydraulic oil lines (1) and
however, do not move the control lever from neutral
mark them in relation to their openings to assure
position after disconnecting cylinder oil lines.
proper connections when installing the cylinder (3).
b. Removal.
(7) Cover all openings to prevent the entry of
(1) Lower the bulldozer blade to the ground.
dirt into the hydraulic system.
(2) Remove bolt (3, fig. 4-24) securing lockpin
(8) Remove bolts (2) and trunnion caps (4),
(2) to the bulldozer blade bracket.
and lift clinder (3) away from the tractor.
(3) Remove pin (4) securing piston rod (1) to
the bulldozer blade.
|
|
Privacy Statement - Press Release - Copyright Information. - Contact Us |