 |
|||
|
|
|||
|
|
|||
| ||||||||||
|
|
 TM 5-2410-233-23
STEERING CLUTCH HUB REPLACEMENT - CONTINUED
0128 00
INSTALLATION - CONTINUED
NOTE
Lightly coat new rings with clean oil before installation.
6.
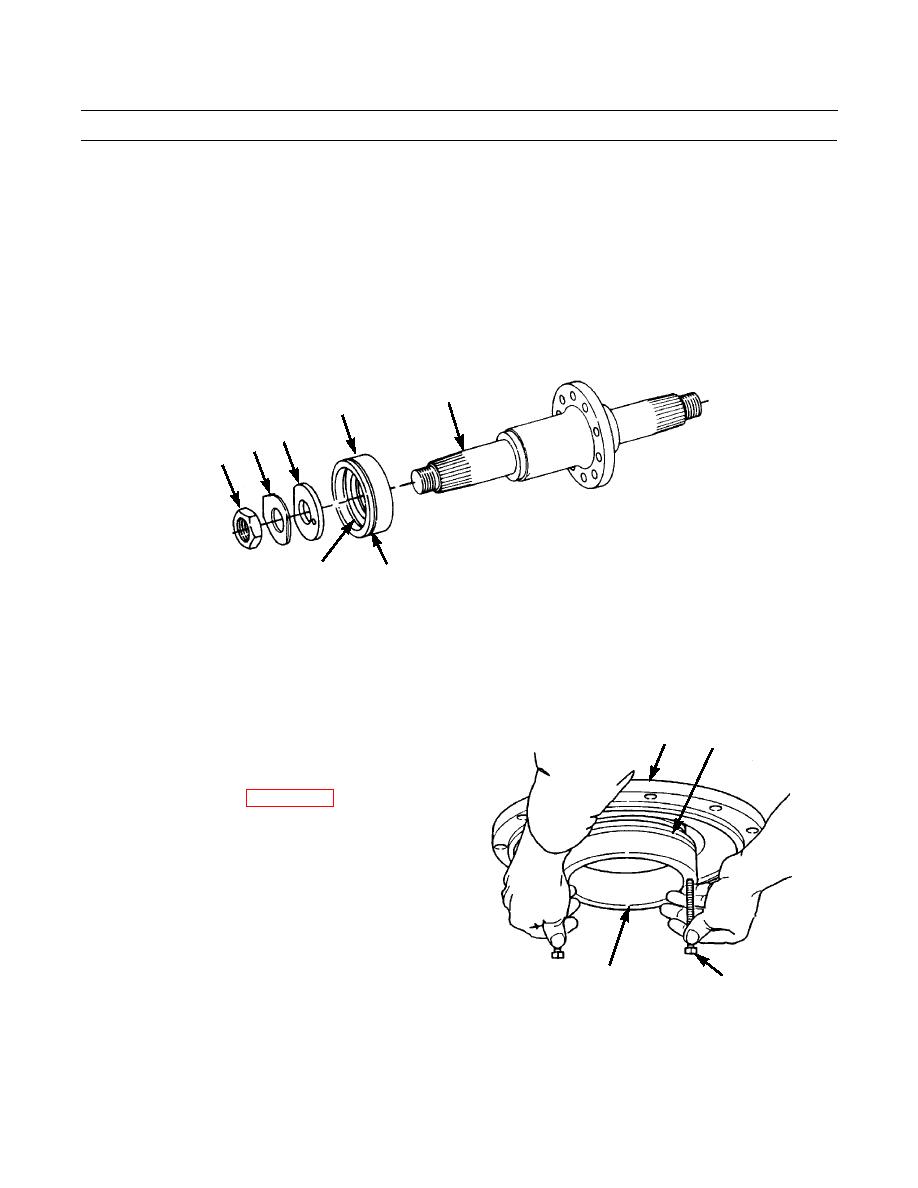
Install new ring (11) on inside and new ring (10) on outside of clutch retainer (9).
7.
Install clutch retainer (9), washer (7), new retainer (5) and nut (6) on bevel gear shaft (8).
8.
Tighten nut (6) to 700 lb-ft (949 Nm).
9.
Bend retainer (5) on nut (6) to secure.
8
9
7
5
6
386-375
11
10
NOTE
Lightly coat new ring with clean oil before installation.
10.
Install new ring (4) on piston (2).
11.
Install piston (2) in steering clutch hub (3) as far as possible.
12.
Install two 3/8 in. anchor screws (1) in outer circle of threaded bores in steering clutch hub (3).
13.
Install hydraulic puller over piston (2) and press piston
3
4
into steering clutch hub (3).
14.
Remove hydraulic puller and anchor screws (1).
15.
Install steering clutch (WP 0127 00).
2
386-374
1
16.
Test drive machine and check steering for proper operation (TM 5-2410-233-10).
END OF WORK PACKAGE
0128 00-5
|
|
Privacy Statement - Press Release - Copyright Information. - Contact Us |