 |
|||
|
|
|||
|
|
|||
| ||||||||||
|
|
 TM 5-2410-233-23
ENGINE OIL PAN REPLACEMENT - CONTINUED
0031 00
INSTALLATION - CONTINUED
NOTE
To ensure a leak-free seal, ensure capscrews are tightened evenly.
2.
Install washers (18) and 20 1-1/2 in. capscrews (17) to secure oil pan (8) to engine.
3.
Install five washers (16) and 2-3/4 in. capscrews (15) to oil pan (8).
4.
Install three washers (14) and 3-1/4 in. capscrews (13) to oil pan (8).
5.
Install new gasket (12) and adapter (10) to oil pan (8) and secure with two capscrews (11).
6.
Install plug (9) in adapter (10).
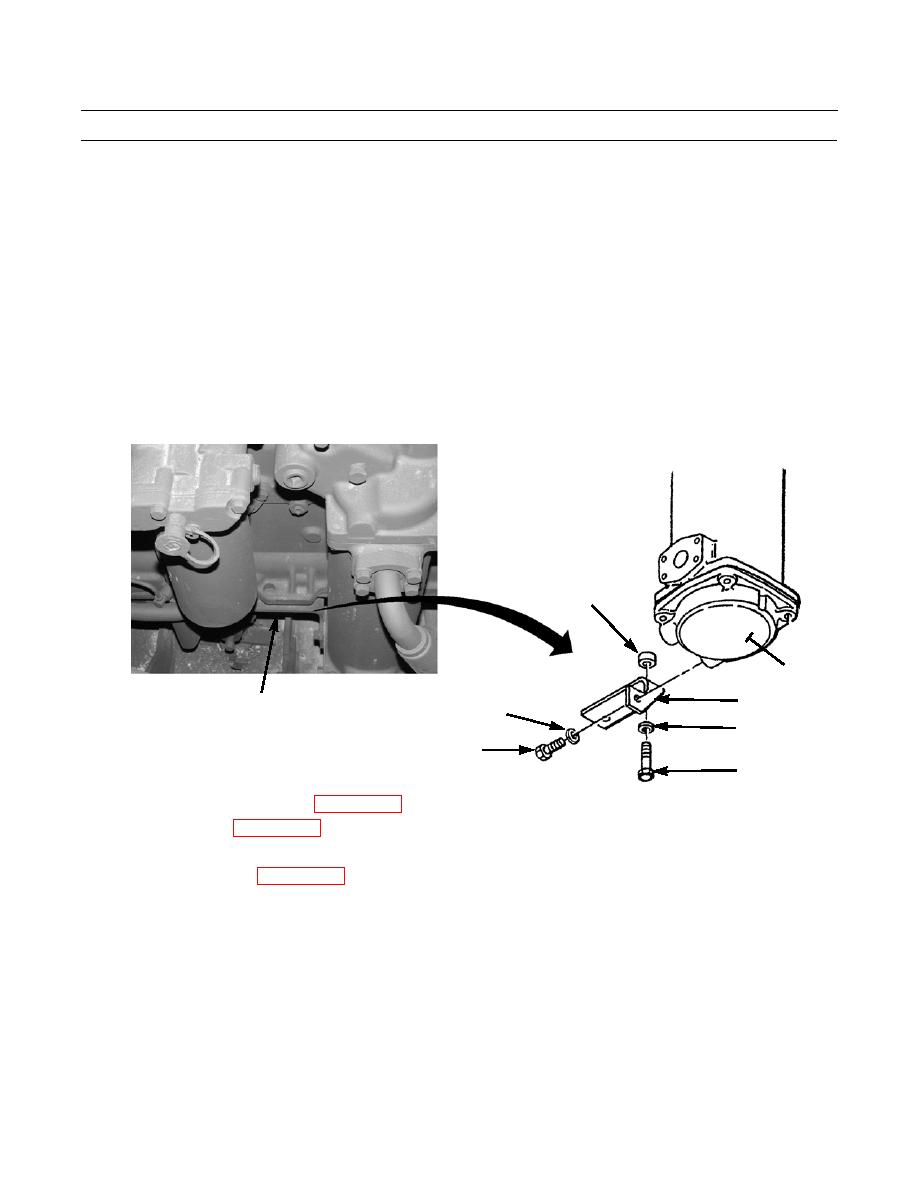
7.
Install two spacers (7), bracket (6), washers (5) and capscrews (4) to oil pan (8).
8.
Install washer (2) and capscrews (1) to transmission oil cooler (3).
7
3
6
8
2
(HIDDEN)
5
1
4
386-024
9.
Install engine oil level gage tube (WP 0011 00).
10.
Fill engine with oil (WP 0010 00).
11.
Run engine and check for leaks and proper operation (TM 5-2410-233-10).
12.
Install crankcase guard (WP 0129 00).
END OF WORK PACKAGE
0031 00-3
|
|
Privacy Statement - Press Release - Copyright Information. - Contact Us |
