 |
|||
|
|
|||
|
|
|||
| ||||||||||
|
|
 TM 5-2410-233-23
CRANKSHAFT REAR SEAL AND WEAR SLEEVE REPLACEMENT - CONTINUED
0025 00
REMOVAL - CONTINUED
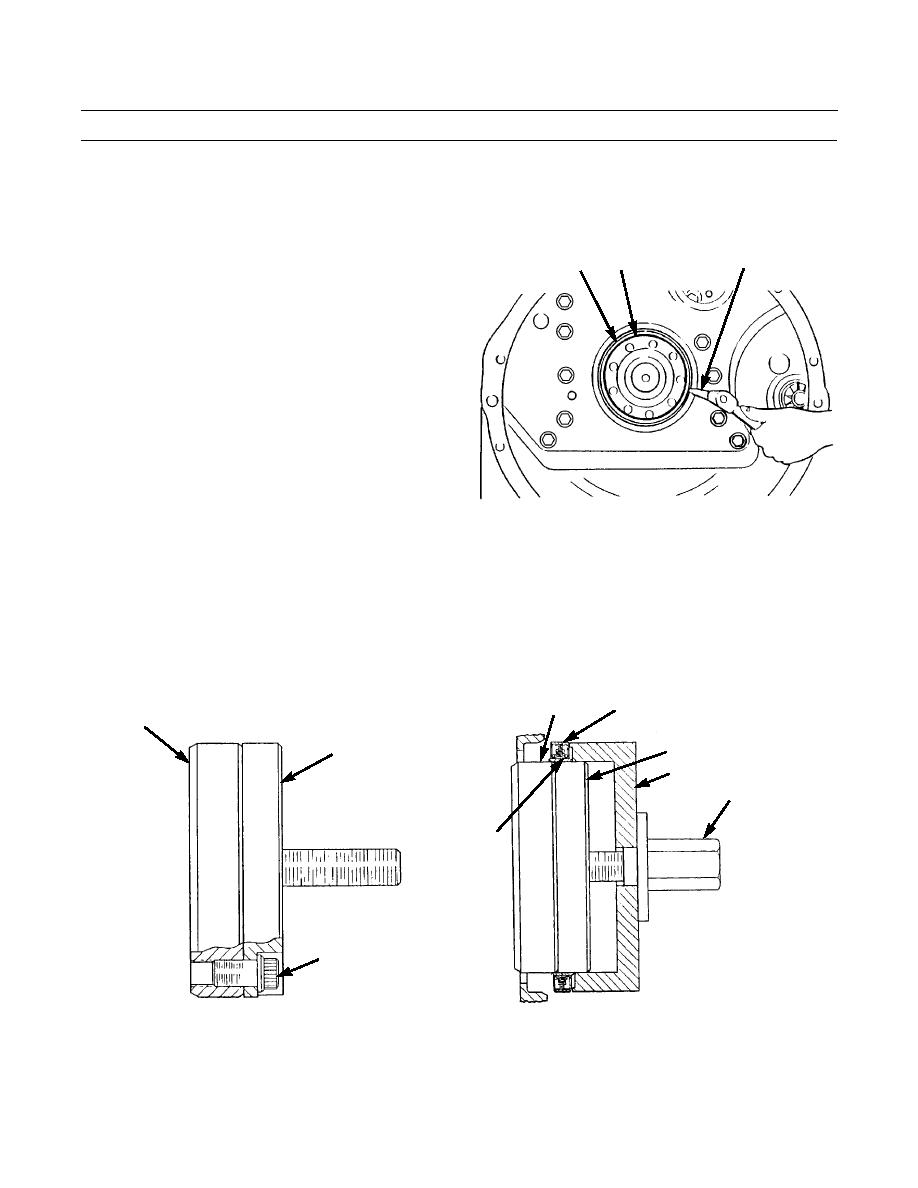
3.
Insert sleeve distorter ring (2) in rear seal bore.
4.
Insert wear sleeve distorter (3) between sleeve distorter ring (2) and wear sleeve (4).
5.
Turn distorter (3) until it makes a crease in wear sleeve
(4). Make additional creases in wear sleeve, every 90
3
4
2
degrees, then every 45 degrees, until wear sleeve is
loose.
6.
Remove wear sleeve distorter (3) and wear sleeve (4).
Discard wear sleeve.
386-194
INSTALLATION
CAUTION
Do not separate new rear seal and wear sleeve assembly.
1.
Clean outer diameter of crankshaft flange (5) and inside diameter of new wear sleeve (4).
2.
Apply sealing compound on outer diameter of crankshaft flange (5) and on inside diameter of wear sleeve (4).
1
5
5
6
6
8
7
4
BOLTS
386-195
3.
Install seal locator (6) to end of crankshaft (5) with three bolts.
4.
Place new seal (1) and wear sleeve (4) assembly on locator (6), with part number on seal facing out.
5.
Apply clean oil on washer face of nut (7). Place installer (8) on locator (6), then install nut.
0025 00-2
|
|
Privacy Statement - Press Release - Copyright Information. - Contact Us |
