 |
|||
|
|
|||
|
Page Title:
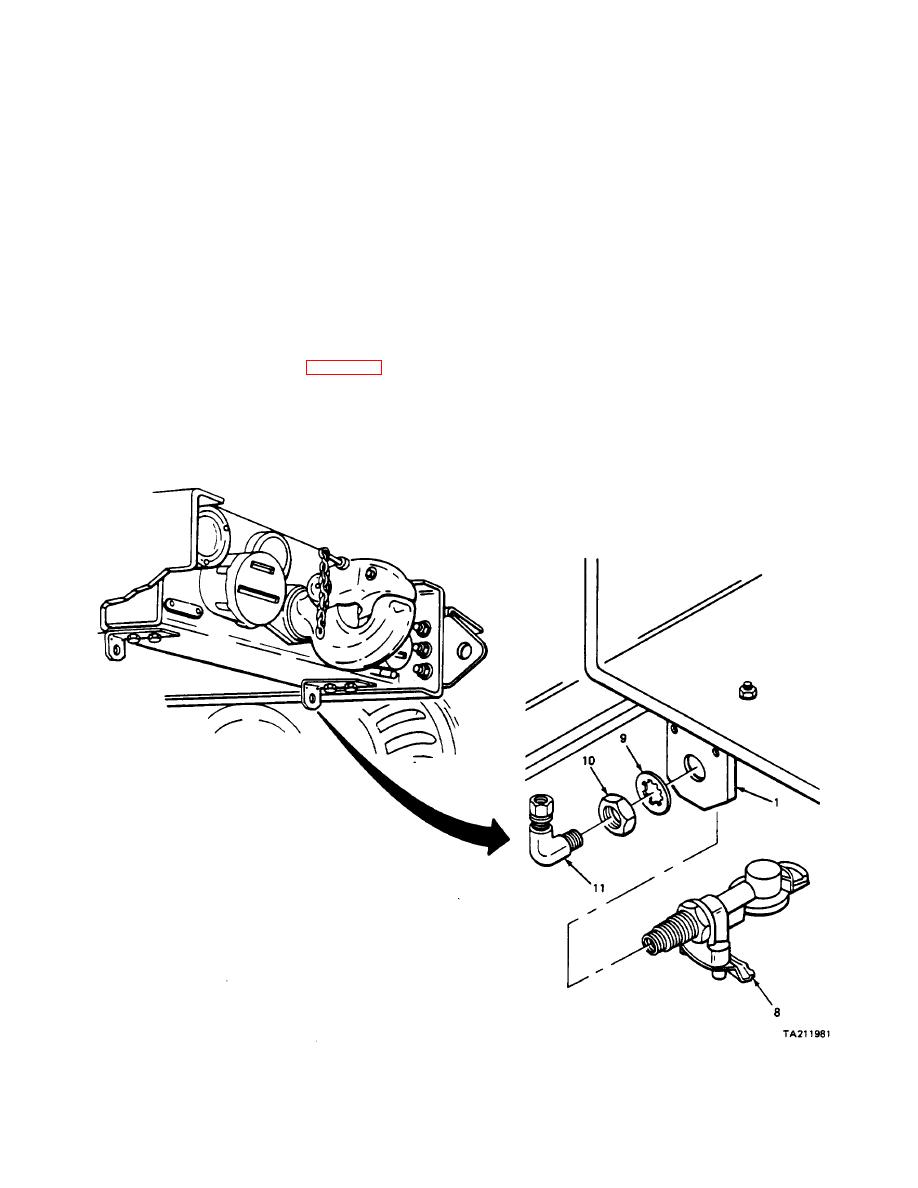
Figure 10. Installing rear gladhand assemblies |
|
||
| ||||||||||
|
|
 MWO 9-2320-287-35
NOTE
S e r v i c e gladhand assembly (blue) goes on the right side of M911
Truck Tractor, emergency gladhand assembly (red) goes on the
left.
r. Position gladhand assembly (blue) (8) in bracket (1), with opening facing
downward.
NOTE
Lockwasher (9) and nut (10) are part of gladhand assembly (8).
s.
Secure gladhand assembly (8) with lockwasher (9) and nut (10).
t. Install elbow (11) (Table 2, Item 33), in gladhand assembly (8) with elbow
( 1 1 ) in the eleven o'clock position as viewed from the rear of the M911 Truck
Tractor.
u. Perform steps r throuqh t on the left side of the M911 Truck Tractor for the
emergency gladhand assembly (red).
I n s t a l l i n g rear gladhand assemblies
11
|
|
Privacy Statement - Press Release - Copyright Information. - Contact Us |
