 |
|||
|
|
|||
|
|
|||
| ||||||||||
|
|
 TM 9-2320-312-24-1
AUXILIARY LIGHT MAINTENANCE - CONTINUED
0105 00
LAMP INSTALLATION - CONTINUED
3.
Place battery disconnect switch in ON position.
AUXILIARY LIGHT REMOVAL
1.
Remove lamp (Refer to Lamp Removal).
2.
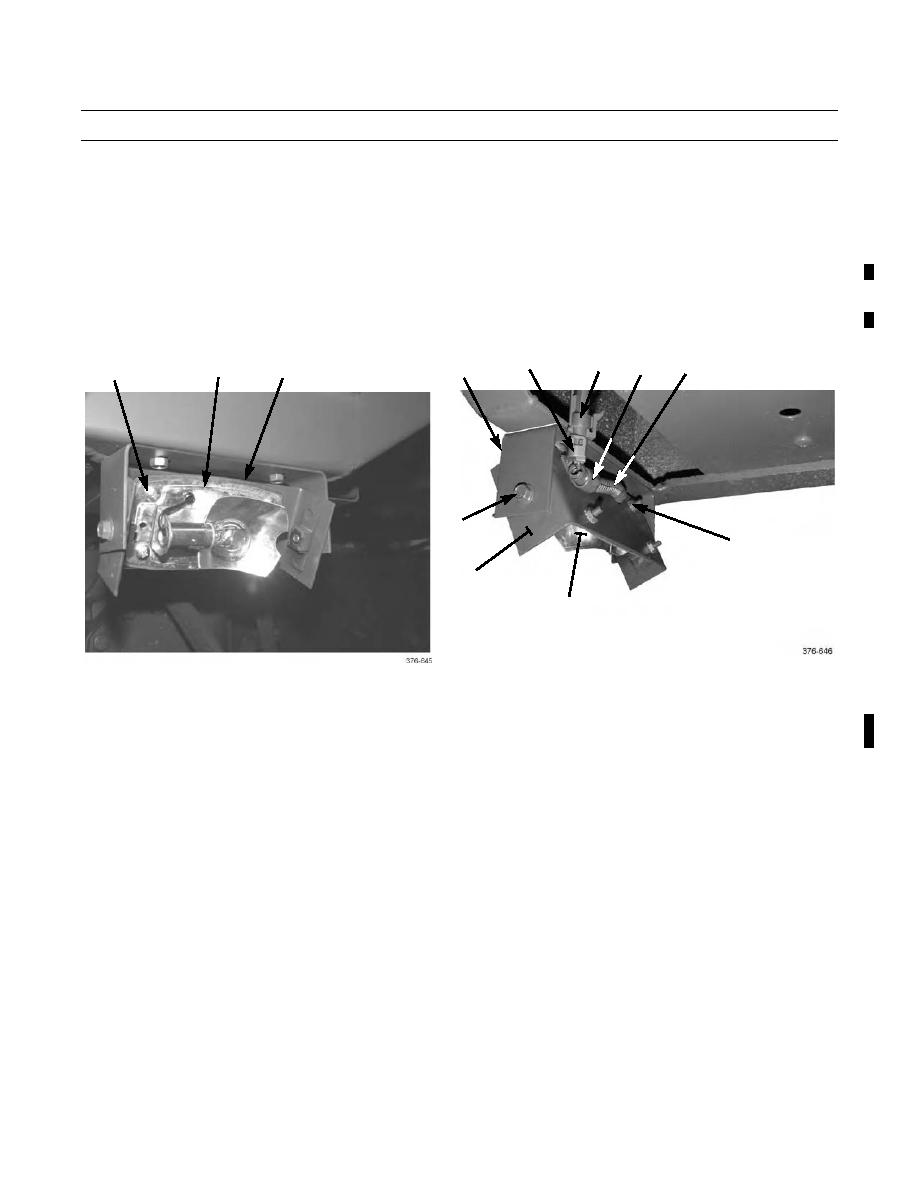
Remove four locknuts (5), screws (6), and light (2) from bracket (7). Discard locknuts.
3.
Disconnect light connector (9) from wiring harness connector (10) and remove light (2) from vehicle.
4.
If bracket (7) is damaged, remove two bolts (13) and bracket from bracket (8).
9
10
12
11
8
5,6
7
2
13
5,6
7
2
AUXILIARY LIGHT INSTALLATION
1.
If removed, install bracket (7) to bracket (8) with two bolts (13). Adjust angle of bracket (7) as required, for best auxil-
iary lighting coverage, then fully tighten bolts.
2.
Position conduit (12) and clamp (11) on auxiliary light wire and connect light connector (9) to wiring harness con-
nector (10).
3.
With light (2) and clamp (11) positioned at bracket (7), install four screws (6), and new locknuts (5).
4.
Install lamp (Refer to Lamp Installation).
5.
Place battery disconnect switch in ON position.
END OF WORK PACKAGE
Change 1
|
|
Privacy Statement - Press Release - Copyright Information. - Contact Us |
