 |
|||
|
|
|||
|
|
|||
| ||||||||||
|
|
 TM 5-2410-237-23
TRACK ASSEMBLY REPLACEMENT - CONTINUED
0143 00
INSTALLATION - CONTINUED
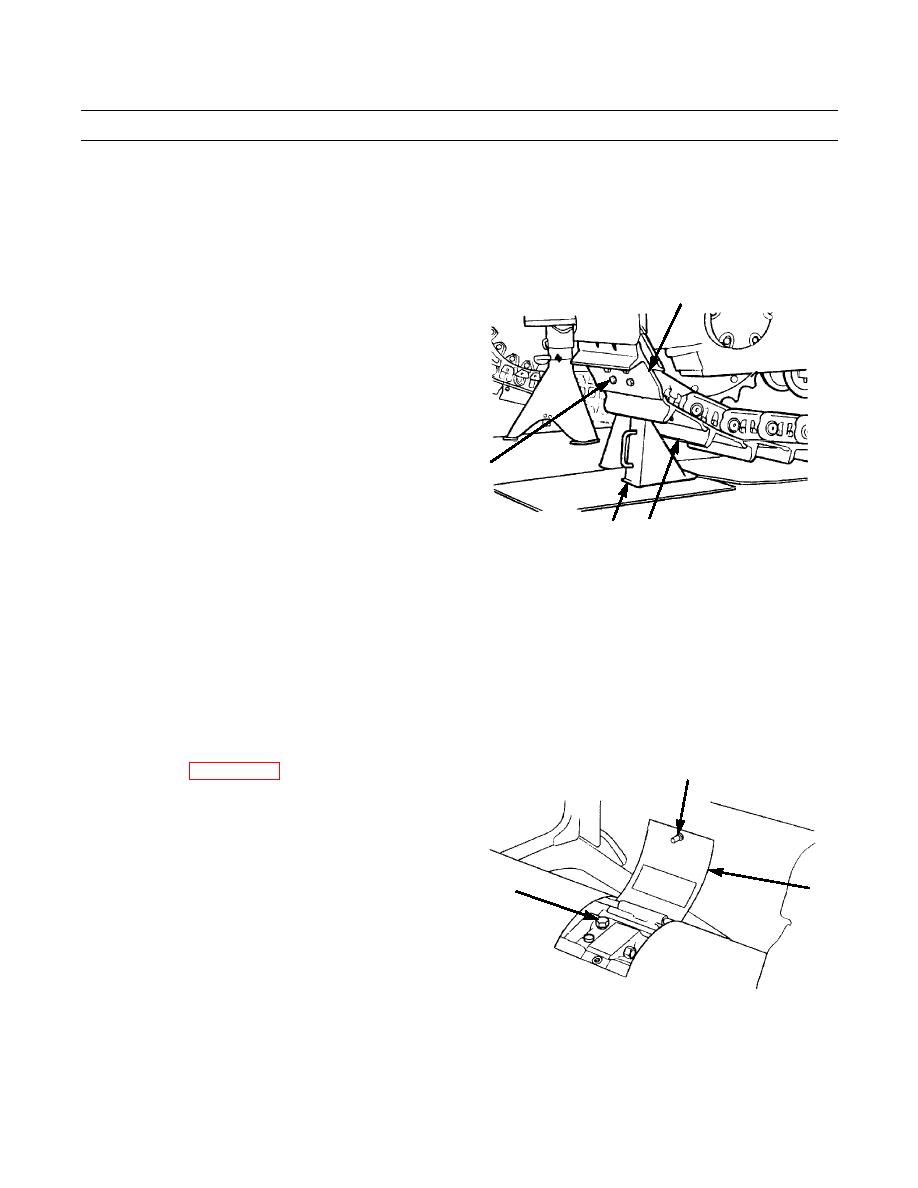
7.
Put track block (7) in position under track. Remove chain (13) and link (14).
NOTE
Some adjustment of master link angle will be needed to engage teeth.
8.
Move machine rearward until upper end of master link
6
(6) is in alignment with lower end of master link.
Make sure teeth of both ends of master link are
engaged. Check for hole alignment with a capscrew
(9) and adjust if necessary.
9
387-596
8
7
NOTE
Prior to installation, apply antiseize compound to capscrews.
9.
Install four capscrews (9) on master link (6). Tighten capscrews to 220 lb-ft (300 Nm). Turn capscrews an additional
180 (1/2 turn).
10.
Move machine forward and remove track block (7).
11.
Remove metal block from between frame and equalizer bar.
12.
Tighten relief valve (3) to 25 lb-ft (35 Nm).
1
13.
Adjust track (WP 0132 00).
14.
Close track adjuster access panel (2) and tighten bolt
(1).
15.
Test drive and check track for proper operation.
3
2
387-594
END OF WORK PACKAGE
0143 00-5
|
|
Privacy Statement - Press Release - Copyright Information. - Contact Us |
