 |
|||
|
|
|||
|
|
|||
| ||||||||||
|
|
 CAUTION
Extend the piston rod (2) out of the
cylinder before removing bolts (3). This
w i l l prevent possible scoring of the
cylinder walls when r e m o v i n g the
piston from the cylinder.
(3) Remove the head, piston rod and piston.
(4) Inspect bearing (4) and mating pin.
(5) Remove retaining ring and pin securing
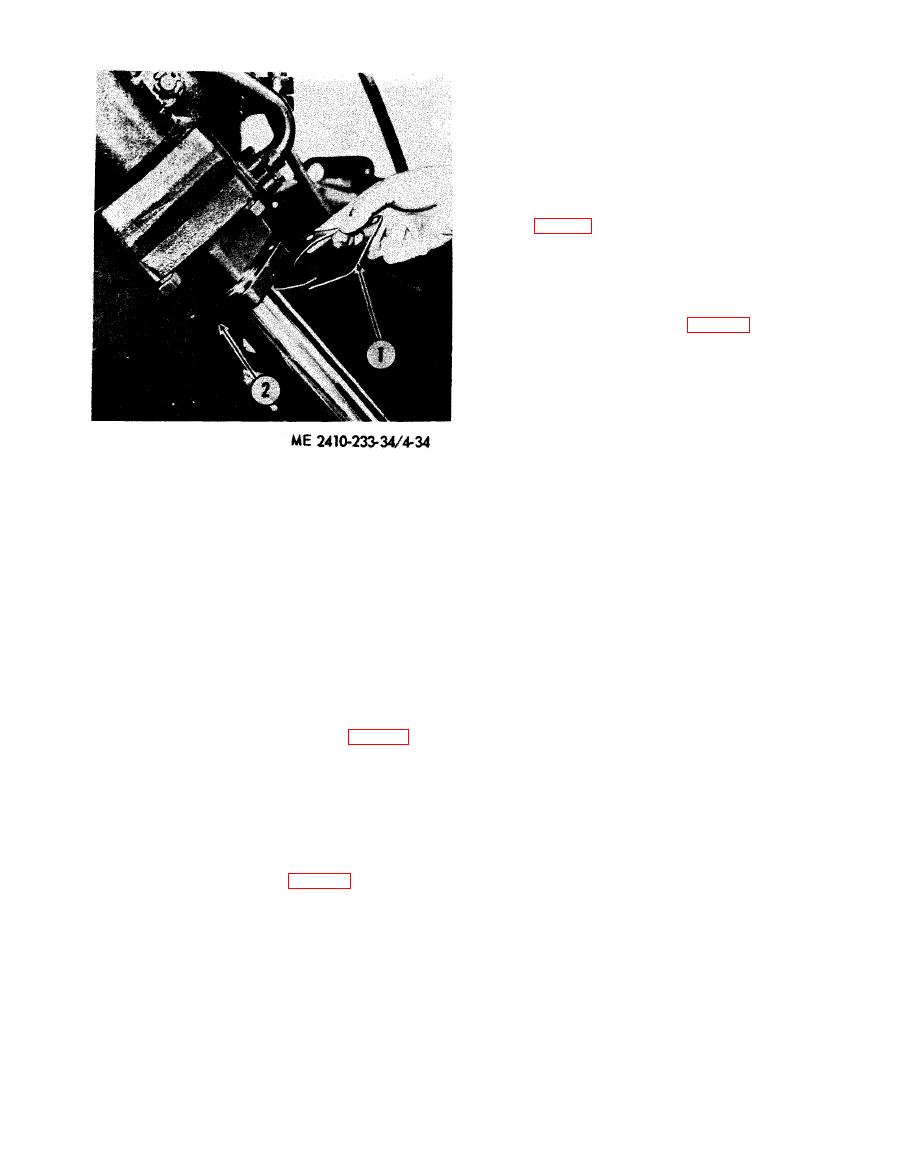
nut (1, fig. 4-37) to the piston rod (2).
(6) Remove nut (1) with a wrench as shown.
NOTE
When removing or installing nut (1) secure piston rod
(2) with a wrench on flats A.
(7) Remove piston (1, fig. 4-38).
(8) Remove wear ring (8).
(9) Expand the outer ring of seal assemblies
(7) and remove the outer and inner rings.
(10) Remove preformed packing (2) and
backup ring (3).
(11) Remove head (4).
(12) Remove bolts (5) securing retainer (6) to
head (4).
1 Slims
(13) Remove packing rings (9) and seal (10).
2 Retainer
(14) Inspect all parts, replacing worn or
dam aged parts.
h. Installation. Reverse removal procedure and
(15) Remove marks or rough spots on the
install the hydraulic cylinders on the tractor.
piston rod with crocus or fine emery cloth to
4-9. Hydraulic Tilt Cylinder
prevent seal and packing damage.
(16) Inspect walls of cylinder bore for scoring
a. General. The hydraulic system need not be
marks. Any scoring m a r k s which cannot be
drained to remove the tilt cylinder, however, do not
removed with a minimum of light honing will
move the bulldozer tilt control lever from the
require replacement of cylinder assembly.
HOLD position after disconnecting the cylinder oil
CAUTION
lines.
U n d e r n o circumstances
should
b. Removal.
welding be done on cylinder. Welding
(1) Lower the bulldozer blade to the ground
on c y l i n d e r may cause e n o u g h
and remove the cylinder oil line guard.
shrinkage to cause interference between
(2) Attach a hoist to cylinder (1, fig. 4-35) and
piston and cylinder wall and result in
remove the bolts (2) securing cap (3) to the blade.
severe scoring of cylinder walls and
(3) Disconnect cylinder oil lines (5). Cover the
piston.
openings in the oil lines and cylinder to prevent dirt
d. Cleaning. Clean all parts with cleaning solvent
from entering system.
(Fed. Spec. P-D-680). Dry parts with a lint-free
(4) Remove pin (6) and lift off the cylinder.
cloth.
c. Disassembly.
(1) Drain both ends of the cylinder.
(2) Remove bolts (3, fig. 4-36) securing the
head (1) to the cylinder.
|
|
Privacy Statement - Press Release - Copyright Information. - Contact Us |
