|
| |
TM 9-2320-360-34-1
15-2. FRONT SPRING REPAIR (CONT)
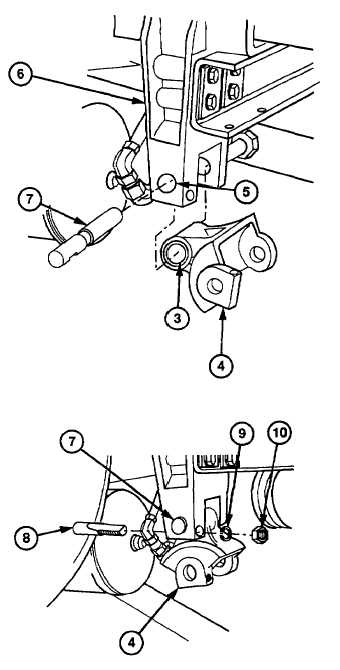
(3)
Coat inside of bushing (3) and spring pin hole
(5) in rear bracket (6) with lubricating oil.
NOTE
· Slotted end of pin must be aligned
with
spring
lockpin
hole
when
installed.
· Spring lockpin on spring link should
be positioned to the outside.
(4)
Position spring link (4) on rear bracket (6) with
pin (7).
CAUTION
Do not allow spring lockpin to enter
slot at an angle. It will wedge and
gall when locked at an angle. It will
become loose and allow pin to turn
and wear spring link resulting in
failure of pin, spring eye, or spring
link.
NOTE
Spring lockpin hole on bracket is
only machined on one side. Spring
lockpin
must
be
installed
on
nonmachined side, lockwasher and
nut must be on machined side.
(5)
Position spring lockpin (8) in pin (7) until spring
lockpin taper aligns with locking slot.
(6)
Tap spring lockpin (8) to lock pin (7) in spring
link (4).
(7)
Install new lockwasher (9) and nut (10) on spring
lockpin (8). Torque to 55 lb-ft (75 Nm).
15-6
|